Don't forget to visit my Etsy shop to see more of my work!

Wednesday, August 28, 2013

Write from the Heart for Kiwi Lane


Hello Kiwi Family (and anyone else who happens to come across my blog)!  It's been a long time since I've been here on the blog or had a turn on the Kiwi Lane blog- I was up at the beginning of last month and now I'm here at the end of this month.  But, the powers that be must have been inspired, because our family had an unexpected move during that time and we are now (sort of) settled in Southwestern Wyoming.  Anyone else in this area?  I need someone to point me in the direction of the local scrapbook store! ;)

On to business- for this week's Write from the Heart, I was super excited to use Jinger Adams' delicious new line "Sweet Tart"!  It is so bright and fun and perfect for some summer photos.  I chose to scrapbook a little summer outing we had as a family a few years ago (yes, I'm that far behind in my scrapbooking... I'm sure *none* of you can relate, right? ;) ). My husband had been told about an abandoned mining town that was tucked up in the hills west of our town and he wanted to go find it- so off we went to explore! 

I knew I wanted to use a spray ink with the templates and I knew I wanted to journal in the white space from the spray, but other than those two things, I had no idea where this layout was going to go.  Sooooo... this is where I would normally have a "before" photo for you.  But I don't have one.  This layout was totally a "fly by the seat of your pants" kind of layout, which is not very typical for me.  I expected to play with the ink a little and have a few layout rejects before I settled on one I liked- but this was the first one!  And I liked how it turned out!!  I should fly by the seat of my pants more often! ;)

Here's what I ended up doing:  I put a few of the Rings templates down on the the white card stock and sprayed one color, then added another ring and sprayed another color.  After the spray dried, I added a few more rings cut out of patterned paper to add a bit more dimension.  Then I matted my photos and cut out some Tiny Tags and a Wildflower and tucked them behind things, layered with some of those awesome, sparkly plastic flower shapes from Jinger Adams' Sweet Tart collection.  I added my hardware (brads, clips), title and date and then started to journal in the white space of the sprayed rings.  That's it!  I hope you try using the white space from spraying your templates with spray ink- it adds yet another layer to the framing method and it's super fun... and kind of addictive.  I think I want to try this again! 


Templates used:
Rings 1, 2, 3, 4
Wildflower 1
Tiny Tags 1T, 5T, 6T, 7T

Thanks for stopping by and happy scrapping!

Monday, July 8, 2013

KLD July Blog Hop Winner!

I hope everyone had a great weekend- especially on the Kiwi Lane blog hop!  And I hope you were able to walk away with your creative well filled to the brim with inspiration!  Now for what you've come back for- the powers that be (at Random.org) have chosen the winner of a set of Wacky templates-
Sara
who said:
What a great layout! It fit a lot of pictures without looking busy. I tend to shy away from "action shot" pictures. I always go for the pictures where they are looking at the camera being cute b/c they are easier. 

You lucky duck, you!  You have until Monday, July 22, 2013 to email me at glo_owens@msn.com with your mailing address.  If you don't respond, I'll draw another winner.

Thanks for stopping by and happy scrapping!


Friday, July 5, 2013

Happy July!! Kiwi Lane Blog Hop


Howdy!  I know you probably have something great planned for this beautiful July weekend, especially if you live in the States.... but I sure am happy you took some time to make your way through another fan-tab-ulous Kiwi Lane Blog Hop!  I hope you've been enjoying yourself thus far and I'm betting you've seen some great stuff.  You should have come here from Jessica's blog.  If you didn't, hop on over to the Kiwi Lane blog and start from the beginning.  I'm the last one on this hop, but make sure you leave a comment on my blog (and all the others, including the Kiwi Lane blog!) for a chance to win a prize- a $25 gift code to the Kiwi Lane Shop!  Hooray!!

Here's a list of all the blogs in case you get lost along the way:


  1. Kiwi Lane
  2. Monique Liedtke
  3. Jennifer Budge  
  4. Cari Locken 
  5. Jennifer Nicholes 
  6. Regina Mangum 
  7. Becki Adams 
  8. Julie Ann Cordero
  9. Jessica Laureano 
  10. Gail Owens    (You are HERE!!)

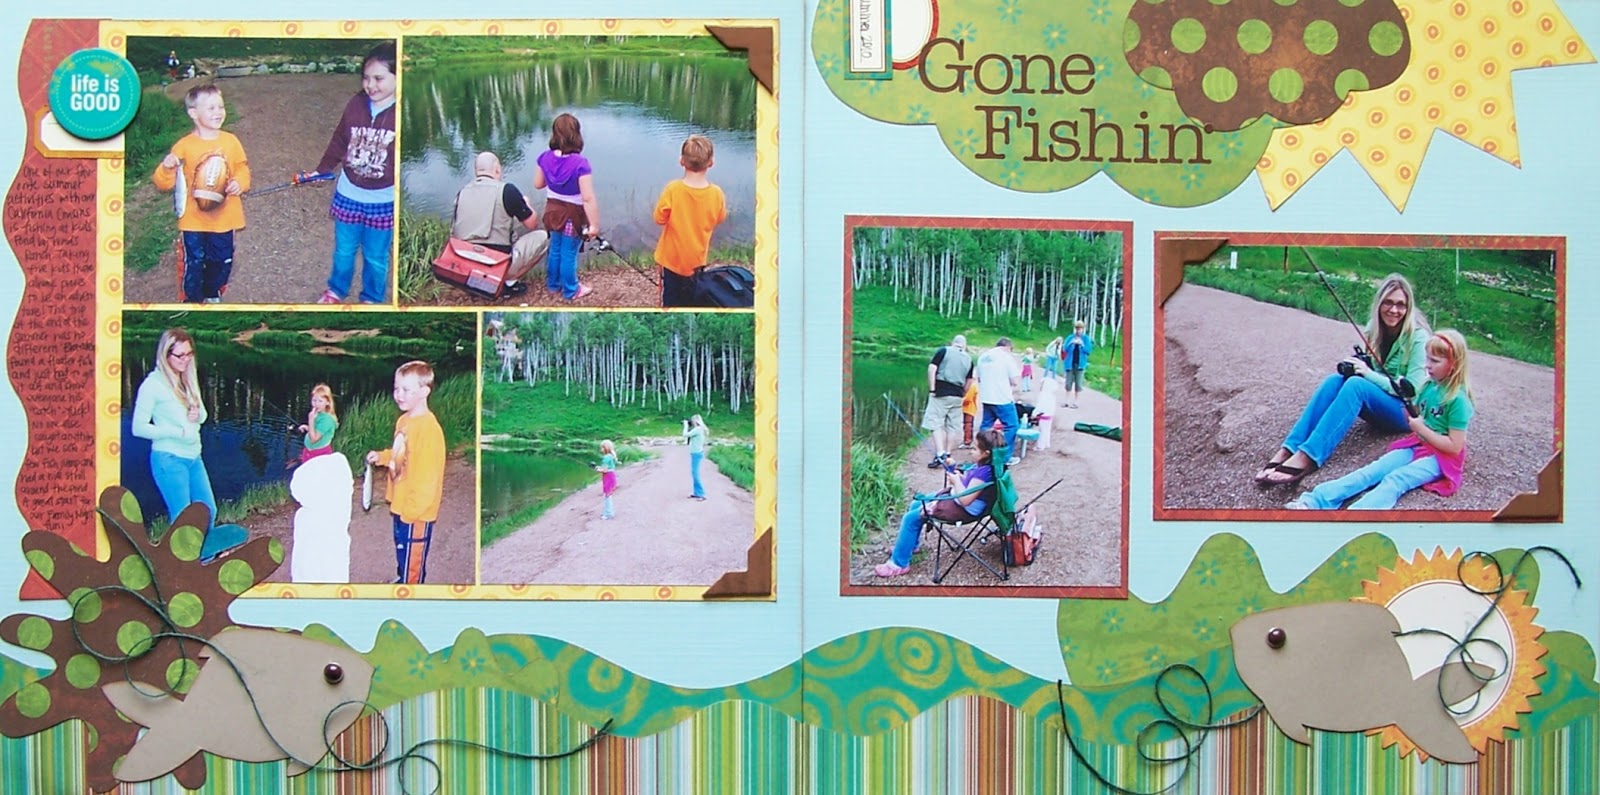
Do you have photos of certain things that you don't scrapbook very often?  I have a LOT of photos from family fishing trips and they tend to get pushed to the back of my box and skipped over for photos that are "prettier."  Let's face it- girly pages with all the glitter, jewels, flowers and frills are just more fun!  So the fishing photos sit and wait while I work with photos that can have flowers and bling, but that's not going to be the case from now on!  Why?  Because I have the Happy Trails, Paradise, Wacky and Tiny Wacky template sets from Kiwi Lane.  Between those 4 sets, I have everything I need to make a fantastic (non-girly) fishing page:
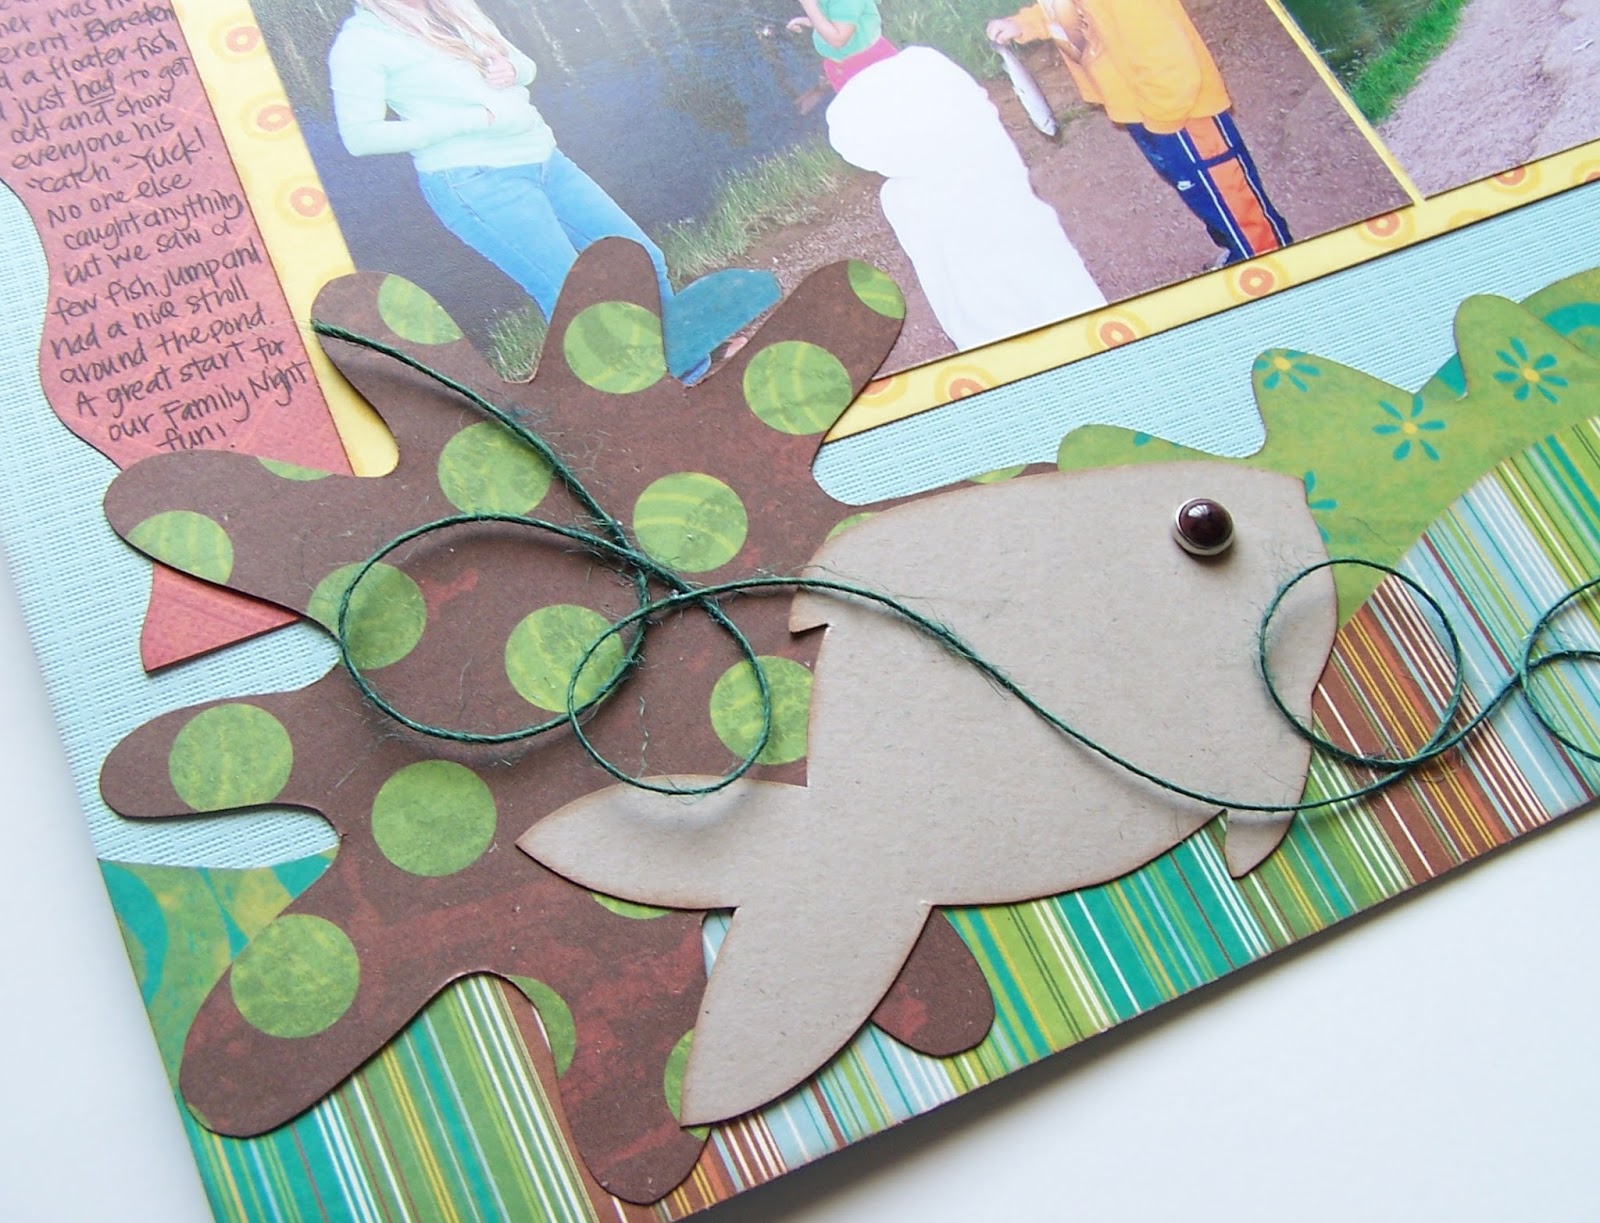
I used some super old (but still loved... by me!) paper, embellishments and letter stickers from Scenic Route to make this layout.  And instead of cutting the Happy Trails into, well.... trails, I used just one edge to get a wavy line border.  I did the same thing to the strips by the photos on the left page.  See how multi-functional the trails are?!  Love them!  Here's what my page looked like when I "Framed" out my layout:
Sorry for the crappy cell phone pic!  

And here's a detail of one of my fish with the twine/fishing line:

Kiwi Lane Designs Templates used:
Tiny Wacky 1T, 2T
Paradise 1, 5
Wacky 1, 2, 3
Happy Trails 1A, 3A, 3B

I hope this inspired you to pull out some photos you don't often go to, along with your templates, and see what you can come up with!  Do you think you need another push towards being inspired?  How about if a prize is involved?  A template set, maybe?
One lucky commenter on my blog will win a set of Wacky Accessory templates.  Just let me know in your comment what photos you tend to shy away from because they aren't what you typically like to work on. (It doesn't have to be a separate comment- one comment will enter you in both drawings.  You have until Sunday, July 7, 2013 at 11:59 PM MST to leave a comment.  Must be a resident of the United States or Canada to win template set.) Can't wait to see what everyone says!

Remember to leave comments at every blog along the hop to be entered to win the $25 gift code from Kiwi Lane!  One commenter from one of the blogs will win!  You have until Sunday, July 7, 2013 at 11:59 PM MST to enter.  

Thanks for stopping by and Happy Scrapping!

Wednesday, July 3, 2013

Write from the Heart with Kiwi Lane.... and Downtown Tape!


Supplies: patterned paper, small letter stickers (Simple Stories); washi tape (Downtown Tape); brad (American Crafts); glitter letters (Creative Imaginations); ink (Ranger); pen (Staedtler)

Kiwi Lane Templates used: Paradise 4, Tiny Accents 1T, Tiny Wacky 1T, Happy Trail 3A

Do you every have "leftover" photos?  You know, the ones you print thinking you'll use them on a layout, but they end up just not fitting?  What do you do with them?  I usually give them to my daughter and let her use them for her layouts, but I kept finding these fun photos of her and her cousin that I just couldn't let go of.  I knew the day would come when I could put all those random extra photos together- and I was right!  

My brother and his family are moving to Guam this month- and this includes my daughter's BFF cousin.  I wanted to make a page with some of those photos as a glimpse into their friendship.  I set to work with my templates, some fun paper by Simple Stories and some marvelous tape from Downtown Tape- an awesome trio!  First I chose my background paper and started to lay out my page.  It looked something like this:
Of course, I always end up moving things around and changing some photo sizes while I'm making the layout.  For instance, I had a flower covering most of a head, so I moved it.  One more reason I love using the Kiwi Lane templates is this planning process!  I knew I'd need a pretty big space for journaling and the templates helped me plan around that space without guessing where things would end up.  I was able to cut my large piece of lined paper (I'm a big fan of lined paper for hand-written journaling!!) and plan around it! No guessing and cutting and wasting pretty paper!  Love it!!  And this is the journaling I ended with:
When I'm planning on doing large sections of hand-written journaling, I cheat and write it all out first on scratch paper, making corrections along the way.  Then I use that to read off of and do my journaling on the page.  I still make mistakes when I'm doing my writing, but my thoughts are a bit more organized.

I loved using the washi tape from Downtown Tape as I would use ribbon- looped behind the top right photo for some added embellishment.  Did you know that you can keep the tape from sticking to itself (making it look more like ribbon) by dusting it with talcum powder?  This is what I did to keep my loops from completely flattening out.  I also made sheets of washi out of the tape that I could trace a template on and easily cut it out- the layered flowers on the page are both made using that technique.  Here's how:

Lay strips of washi (long enough to span the width of the template you intend to trace) sticky side up, slightly overlapping the edges.  When you have enough laid out to accommodate the size of the template, start laying strips of washi tape sticky side down and perpendicular to (or criss-crossing) the washi that is laying sticky side up.  It should look something like this:
Now give it a good rub to make sure it's all stuck together.  Then place your template on top and trace:
I used a pencil to trace and found that it worked quite well and didn't leave dark marks that I had to make sure I cut off.  I also found that cutting the exposed tape off your washi sheet made for easier cutting (nothing extra got stuck to me or the scissors that way).  Here's what my flower looked like:
And I loved the finished look because it has kind of a transparent/plastic/paper look that is hard to see when it's laying on the mat, but this is what it looks like in the light:
Kind of fun!  The orange one had more of a grid pattern because it was lined washi tape.  And here's what it looked like on my page:
And, of course, I had to make a cute little card with some of my scraps:
Kiwi Lane Templates used:  Tiny Floral 3T, Tiny Wacky 2T, Thoughtful 2A

I used the same washi tape layering method to make the pink fluff behind the sentiment.  I love how it just gives a little bit more dimension to the card without adding too much bulk!

Are you as obsessed with washi tape as I am? ;)  Try giving this technique a try!  I'd love to see what you come up with so don't forget to comment with a link to your creative endeavor!

Don't forget to stop by on Friday- Kiwi Lane is doing their monthly blog hop and I have a 2 page layout to share... and maybe a prize will be involved... ;)

That's it for now.  Thanks for looking and happy scrapping!

Monday, June 17, 2013

DT Doodles for Kiwi Lane... with My Mind's Eye!!


Happy Monday Kiwi Family!  Do you know what the best part of Monday is for me?  Sharing a Doodle!  Here's what I came up with for today's doodle:

Here's what it looked like when I laid out my templates and before I cut anything (assuring me that I didn't do any accidental cuts and ruin my beautiful new paper!):
And my version using the awesome new Collectable collection called "Memorable" by My Mind's Eye:

I absolutely LOVE My Mind's Eye!  I really don't think they've had a collection in recent years that I didn't fall in love with immediately, and this was no exception- I loved working with their high quality papers and embellishment, including brads, chipboard stickers, buttons and cardstock stickers.  Pair that with some of my favorite templates and some great photos waiting to make their way onto a scrapbook page, and I have a beautiful layout!

You may notice that this page doesn't have any journaling visible, and you'd be right.  It was kind of a mistake on my part,  as I was enjoying the beautiful papers and embellies soooo much that I forgot to leave room for the journaling.  I put a super cute chipboard banner there instead- oops!!  Easily fixed, though, with the help of a journaling card stuck under a photo.  Yep, that cute little butterfly border under the photo of li'l ol' me is actually a journaling card that can be pulled out.  So what does it say?  It just talks about working with the Kiwi Lane ladies at a show in Del Mar, California a few years ago (yes, I'm not even close to caught up with my scrapbooks!!) and how we took a few minutes after the show to go down to the beach and play.  Nothing spectacular, but still a cherished moment that now has a home in my scrapbook.
Templates used:
Scallops 2A & 2B, 3A & 3B
Adorn 3B
Madison Avenue 2A & 2B
Accents 1, 2 & 4
Tiny Accents 1T & 2T
Brackets 1 & 2
Tiny Shapes 3T
Strips
Photos

And last but not least, I have a card to share with you:

I made this card using the same paper and embellishments as the layout.

Templates used:
Accents 4 (cut in half)
Mini Scallops 2A (finely misted with water and scrunched and folded)
Tiny Strips

That's all for today- thanks for stopping by and happy scrapping!
Wednesday, May 29, 2013

Technique Tuesday Giveaway!


So you know how Kiwi Lane has been partnering with Technique Tuesday this month?  (You can see how I used their stamps on my DT Doodle HERE)  Well, those awesome peeps over at TT are having a full week of giveaways, tips, inspiration and more!  Here's a peek at some of the goodies they'll be giving away-

I think you should take a second and hop over to their blog to see everything they have in store for the next week.  Even if you don't win anything, you'll surely be inspired to pull out your stamp stash, which is almost as good... almost!

Thanks for stopping by and happy scrapping!

Ideas to Inspire for Kiwi Lane


If you're new to Kiwi Lane (and even if you're not) you may not know that they strive to come up with lots of inspiration to help with the creative process and using their designer templates.  Usually this task is well-executed by one of the co-owners, but this week, I was in charge of the Ideas to Inspire segment.... no pressure, right?!  Here's what I came up with for my assignment:

Sometimes when I'm using my templates, I get stuck with the idea that I can only use one of each template, which ends up limiting my design because don't have doubles of very many templates, and I don't have more than two of anything.  And that makes me feel a little limited when designing a page.  But that feeling is what helped inspire today's idea:

Use your templates to cut out more than one of the same shape to create a repetitive pattern!

Can you hear that?  It's the sound of my mind moving out of the box- and I love it!  For this edition of Ideas to Inspire, I used just 4 templates on my page (I guess it's more if you count photo templates, but those are more like an extension of my arm when I'm creating layouts...).  By using one template (Celebrate 6) repeatedly and in a geometric pattern, I've created a whole lot of visual interest that compliments my photos.  So how did I do this?  Here's the simple rundown: I designed my page using the templates as usual, only I left a space for the triangle shape at the bottom of my layout.  Then I cut out a bunch of the triangles and arranged them across the bottom.  I moved them, switched them, and rotated them until I was happy with the look.  Then I finished my pages buy cutting out the remaining pieces, inking and adhering everything.  Last of all, I added some cardstock stickers and journaling.  


I'm sure I'm not the only one that finds themselves limiting their use of the templates to how many they have on hand, but I think we should all take a moment and remember that the templates are here to inspire our creativity- not limit it!  So next time you feel like stepping out of your creative box, give this idea a try!

Templates used:
Celebrate 6
Brackets 2
Chestnut Drive 1A & 1B

Patterned paper and stickers:  Flower Box Essentials Kit by Doodlebug Design
Washi tape: My Mind's Eye
Border punch: Martha Stewart Crafts

Monday, May 20, 2013

DT Doodles for Kiwi Lane Design- Week 20


Happy Monday fellow Kiwi Lane-ers!  I'm excited to share my DT Doodle with you today.  As you may recall, Kiwi Lane has partnered with Technique Tuesday for the Month of May. I'm sure you're tired of hearing us rave about their stamps, but I'm gonna anyway- you need to try these stamps!!  I don't declare myself to be a "stamper," but I do have my fair share of stamps in all shapes, sizes and materials.  Yet, with all those stamps, this was the first time I'd ever used Technique Tuesday stamps.  And they are wonderful!  The designs are great, they hold ink very well and they produce clean, crisp lines- especially for acrylic stamps!  

On to what you stopped by to see- this week's DT Doodle:


This is what my templates looked like laid out on my paper:  


(I ended up switching the arrows and adding more layers to the flowers as I went, but that is part of the way the templates work- you can still visualize the end product even if you make changes in the process!  And still no wasted paper!)

And this is what my layout looked like after I traced, cut, inked and replaced... 
Supplies: patterned paper (Scenic Route); cardstock (Bazzill, American Crafts); glitter glue (Ranger); pen (Staedtler); journaling cards, stamps (Technique Tuesday); ink (American Crafts, Ranger)

(I ended up switching the arrows and adding more layers to the flowers as I went, but that is part of the way the templates work- you can still visualize the end product even if you make changes in the process!  And still no wasted paper!)

....and added some glitter glue and journaling:  


I used the "Beautiful by Ali Edwards" stamp set from Technique Tuesday to create a border with word filled arrows.  I thought they went well with the other arrows on the page made with the KLD templates.  I also used the Journaling Cards from Technique Tuesday for my title, a caption and a space for journaling under a few of the photos.  


I used the following templates on this layout:
Aspen 1A & 1B, 2A & 2B
Playtime 3 & 4
Tiny Accents 1T
Tiny Sweetheart 4T
Tiny Nature 6T
Tiny Shapes 3T
Adventure 4 & 5
Strips
Photos

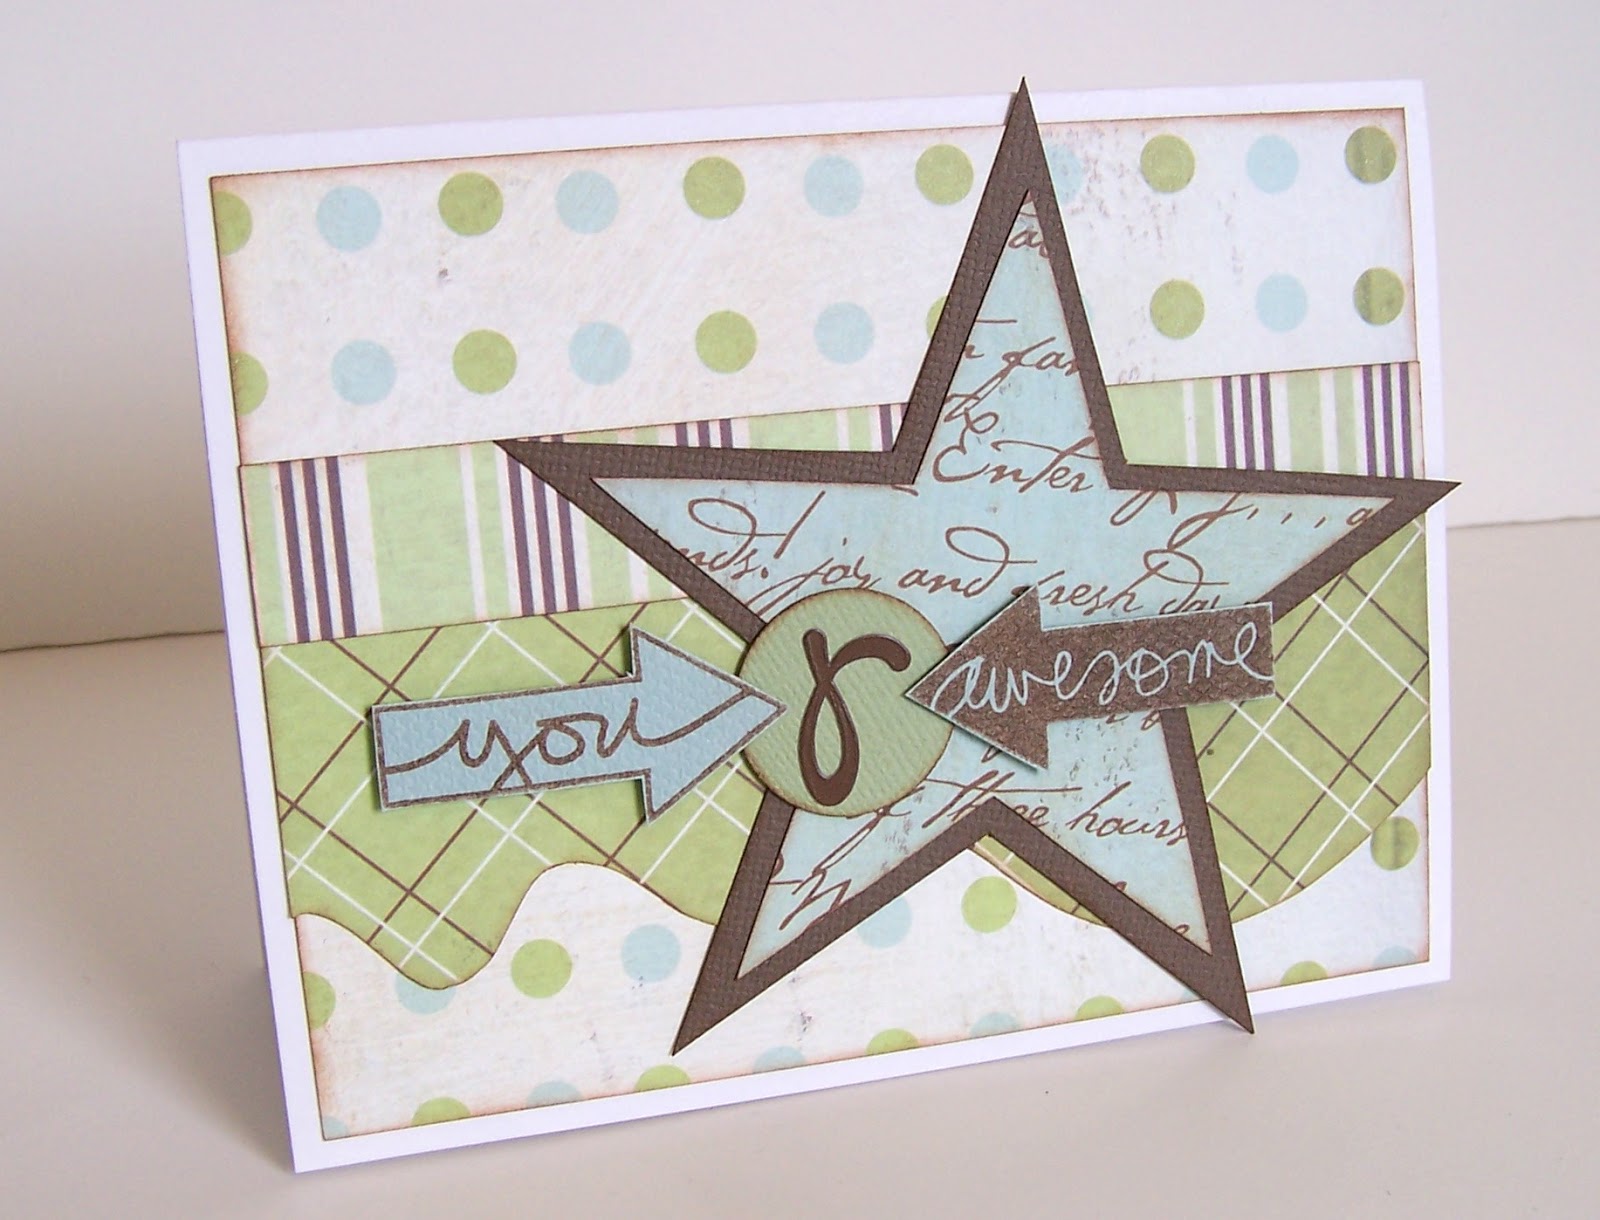
With some of my leftover paper and those amazing TT stamps, I created this "Awesome" card:  
Supplies: cardstock (American Crafts, Bazzill); patterned paper (Scenic Route); ink (American Crafts, Ranger); stamps (Technique Tuesday); letter sticker (Doodlebug Design)

I used these templates for the card:
Sentiments 3A
Adventure 1 & 2
Tiny Strips

I hope you enjoyed this week's DT Doodle- don't forget that you could win a $25 gift code to the Kiwi Lane Shop for playing along!  For all the details, just head on over HERE.

Thanks for stopping by and happy scrapping!
Monday, May 13, 2013

Winner, Winner!! Re-Draw

Two weeks have passed and the winner I drew for the Kiwi Lane Blog hop has not contacted me. So let's try again, shall we?  The new winner of the set of Kiwi Lane Brackets Templates is....

Lynne Blodgett!!

Lynne, please email me at glo_owens@msn.com with your mailing address.  You have 2 weeks from today to claim your prize!  If you don't email me by Monday May 27, 2013 I will draw another winner.

That's all for now.  Happy Scrapping!

Monday, May 6, 2013

Winner, Winner!!

I hope everyone had fun this weekend!  Between the Kiwi Lane Blog Hop and National Scrapbooking Day, how could you not have fun, right? ;)

Now what you've been waiting for- the winner of the Bracket Template Set from Kiwi Lane.

The winner is.....  Chloe Arielle!!

Congratulations Chloe!  You have until Monday, May 13th to email me at glo_owens(at)msn(dot)com with your mailing address so I can get your prize in the mail.

A big THANKS to everyone who played along- and welcome new followers!

That's it for now.  Next time- what I did for National Scrapbooking Day.  Have a great day and Happy Scrapping!

Friday, May 3, 2013

Happy May!!- Kiwi Lane Blog Hop

Hello Kiwi Community!  It's the beginning of a new month, and that means it's time for another fabulous blog hop!!  I hope you've been enjoying your hop so far- you should have come here from Catherine's blog.  If you didn't, hop on over to the Kiwi Lane blog and start from the beginning- I know you don't want to miss any of the fantastic ideas!!  And remember, there is a prize involved- a $25 gift code for the Kiwi Lane Shop- YAY!!  Just make comments at all the blogs along the hop, including the Kiwi Lane blog, to be entered and one random commenter from all of the blogs will WIN!  Easy peasy!  And if you stick around here for a bit, there might just be another little giveaway, too....

Here's the line-up for this weekend's festivities (just in case you get lost along the way):

  1. Kiwi Lane 
  2. Venetia Holbrook 
  3. Heather Conklin 
  4. Jana Eubank 
  5. Jen McDermott 
  6. Jennifer Budge: 
  7. Catherine Povec 
  8. Gail Owens  (You are HERE!)
  9. Erin Schultz 
  10. Jenn Nicholes 

Here's my little contribution for this lovely blog hop:
Supplies: patterned paper (DCWV); chipboard letters (Cosmo Cricket); ribbon (My Mind's Eye, craft supply); buttons (October Afternoon, Provo Craft); twine (Lilly Belle's Paperie on Etsy, The Twinery, Pebbles); ink (Ranger); pen (Staedtler)

Kiwi Lane Templates: Scallops, Tiny Nature, Tiny Shapes, Accents, Brackets

Here are some photos of the details:   
I used my templates to "frame" my layout first- I didn't have 3 of the same shape, so I used others as place holders.  It gave me a good idea of what I needed to cut and where things would be.  I also (obviously) ended up changing out the background paper for something a bit lighter.


 I used my Martha Stewart Crafts multi blade scissors to cut one layer of the scallops to add texture and make it look more like grass. (That photo disappeared from my camera.... little fingers "helping," I'm sure)  I also did my handwritten journaling on one of my favorite basic shapes- a bracket.  And I was able to use my Scallops 1A border template to make those scalloped rosettes.  Here's how:

First, trace your template, leaving a little bit of the template hanging off the long edge of the paper (about 1/8") or trim off a bit after you're done cutting the border.
Then use a scoring board to score on the peaks (highest point) of the scallops, in the valleys, and halfway between each one.  Kinda like this:
**Please note- I drew some of my lines to show you where you need to score- DO NOT use a writing utensil for your scoring tool!!

Once you have your lines scored, accordion fold your strip like this:
I used paper that was thin enough that I could have just lined things up as I folded, leaving out the scoring.  If you use a heavy paper, you will want to score your lines before you fold.

Next, tape your ends together.  Don't overlap the paper.  You want a continuance of the scalloped pattern, and you will lose part of a scallop if you overlap.  Just use tape on the back of the paper to make a ring like this:
Now you will need a circle of paper (I used a punch to get a 1 1/2" circle) and a hot glue gun.  I prefer hot glue for rosettes because you need something very strong to keep the rosette from popping up later. Here's what you do now: put your circle on your table, put a good sized glob of hot glue in the middle and flatten out the rosette on the circle.  Try to keep your circle in the middle (hard to do since you can't see it once you flatten out your rosette).  This is what it will look like on the back when it's all together:
Now it's ready for your page.  You can ink at this point, add buttons or other embellishment for the center, add glitter glue... whatever your heart desires!

Whew!  That was kind of a long post... thanks for sticking around!!  Now, didn't I say something about a giveaway?  I believe I did!

Who would like to win a set of their very own Kiwi Lane Designer Templates??!!  I will be giving away a set of these Bracket Templates...
...here on my blog.  To enter, become a follower of my blog and leave me a comment letting me know you did so (if you're already a follower, leave a comment letting me know).  You have until 11:59 pm on Sunday, May 5, 2013 to enter.  That's it!  One follower will be randomly chosen and announced here on my blog on Monday.

Thanks for stopping by.  Don't forget to leave a comment!  Erin's blog is up next.  Have a great weekend!

Thursday, May 2, 2013

What Can We See Under the Sea?

I recently became a member of a fabulous group of amazingly talented fellow scrappers on Facebook. I'll admit, I feel quite intimidated by the sheer talent of these women!!  The main purpose of this group is to challenge your scrapping style by participating in, well, challenges.  These challenges are issued by either the Mojo Mama herself, or other members of the group.  And here are the results of my first challenge:
Supplies: cardstock (American Crafts, Bazzill); patterned paper (October Afternoon); letter stickers (American Crafts, My Mind's Eye, Making Memories); edge punches (EK Success, Martha Stewart Crafts); die cut machine (Silhouette, Sizzix); buckle die (Sizzix); spray ink (Studio Calico, October Afternoon); ink (Ranger); paper clip, string (craft supple); deco edge scissors (Provo Craft)

Kiwi Lane Templates: Tiny Wacky, Tiny Tags

Here was my challenge:
  • Use something nautical (I used my Silhouette to make the anchor)
  • 2 pages
  • 9 photos
  • blue, yellow, green and white for colors
  • use deco edge scissors (I made the yellow zig zag)
  • use a ribbon slide (I didn't have one in my stash, but I did have a die for ribbon buckles, so I made one really quick)
  • misting (I did yellow and blue on the background- took me 3 days to get enough courage to do it- misting scares me!)
  • hand journaling on a cloud shape (enter my trusty Kiwi Lane templates!)
This layout had a few things that were definitely a challenge and pushed me out of my box (misting!!) and a few things to help me remember to use my oldies, but goodies (deco edge scissors, ribbon slide die)- which I'm glad for!  Sometimes I find myself getting in creative ruts, and hopefully this group with help me push myself in new crafting directions!

So what do you think?  Did I meet my challenge?

Thanks for stopping by and Happy Scrapping!


Monday, April 22, 2013

DT Doodles for Kiwi Lane...Week 16


It's Monday and time for another Kiwi Lane DT Doodle to get your creative juices flowing for the week!  

I was so excited when I saw that I got to work with Doodlebug this month- I've been a fan of their paper and embellishments for... well, let's just say a long time!  And the Flower Box Essentials Kit that I used for this week's DT Doodle is no exception!  Without further ado- here's this week's Doodle:

And here's my layout:
I used some washi tape along the bottom border for some more layers, and I used some stickers and adhesive backed pearls from the kit to help embellish the page.  I added some texture to the clouds and sun by cutting out the shapes, then embossing them using 2 different patterns.
I used the following templates for this layout:
Chestnut 1A & 1B
Tiny Floral 2T
Tiny Accents 4T
Celebrate 3 & 5
Bracket 2

With some of my leftover paper and some of the small letter stickers from the kit, I was able to make this card:

I added a sticker to the center of the flower, and a button with some twine and that was it- super cute, super easy card!
I used the following Kiwi Lane templates for this card:
Sentiments 3A
Adorn 3A
Celebrate 3
Tiny Accents 2T
Tiny Strips

Did you know that you can win a $25 gift code to the Kiwi Lane Shop?  Well, you can!  Just make a layout based on my layout, then go HERE and follow the instructions at the bottom of the page.

That's all for today- Happy Scrapping!

Monday, April 8, 2013

Panguitch Lake Layout

Last month, when Kiwi Lane partnered with Quick Quotes, I received a generous stack of paper from Quick Quotes to work with and for making lots of pretty things...  which I did and posted in various places on the internet.  However, as usual, I'm not so on top of the blog postings, and it has taken me a few weeks to realize that I had yet to post any of those projects here.  So here's one of them:
Supplies: patterned paper (Quick Quotes, Chatterbox (orange)); card stock (Provo Craft (white), Bazzill (purple)); alphabet stickers (American Crafts (purple), Making Memories (blue)); brads (Creative Impressions); gemstones (craft supply); fabric flowers (Bazzill); ink (Ranger); pen (ZIG)

Of course I used Kiwi Lane Designs Templates- Floral, Cascade Trails, Tiny Wildflower, Tiny Accents, Accents, Tiny Brackets, Nature and Photo Templates.

That's it for today.  I do have some more finished pages and cards, but no photos yet- something for you to look forward to, I guess. ;)

Thanks for stopping by and happy scrapping!


Monday, March 25, 2013

DT Doodles for Kiwi Lane (Week 12)


Happy Monday!  For this week's DT Doodles sketch for Kiwi Lane, I had the opportunity to play around with Quick Quotes' "Stowaway" collection.  Filled with shades of brown and aqua blues with bits of darker blue and peach, this collection is super versatile!  I chose to use some sepia toned pictures I have been saving for just the right paper.  Confession- these photos are almost 4 years old!  I tend to hold onto my most favorite photos, just waiting for someone to come along with a collection of paper that will be perfect.... does anyone else do this? or am I the only one??  Anyway, I was digging through my supplies and was thrilled to run across a Quick Quotes vellum quote that I vaguely remember buying a few years ago... ok, more like 10 years ago.  (Apparently I also save my supplies to match with the perfect pictures!)  The quote was about beauty and the pictures were my beautiful kiddos- perfect!  So, perfect paper, perfect pictures, perfect quote and here's what I came up with:  

Supplies: patterned paper and vellum quote (Quick Quotes); brads (Basic Grey); glitter glue (Ranger); paper flowers (American Crafts); doilies (OwlSupply on Esty, craft supply)

I loved the way the paper doilies looked with the Tiny Wildflowers!  So I added a bunch.  If you don't want/have doilies, the rings would work as a substitute.  Brackets would also work.   I didn't do any inking on this layout- totally not the norm for me!  Instead of ink, I distressed the edges of everything so that more of the white core of the paper was showing.  To finish up, I added some glitter glue, a few brads and a few paper flowers.  


Templates:  
  • Tiny Wildflower 3T, 6T
  • Cascade Trails 1B, 3B
  • Mini Paisley 2B, 3A & 3B
  • Tiny Shapes 3T
  • Tags 6

With some of my leftover paper, I made this "Bon Voyage" card: 
Supplies: patterned paper (Quick Quotes); letter stickers (Making Memories); twine (Pebbles)

This card measures approximately 4" x 8".  If you don't want to use the cruise ship template, feel free to switch it out for whatever suits the theme of your card- brackets, some more tiny flowers, Accents or any other medium size shape would work in that spot.  You can also use any of the 8" mini borders instead of using part of a 12" trail template like I did.  Use this card as a jumping off point and let your creativity run wild!

Templates:
  • Tiny Wildflower 1T, 4T
  • Cascade Trails 1B, 2A
  • Journey 7
Don't forget to play along with this week's sketch for your chance to win a $25 gift code to the Kiwi Lane Shop!  Find the details HERE.

That's all for today- thanks for stopping by and happy scrapping!