Don't forget to visit my Etsy shop to see more of my work!
Showing posts with label giveaway. Show all posts

Thursday, October 2, 2014

Happy World Card Making Day!!

....well, it will be on Saturday.  But, around here, we like to get an early start on any party! ;)  And I think a giveaway is in order for this party, right?  Details for that part will be at the end of the post, so look at the pretty cards and then follow the instructions for the giveaway.  Got it?  Good!

Here are some holiday cards I made using my Kiwi Lane Designs Templates:

"Falling For You"

Supplies: cardstock (American Crafts); patterned paper, sticker (Doodlebug Designs); ink (Ranger); pen (Sakura, Staedtler)
Kiwi Lane Templates:
Mini Colter Trails 2A
Nature 4
Tiny Nature 4T
Tiny Holiday 2T
Tiny Brackets 1T
Autumn 2

"Spooky"

Supplies: cardstock (American Crafts); patterned paper (BoBunny); sentiment (Doodlebug Designs); ink (Ranger); enamel dots (My Mind's Eye)
Kiwi Lane Templates:
Autumn 1, 5, 6

"Cornucopia"

Supplies: cardstock (American Crafts); patterned paper, stickers, washi tape (Doodlebug Designs); ink (Ranger); pen (Sakura, Staedtler)
Kiwi Lane Templates:
Celebrate 7
Tiny Shapes 7T
Tiny Holiday 2T
Tiny Nature 1T
Autumn 3

"Let it Snow"

Supplies: card stock, glitter glue (American Crafts); patterned paper (Pebbles, Inc.); brad, twine (Creative Impressions?); ink (Ranger); pen (Sakura, Staedtler)
Kiwi Lane Templates:
Tiny Traditions 3T

"Joy"

Supplies: cardstock (American Crafts); patterned paper (My Mind's Eye); stamp (Studio G); ink (Ranger, Tsukinedo)
Kiwi Lane Templates:
Tiny Holiday 1T
Cedar Trails 1A
Tiny Traditions 2T

So do you feel ready to tackle the holiday card season now?  I hope so!

Now for that giveaway- simply leave me a comment telling me which holiday is your favorite to make cards for.  That's it.  If you want a bonus entry, become a follower of my blog and let me know in your comment that you have become a follower (or let me know that you're already a follower).  You have until Sunday October 5, 2014 at 11:59 pm MDT to leave me a comment to win.  The winner will receive a set of Tiny Holiday Templates like this one:
I hope you enjoyed my cards!  Don't forget to leave a comment to participate in the giveaway!

Thanks for stopping by and Happy Scrapping!
 

Tuesday, August 26, 2014

August Blog Hop Winner and a Layout with Mon Ami Gabby and Kiwi Lane

Whew!  That blog post title is certainly a mouthful!!  And without further ado, the random winner of a set of Tiny Celebrate templates is...


Blogger bird said...
I love your layout!! And I am already a follower!!
August 22, 2014 at 5:53 PM

Congratulations bird!!  Please send me an email letting me know that you are my blog hop winner and also your mailing address and I'll get that little package of creative goodness out to you as soon as possible!  (You have 2 weeks from today to claim your prize.  If I've not heard from you, I'll randomly choose another winner.)

Now on to today's post:


It's my turn on the Kiwi Lane blog today, and I came up with a pretty simple one page layout using Mon Ami Gabby embellishments and Kiwi Lane templates.  As with the majority of my layouts, I started with framing my page with my Kiwi Lane templates like this:


I have a slight confession- this is not my real "before" photo.  My real "before" photo was too difficult to see on the floral paper with the cream colored background.  So I staged this one on a green background so you could see how I framed my page.  You're welcome. ;)

And this is what my finished layout looks like:

Supplies:  patterned paper, card stock, journaling card (Echo Park); blue flower, crepe paper, tulle (Mon Ami Gabby); letter stickers (Pebbles, Inc.); jewels (craft supply); pen (Staedtler)

Templates:
Playtime 3, 4
Accents 1
Tiny Nature 1T
Nature 1
Photos

Pretty cute, huh?  Did you know that Mon Ami Gabby sells rolls of crepe paper?  And it's thicker and wider than that stuff you get at the party supply store to decorate for birthdays parties, etc.  To get the ruffled effect on the scalloped border just below the photos, simply stretch the edge of the scallop (after you've traced and cut) and then let it contract.  The light yellow mesh border is actually a tulle that has some foam-like stuff sprayed on it.  I know that's not very descriptive, but I'm having a hard time trying to find the right words... anyway, it's a bit messy to work with (tiny bits of the yellow and white foam were all over my work space), but I loved the look when I layered it in with the crepe paper!  And most of the foamy bits stay in the tulle, so don't worry if it seems like there's a lot coming off. :)


One other thing I did with this layout was sand all the edges, instead of inking all the edges.  The reason for this is that I wanted to keep the layout feeling light and airy (like a spa) while still defining the edges of my layers.  So I used a nail file and sanding block to take off just enough of the top layer of printed paper to get the white core to show.  I did the same thing around my photos, too.


I've seriously loved all of the products that I've been able to use from Mon Ami Gabby this month!  They add so much to my layers and work so well with the templates from Kiwi Lane!  If you haven't had a chance to check them out, I highly suggest either visiting their blog, Facebook page or Pinterest boards, and Instagram, if not all of the above.  They are full of fun and creative ways to use their plethora of embellishments!

Thanks for stopping by and Happy Crafting!

Friday, August 22, 2014

Kiwi Lane's August Blog Hop!!

Wahoo! It's blog hop time!  You should have hopped over from Charity's blog, but if you happened to wander over from somewhere else, I highly recommend that you scurry on back to the beginning of this Kiwi Lane blog hop!  There's lots of fun to be had, a few prizes along the way and some awesome inspiration you won't want to miss!  If you happen to get lost along the way, here's the entire line-up:


2. Barb 
3. Alicia 
4. Charity 
5. Gail (You are HERE!!)
6. Connie Wallenbrock  (Go HERE next!!)
7. Brittany 

Make sure you comment at every stop along the way- you'll be entered to win a $25 for the Kiwi Lane Shop (Yippee!!).  You have until 11:59 pm MDT Sunday August 24, 2014, to leave your comments.  One random commenter will be picked from one of the blogs on the hop.  The winner will be announced on the Kiwi Lane Blog on Monday, August 25th.  And there might be another little prize given away on this blog, too.  You'll just have to read all the way through to find out... :)

So, I always have a hard time picking a project to make for blog hops.  I feel like I need to show you some fun and new or exciting way to use the templates.  I was struggling to come up with something this time, so I started sorting through photos.  I found some that we took while visiting the Tracy Aviary in Salt Lake City a few years ago and it got my creativity going.  I decided to use my templates to create a wetlands scene, complete with birds.  You ready?  Here it is:
Supplies: cardstock (Bazzill, American Crafts, Provo Craft, DCWV, We R Memory Keepers); patterned paper (My Mind's Eye, Scenic Route, Imaginisce, American Crafts); alphabet stickers (American Crafts); enamel dots (My Mind's Eye); ink (Ranger); pen (Staedtler)

I'm so in love with those little birds!  I made them using the paisley and banner shapes in the Tiny Celebrate template set, and the wings were made using a leaf template from the Tiny Nature set.  I added black enamel dots for their eyes and drew some legs.  Cute, no?  I used the circles and ovals from the Tiny Shapes template set and the grass was done with the ice crystal shapes from the Winter and Tiny Holiday sets, along with a Tiny Wildflower template.  I used Martha Stewart fringe scissors to make the grass blades.  Here are some close ups of the birds:

And there you have it!  Don't forget to comment for a chance to win a $25 gift code to the Kiwi Lane Shop!

And as an added bonus, I'd like to giveaway a brand new pack of Tiny Celebrate templates (pictured above) to one lucky commenter on this blog.  Just make sure you tell me what the best part of your summer was (in your comment) to be eligible to win!  You can also follow my blog, if you'd like.  If you do, I'll give you a bonus entry in my giveaway- just tell me you are a new follower in your comment (or tell me that you're already a follower).  You have until 11:59 pm Sunday, August 24, 2014 to get your comment submitted.  I'll announce the winner here on my blog on Tuesday, August 26th.

Thanks for stopping by!  Head on over to Connie's blog to continue hopping!

Templates:
Tiny Celebrate 5T, 7T, 8T
Celebrate 5
Tiny Nature 1T
Tiny Wildflower 5T
Tiny Shapes 3T, 4T, 7T, 8T
Tiny Holiday 3T
Paisley Place 1A & 1B
Sunnybrook Lane 1A & 1B
Winter 1
Photos

Friday, April 4, 2014

April BLOG HOP!!! with Kiwi Lane


It's time for a blog hop!  Who's excited? Me, ME!!  Are you excited, too?  Well, you should be!  Why?  Because you're going to have crafting inspiration coming out of your ears AND there's a prize!  Here's the scoop- ONE random commenter from one of the blogs along the hop will win a $25 gift code to the Kiwi Lane Shop.  How's that for incentive?!  So make sure you start at the Kiwi Lane Blog and comment along the way (including the Kiwi Lane Blog)!  You have until Sunday April 6, 2014 at 11:59 p.m. MDT to make you comments.  The winner will be announced on the Kiwi Lane Blog on Thursday April 10th. 

Here's the line-up of blogs, just in case you take a wrong turn along the way:
  1. Kiwi Lane 
  2. Gail Owens (You are Here!!)
  3. Catherine Povec  (Go Here Next!!)
  4. Jennifer McDermott 
  5. Kristy Lee 
  6. Heather Conklin 
  7. Misty Buck 
  8. Jennifer Nicholes 
  9. Barb Rapp 
  10. Christina Steel 
For this month's blog hop, we were asked to create something using the Celebrate and Wacky template sets from Kiwi Lane.  Here's the two page layout I came up with:
Supplies: patterned paper (The Pier by Crate Paper); brads (Echo Park); alphabet stickers (American Crafts); wood shapes (Studio Calico); plastic flower (Queen and Co.); stamps (Autumn Leaves); pen (Staedtler); ink (Ranger)

Templates:
Photos
Wacky 1, 3
Celebrate 3, 5, 6, 8
Tiny Celebrate 3T, 4T, 5T, 6T
Tags 1
Tiny Tags 1T

Here's what it looked like when I "framed" my layout:

And a few detailed photos:

I loved the look of this paper for these photos- and I couldn't resist using a collection called "The Pier" to document our walk down the pier at Tybee Island in Georgia!  I loved the look of the weathered wood with the distressed colors that were reminiscent of wind tattered beach umbrellas and canopies.  I wanted to add some whimsy and almost a celebratory feel to my layout and I accomplished this with layering two shapes (the long triangle/pennant from the Celebrate sets and a tag from the Tag sets) in two sizes.  I also tucked the ticket shapes under the photos on one side to add to the fun feeling of the layout.  To add a hint of the sun and sea to the layout, I used a template from the Wacky set to make a "sun" shape on the left page, layered with "clouds" from the Celebrate and Tiny Celebrate sets.  I added a splash of blue in a wavy shape from the Wacky set to mimic the water on the bottom of the right page. 

Sometimes when I get everything on the page, I feel like some of the shapes are blending into each other, when I really want them to stand out from each other.  When this happens, I use a pen to highlight the shapes that I want to stand out.  This time I used a fine tipped black pen to do some quick outlines of the cloud shapes, the tickets, the pinwheel and the banner where I put the title.  I made my outlines quickly and didn't worry about perfection- an added bonus of using shabby-looking paper!

To make my journaling spot, I stamped a lined image on my left page using distress ink.  I thought it looked too neat for the feel of the layout, so I stamped it again- the same image just slightly askew from the original.  Then I used my pen to write my little story.

This layout turned out almost exactly like what I framed it to look like using my templates- and it's exactly what I had in my head!  Don't you just love Kiwi Lane Designs Templates?!  I do!

And for an added bonus for getting to the bottom of my long-winded post (Sorry, kids.  I'm wordy.  It's not gonna change anytime soon.), how about another giveaway?!  In the comment that you're going to leave on this blog post (ya know, the one you need to leave so you can be entered to win a $25 gift code to the Kiwi Lane Shop...), please tell me what template set you've had your eye on.  Or which one is your fave, if you happen to have them all.  You have until Sunday, April 6, 2014 at 11:59 p.m. MDT to leave your comment.  I will draw a winner and announce it on Monday, April 7th.  The lucky commenter will get to choose a template set of their choice from my stash!  Hooray!

That's it for now- don't forget to comment!  Happy Scrapping!

Friday, February 7, 2014

February Blog Hop with Kiwi Lane

Happy Blog Hop Weekend!!  I hope you've been having fun along this hop and have been gathering lots and lots of scrapbooking inspiration.  You should have made your way here through Kristy's blog.  If you happened to wander over from another location, I highly suggest you mosey on back to the Kiwi Lane blog and start from the beginning- I'd hate for you to miss any ideas!  Here's the line-up if you get lost along the way:
  1. Kiwi Lane 
  2. Charissa Miller 
  3. Claire Spielman
  4. Lissa Mitchell
  5. Kristy MacKeen 
  6. Gail Owens (You are HERE!!)
  7. Arin Flynn 
  8. Holly Gagnon 
  9. Jennifer Blomquist
  10. Christine Meyer
Don't forget- there's a prize involved in this blog hop!  One random commenter from ONE of the blogs on the hop (including the Kiwi Lane blog) will win a $25 gift certificate to the Kiwi Lane Shop.  You have until Sunday night (February 9, 2014) at 11:59 p.m. MST to comment.  The winner will be announced on the Kiwi Lane blog on Thursday, February 13th.

Alrighty... here's what I came up with for my project:
Supplies:  patterned paper, journaling cards, title, stickers, brads, washi tape (My Mind's Eye); cardstock (craft supply); flower (Doodlebug Design); flower punch (American Crafts); black pen (Staedler); white pen (Signo); ink, glitter glue (Ranger).

These photos were taken at the beach on Tybee Island in Georgia a few years ago.  It was really misty and cool the morning we went, so all my photos turned out gray and tan.  I decided to use the subtle blue, gray and greens of My Mind's Eye's The Sweetest Thing- Bluebell collection.  I layered the border designer templates on the bottom of the layout to echo the water meeting the sand.  I used a navy blue cardstock to mat my photos and really have them pop- did it work?  I think it did! ;)  And I used some accessory templates from both the Paradise and Sweetheart sets to add a few embellishments. 
 I find that sometimes outlining the template shapes helps to add another layer of dimension without adding bulk to a page, so I outlined the blue shapes (the swirl on the left page and the splat on the right) with just a white pen.  I outlined the flower and shell shapes with the same white pen, but I also did an outline with a black pen on top of the white when it dried (not right on top of the white line, but close) and then some "Frosted Lace" Stickles on top of the pen outlines.  Sounds kind of complicated, but it's really a fast and simple way to add some more interest to your pages- give it a try sometime!
Templates used: 
Clara Lane 1A & 1B
Abbie Road 3A & 3B
Aspen Court 3A & 3B
Sweetheart 4
Tiny Sweetheart 1T
1/2" Strips
Paradise 3, 4, 5, 6

I hope you enjoyed my layout today!  Don't forget to leave a comment on my blog before you leave- you could win a $25 gift code to the Kiwi Lane Shop, remember?  And next on your hop is the blog of the ever so talented Arin Flynn!  

How would you like a chance to win another prize?  I have a few sets of templates hanging around my craft table and I would love to give one of those sets away to one random commenter on this blog post.  Just tell me where your favorite vacation spot is, and you'll be entered to win.  That's it- easy peasy!  Your vacation spot comment doesn't have to be a separate comment.  I will choose a random commenter to win their choice of templates from my desk.  You have until 11:59 p.m. on Sunday, February 9, 2014 to leave a comment and I will choose a winner on Monday, February 10th.  Don't forget to check back to see if you've won!  Or, better yet, follow my blog!!

Have a great day and happy scrapping!


Wednesday, October 16, 2013

Ideas to Inspire for Kiwi Lane Designs and a Giveaway!


Hello everybody! I’m here today with a mini album done with Pebbles’ Thirty One collection and a few of this month’s featured Kiwi Lane Templates.  


This album has lots of different shapes and sizes of pages and probably looks a little intimidating to make, but not with the templates!  (Don’t you just love them?!)  Here’s how you start:

Lay out your photo templates with the largest one at the back of the album and smallest on top, lining up the left edges where you will bind your book.  To give you an idea of the sizes of the pages, the front page is 3x3 and the back page is 5x7.  Then add your shapes at the edges of the photo templates.   Use removable adhesive, like washi tape or removable glue dots, to adhere the shapes templates to the photo templates so they stay together.


Pull the layers apart.  They should look something like the photo below:


Trace the templates onto heavy cardstock or lightweight chipboard.  I recycled file folders for my mini album.  And I numbered my pages to help me keep them in order.  This is what it should look like:


Start covering your pages, adding photos and memorabilia, journaling and embellishments, starting with the larger pages and working towards the smaller ones.  Use ink on the edges of everything to add shadow and dimension without more layers.  Here are the finished pages: 


I wanted a little bit of interaction in my book, so the back page has a flap that folds over the page.  It just adds a little more detail and a little more fun to the book.


I had so much fun making this album about the “Chem-mystery of Halloween.”  And the papers and stickers from Pebbles’ Thirty One collection were the perfect backdrop!!  

Now for some fun- would you like a chance to win your own set of Kiwi Lane Halloween templates?  And really, who wouldn’t?!  Just leave a comment on this blog post letting me know what kinds of projects you like to see using the templates.  Get a bonus entry for becoming a follower of my blog and leaving me a separate comment letting me know  (or letting me know you are already a follower).  Sounds good, yes?  I thought so! ;)  You have until this Monday, October 21st 2013 at 11:59 MST to leave your comments and be entered to win.  I’ll draw a random winner the next day and announce the winner  right here on my blog.

Thanks for stopping by and Happy Crafting!

Templates used:
Mini Aspen 1B, 2A, 2B, 3A
Tiny Hoiday 2T, 4T, 5T
Halloween 4, 2
Tiny Nature 4T
Photos and Mini Photos

Supplies:  cardstock (Provo Craft, Teresa Collins, We R Memory Keepers, DCWV); file folders (office supply); patterned paper (Pebbles/American Crafts); stickers (Pebbles); ribbon (SEI, Pebbles, Lil Davis Designs, craft supply); ink (Colorbox); brad (SEI); glitter glue (American Crafts, Ranger); epoxy dots (Teresa Collins); die cutting machine and embossing folders (Cuttlebug by Provo Craft); clear pocket (3L Adhesives); tiny bag (Whisker Graphics); wire (Provo Craft); twine (LilyBelle's Paperie on Etsy, Creative Impressions)

Friday, July 5, 2013

Happy July!! Kiwi Lane Blog Hop


Howdy!  I know you probably have something great planned for this beautiful July weekend, especially if you live in the States.... but I sure am happy you took some time to make your way through another fan-tab-ulous Kiwi Lane Blog Hop!  I hope you've been enjoying yourself thus far and I'm betting you've seen some great stuff.  You should have come here from Jessica's blog.  If you didn't, hop on over to the Kiwi Lane blog and start from the beginning.  I'm the last one on this hop, but make sure you leave a comment on my blog (and all the others, including the Kiwi Lane blog!) for a chance to win a prize- a $25 gift code to the Kiwi Lane Shop!  Hooray!!

Here's a list of all the blogs in case you get lost along the way:


  1. Kiwi Lane
  2. Monique Liedtke
  3. Jennifer Budge  
  4. Cari Locken 
  5. Jennifer Nicholes 
  6. Regina Mangum 
  7. Becki Adams 
  8. Julie Ann Cordero
  9. Jessica Laureano 
  10. Gail Owens    (You are HERE!!)

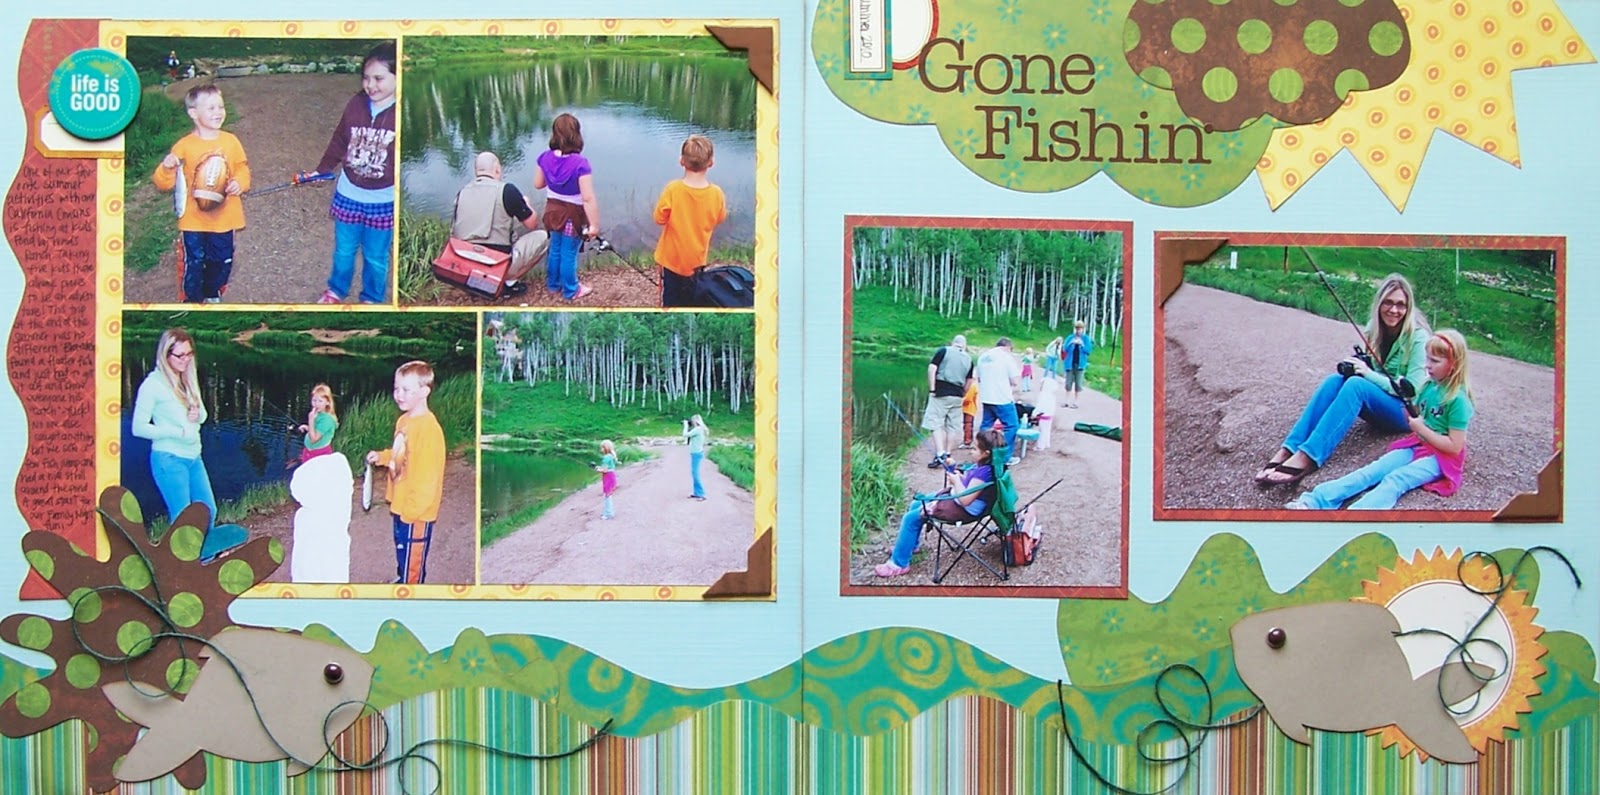
Do you have photos of certain things that you don't scrapbook very often?  I have a LOT of photos from family fishing trips and they tend to get pushed to the back of my box and skipped over for photos that are "prettier."  Let's face it- girly pages with all the glitter, jewels, flowers and frills are just more fun!  So the fishing photos sit and wait while I work with photos that can have flowers and bling, but that's not going to be the case from now on!  Why?  Because I have the Happy Trails, Paradise, Wacky and Tiny Wacky template sets from Kiwi Lane.  Between those 4 sets, I have everything I need to make a fantastic (non-girly) fishing page:
I used some super old (but still loved... by me!) paper, embellishments and letter stickers from Scenic Route to make this layout.  And instead of cutting the Happy Trails into, well.... trails, I used just one edge to get a wavy line border.  I did the same thing to the strips by the photos on the left page.  See how multi-functional the trails are?!  Love them!  Here's what my page looked like when I "Framed" out my layout:
Sorry for the crappy cell phone pic!  

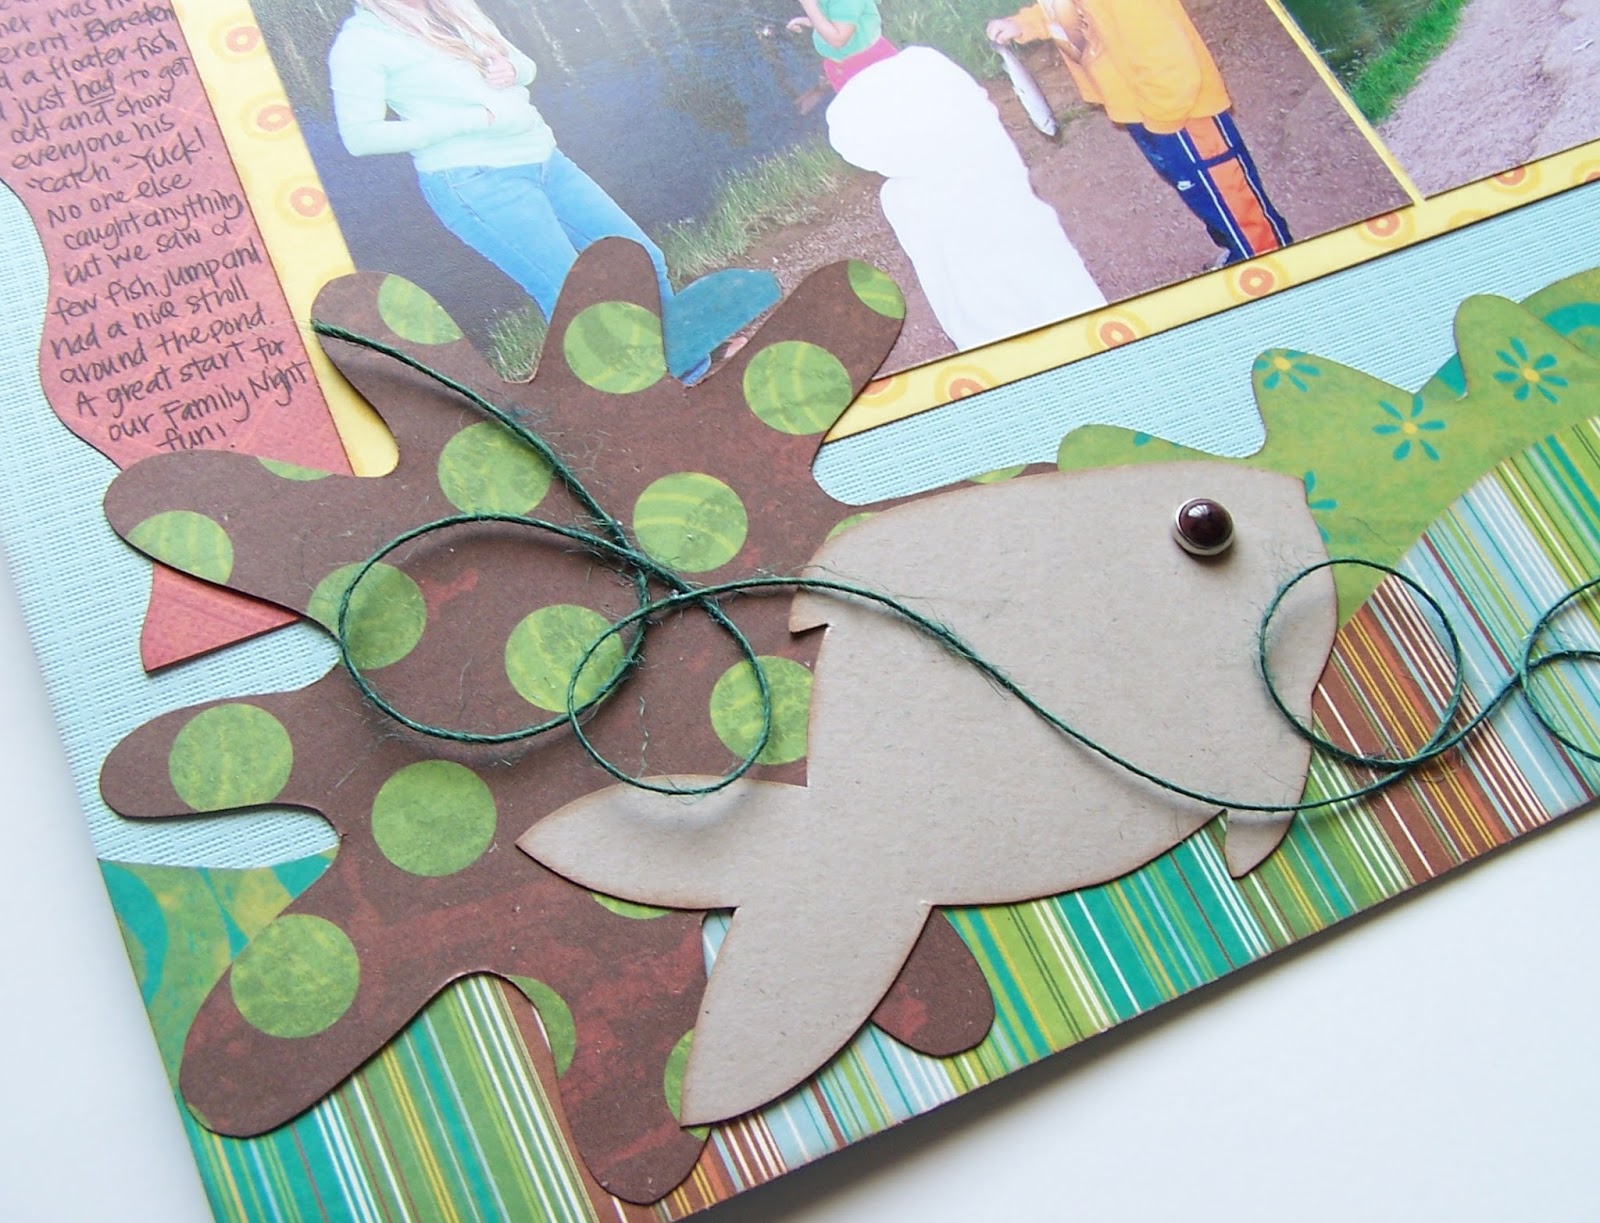
And here's a detail of one of my fish with the twine/fishing line:

Kiwi Lane Designs Templates used:
Tiny Wacky 1T, 2T
Paradise 1, 5
Wacky 1, 2, 3
Happy Trails 1A, 3A, 3B

I hope this inspired you to pull out some photos you don't often go to, along with your templates, and see what you can come up with!  Do you think you need another push towards being inspired?  How about if a prize is involved?  A template set, maybe?
One lucky commenter on my blog will win a set of Wacky Accessory templates.  Just let me know in your comment what photos you tend to shy away from because they aren't what you typically like to work on. (It doesn't have to be a separate comment- one comment will enter you in both drawings.  You have until Sunday, July 7, 2013 at 11:59 PM MST to leave a comment.  Must be a resident of the United States or Canada to win template set.) Can't wait to see what everyone says!

Remember to leave comments at every blog along the hop to be entered to win the $25 gift code from Kiwi Lane!  One commenter from one of the blogs will win!  You have until Sunday, July 7, 2013 at 11:59 PM MST to enter.  

Thanks for stopping by and Happy Scrapping!

Monday, February 25, 2013

DT Doodles With Kiwi Lane and We R Memory Keepers (and a Giveaway!)

It's Monday.... and I really can't decide if that's a good thing or not.  I'm not a fan of Mondays, but my daughter loves them because it means she gets to go to school... weird kid!  Well, whether you're glad it's Monday or not, you should be glad that it's time for another DT Doodle!  And I should mention the chance to win a $25 gift code in the Kiwi Lane Shop if you play along... that should help you get going today!

This month, instead of doing a few card sketches, I chose to do one sketch and use that sketch for both a layout and card or two.  I just really wanted to show how versatile sketches can be with the Kiwi Lane templates, no matter the size of your project.  So here it is:


And here's my layout using We R Memory Keepers' "Crazy for You" collection:
Supplies: cardstock (DCWV, Provo Craft); patterned paper, ribbon, twine, bottle cap, metal flower, die cut (We R Memory Keepers); white alphabet stickers, brad (Doodlebug); black alphabet stickers (Making Memories); ink (Ranger); shimmer mist (Tattered Angels); date stamp (7gypsies)

Kiwi Lane Templates:  Clara Lane 1B; Scallops 2A; Sweetheart 3, 4 & 5; Tiny Sweetheart 3T, 4T & 5T; Tiny Accents 4T & 5T; 12" Strips 1/2"

I used the Sew Easy Ribbon- Scallop tool from We R Memory Keepers to punch the scallops for the ribbon to be threaded through- such a fun look with the Kiwi Lane Scallop!  I'll give you a quick tutorial on the tool at the end of this post... and give you a chance to win it!  I also used the twine a few different ways- I made a bow with a double strand and put it under the metal flower embellishment, made a flower with a single strand to put under the bottle cap embellishment, sewed around the smaller heart with it, and separated the strands to get just the purple to sew along the Clara 1B border.  I love how thick this twine is and the different ways you can use it!

Here are a few close ups of the layout:
Now for some cards:
Supplies: cardstock (Provo Craft); patterned paper, ribbon, twine (WRMK); flowers (American Crafts); ink (Ranger)
 Kiwi Lane Templates: Thoughtful 2B; Adorn 3B; Tiny Sweetheart 2T; Tiny Accents 4T

For this card, I mimicked the border at the bottom of the page and added a few of the shapes from the top right of the layout, used the Sew Ribbon tool again, added some twine and flowers and TA DA! A card based on a layout sketch!  Easy, right?  But what if you want your card to be rotated?  You rotate the sketch, of course!  Here's another card, still based on the same sketch, just rotated a bit:
Supplies: cardstock (Provo Craft); patterned paper, ribbon, twine, button (WRMK); ink (Ranger); jewel (Doodlebug)
Kiwi Lane Design Templates: Sentiments 1B; Adorn 3A; Tiny Accents 1T & 2T

I used flowers on this card to mimic the flower on the layout.  I also used twine for one of my flower centers by twirling it onto a 1" Glue Dot and finishing it off with a self-adhesive jewel.  Easy, peasy!

Alrighty... the moment you've been waiting for! ;)  Here's how to do the Sew Ribbon punch tool:

 It comes with a two sided punch that has magnets that hold it together over the paper:
 It really is easy- you just use the punch thingy and stick it through the holes in the punch template thingy:
 Then you thread the ribbon through the slits like so:
(And I know that fuchsia and kelly green don't go together... I was using scraps and that's what I pulled out of my box.)  This is quite a fun tool and goes hand-in-hand with the Kiwi Lane Templates!  I love how it adds just a bit more texture and a bit more dimension to your projects and layouts.... and I love how easy it is to use!!

So wouldn't you love to have one of these fancy schmancy tools to add to your scrapbook supplies??  Well, you can win one... this one, in fact!  That's right- I'm giving it away to one lucky blog follower.  All you have to do is become a follower of my blog (if you're not already) and leave a comment letting me know that you're a follower and what you would use this Sew Easy Ribbon Punch for!  You have until 11:59 p.m. MST on Sunday, March 3rd to enter.  I'll announce the winner here on my blog on Monday, March 4th 2013. (I had to modify the dates to better correspond with the blog hop... sorry to those who were counting on it being earlier!)

Don't forget to make a project based on this week's DT Doodle for a chance to win a $25 gift code for the Kiwi Lane Shop- head on over to the Kiwi Lane Blog for the details!  

That's it for now - Happy Scrapping!