Don't forget to visit my Etsy shop to see more of my work!

Thursday, February 11, 2016

Valentine's Day Cards with Kiwi Lane Designs

Hello again! I know what you're thinking- two blog posts in a month?! And within 24 hours of each other, no less! I know... don't faint. ;) 

Today, I have a few Valentine's Day cards to share with you, along with a little tip that you can use for any theme- it will work for any of the templates! First off, here are some Valentine's Day cards:


Do you see how there are shapes of white on the background on both cards? That was made by laying Kiwi Lane templates on plain white paper and spraying ink all over the paper. On the "XOXO" card, I left the white background shape untouched and layered some hand cut template shapes on top.  Here's the step by step:

1) Lay templates on the paper where you want them and spray with ink, essentially using the templates as a resist.

2) Let ink dry for a minute and carefully remove templates. (Wash templates under water to remove ink. It should come right off. If not, try washing with a mild soap.)

3) When paper is completely dry, layer smaller templates.

4) Trace, cut, ink and replace to get your card!

There are a few things to point out about this card:
-I originally used a white card base. I decided to cut it down to the piece you see on the front of the card because it warped a little more than I liked. It was an easy fix- you can do the same if you feel like you don't like the way your spray ink warped your paper.  
-I forgot to cover the hole on the template with a little bit of tape before spraying the ink. This made a little dot of color that I didn't really want. I was able to cover it with the layered shape on top, but you might want to cover the hole before you spray your ink. ;)

While the "XOXO" card has plain white resist shapes, I decided that the "Head over Heels" card needed some doodling around the resist shape. I also doodled around the smaller shapes that I layered on the card.

And just because I can, here's another card for your viewing pleasure... and hopefully some template inspiration:

There you go- three cards to help you show some love! I hope you enjoyed them- leave a comment and let me know what you think!

Templates used:
Adorn 2A,2B
Sweetheart 2,3
Tiny Sweetheart 2T,3T
Tiny Accents 1T
Tags 1
Tiny Tags 1T,6T
Tiny Nature 1T

Wednesday, February 10, 2016

Valentine's Day Decor with Kiwi Lane Designs

Hey there Kiwi Lane Peeps!

Today I've veered from my normal paper crafting and ventured into the land of wood blocks! Ok, so it's not so unusual, but I don't usually share it here. But I loved how they turned out, and I thought you might like to see it. Here's what I made with the help of my templates from Kiwi Lane Designs:

Pretty cute, huh? All I did was paint some wooden hearts, cover with paper, add some template shapes and finish off with some epoxy dots of various colors and sizes. It's really pretty self explanatory, so I'll let the photos speak for themselves. Mostly.

Here's what I started with:

The paper collection I used is called "Kiss Kiss" and it was Crate Paper's Valentine line a few years ago. The hearts are cut out wood shapes that I picked up at the farmer's market over the summer. They're about 4.5" tall and 4.5" wide and just under 1.5" thick. Before I painted, I made sure I sanded them lightly and wiped off any sanding residue. You'll get a cleaner paint application if you remember to do that.

I also want to point out that I framed my project right on the wood shapes. Who says you can only use your Kiwi Lane templates to frame on your paper?! And just like when you design on your pages or cards, you can change things as you go without ruining pretty paper in the process!

I love the size and configuration of these hearts because you can mix it up when you display them:


And I covered the back with paper so it's pretty from the other side, too.

Looking at the bare paper on the back, I'm thinking I need to go back and add some more layers...

Thanks for taking a look! Leave a comment and let me know what you think!

Templates used:
Tiny Sweetheart 2T,3T
Tiny Explore 3T,6T
Mini Abbie Road 3A,3B
Elements 2,7

Friday, January 29, 2016

Winter Layout with Kiwi Lane Designs

Hello, Hello!!
Happy January! I'm sure you've made (and possibly broken) your resolutions by now, but did you make one that had to do with getting your scrapbooks done? Well, hopefully I can help inspire you today and get you on your way to meeting your goals! 

First of all, I used some of January's featured templates on my layout, plus a few extras. And the paper line I used was called "Snow Fun" by Pebbles, Inc. and I'm pretty sure it was released circa 2008/2009. Yes, I know. I'm a paper hoarder. Admitting it is the first step... to the craft store to get some more paper. Haha! Anyway... Here's what my layout looked like when I started framing using my Kiwi Lane templates:
I know you can't really see the framing. It's what happens when you are trying to take a photo of framing on a white background after midnight under fluorescent lighting. You get the idea, though. And, of course, the original framing is not exactly what I ended up with. I added a few more templates, plus some punched snowflakes.  Here's what the finished product looks like:
Supplies: card stock, glitter glue, chipboard (American Crafts); patterned paper, die cut, letter stickers (Pebbles, Inc.), brads (Creative Impressions), vellum (Provo Crafts); pen (Staedtler); ink (Ranger); punch (Marvy Uchida); Kiwi Lane Designs templates

If you haven't figured this out yet, I love, LoVe, LOVE using vellum and glitter on winter layouts! They add layers and texture without a lot of bulk, an they mimic the look of ice and snow. So what happens when you combine the two? You get a little bit of warping. Not great, but not horrible either. In fact, it adds another layer of texture to your layout. If you look at the finished layout, you'll notice that the vellum ice crystal shape is outlined with glitter glue and it's warped it so it curls off the page a little bit. It will get pressed down when put in a page protector, so not a big deal. My punched vellum snowflakes didn't fare so well when I added some glitter glue- they warped a LOT!! I put the glitter on them and went to bed. I awoke to this:
Warped and curled and not willing to flatten out at all!! So what do you do when you need to flatten your crafting project quickly? You grab your super small crafting iron, of course! I put the snowflakes between the folds of a kitchen towel and ironed (crossing my fingers because I hadn't actually ever ironed vellum before and I didn't know if it'd work). And it worked!! Here's a before and after:
And just because I know you're going to ask, here's the super cute little crafting iron I used:
It's the size of your palm, plugs into the wall, only does dry heat and doesn't have holes on the face of the iron. It's a great little tool!

Thanks for stopping by and checking out my layout- Happy Scrapping!!

Templates used:
Mini Aspen 1B,3A
Winter 1,2
Tags 1

Merry and Bright Paper Kit with Kiwi Lane

Hello again!  I'm so excited to show you a layout I made using Kiwi Lane's newest paper kit "Merry and Bright."  And can I tell you how much fun I had working with this kit?!  I know when you look at the photos for some of the projects made from the kit, the red looks a little orange-ish. But when I had the paper kit in my hands, I was happy to see that the red is a rich, beautiful Christmas red. And the color combination in the kit are perfect for anything Christmas, holiday or winter related!

Here's the layout I made using my Kiwi Lane Merry and Bright paper kit:
Supplies: Merry and Bright paper kit and designer templates (Kiwi Lane Designs); glitter, twine, glitter tape (American Crafts); ink (Ranger); pen (Staedtler); brads, tape (craft supply)

I totally forgot to take a "before" photo with my page framed and ready to go... Sorry! Next time, for sure!

The photos on this layout were take a few years ago when my family and I visited Temple Square in Salt Lake City to see the lights. It was a beautiful night and perfect for wandering around enjoying the displays. If you've never been, and you're a fan of holiday lights, you should totally go! It's quite the sight!!

Soooo.....Did you see the cute little details on the Tiny Traditions mitten and light bulb shapes? Here are the mittens:
I made the cuffs look furry using double sided tape and tinsel glitter.  Fun effect, yeah? You can still see just a hint of the pattern on the paper (it's gray polka dots on a white background) under the translucent glitter. Well, you can see it in person. Not so much in photos.

And here is one of the light bulbs:
I used silver washi tape to cover the end and tied some white twine around it to finish it off. I also ended up fussy cutting some of the circles out of the snowflake paper to make my grouping look more complete.

The title area features more light bulbs and looks like this close up:
I know I've mentioned this in previous posts about the Kiwi Lane paper kits, but I'm going to have to do it again. It bears repeating. The printed elements paper is fantastic! I love that it has a few titles, sentiments, journaling spots and some smaller areas of various patterns that you can use to add to your layers. It's basically like they've combined a title pack, journaling pack and 3 extra sheets of paper (you know, those sheets that you only need a little bit of but you have to buy the whole sheet to get?) all in one handy printed piece of awesomeness! I'm telling you- it's GENIUS!!

So that's it. I'd love it if you'd leave a comment at the bottom of this blog post. It's always nice to hear from you!! 

Templates used:
Sunnybrook Lane 1A,1B,2A,2B

Friday, November 6, 2015

A Layout and a Few Cards with Kiwi Lane

Hello fellow Kiwi Lane fans!  I have a few things to share with you today. And to continue with my theme from some of the last few posts I've done, I used another fabulous Kiwi Lane paper kit to create a single page layout and a few cards, along with this month featured templates- Brackets, Adorn and Autumn.

I used Kiwi Lane's "Social Butterfly" paper kit this month. I have to admit- when I saw this collection, I thought it was going to be way too girly for me to do use very well.  Especially with the Autumn template set.  I mean, it has pink, flowers and butterflies!  BUT, I should have known better!! These Kiwi Lane ladies are genius and know how to make a paper kit so that you don't have to use the girly elements in a way that overpowers the page. Instead, you use the reverse side and smaller pieces of those prints that scream GIRLY GIRL.  And you end up with a project that is just feminine enough without jumping out at you with a tiara, tutu and sparkly wand. I'm telling you, it's pure genius!!

So here's the layout I ended up with:
Supplies: Kiwi Lane's Social Butterfly paper kit; alphabet stickers (American Crafts, Making Memories); ink (Ranger); pen (Staedtler)

And here's how I "Framed" my layout:


Yes, that is a grand total of three templates on my layout.  I had no idea what I wanted to do with the layout when I started.  So I threw on a few templates from the Adorn template set, along with a template from the Bracket set and built my page from there. I added lots of layers of the scalloped edge and mirrored that at the bottom of the page.  I also used one of the printed quotes from the paper kit and added that early on to make sure I left room for it.  I finished off the page with a butterfly from the Tiny Nature set and a few flowers from the Tiny Wildflower set and a title using some alphabet stickers.  

With some of the remaining paper from the kit, I made some cards:
Supplies: Kiwi Lane's Social Butterfly paper kit; card stock (American Crafts); pen (Staedtler); ink (Ranger); stamp (Basic Grey); jewels (craft supply)
 Supplies: Kiwi Lane's Social Butterfly paper kit; card stock (American Crafts); pearl (Doodlebug); brad (American Crafts); ink (Ranger)
Supplies: Kiwi Lane's Social Butterfly paper kit; card stock, alphabet stickers (American Crafts); pearls (Doodlebug); ink (Ranger); pen (Staedtler)


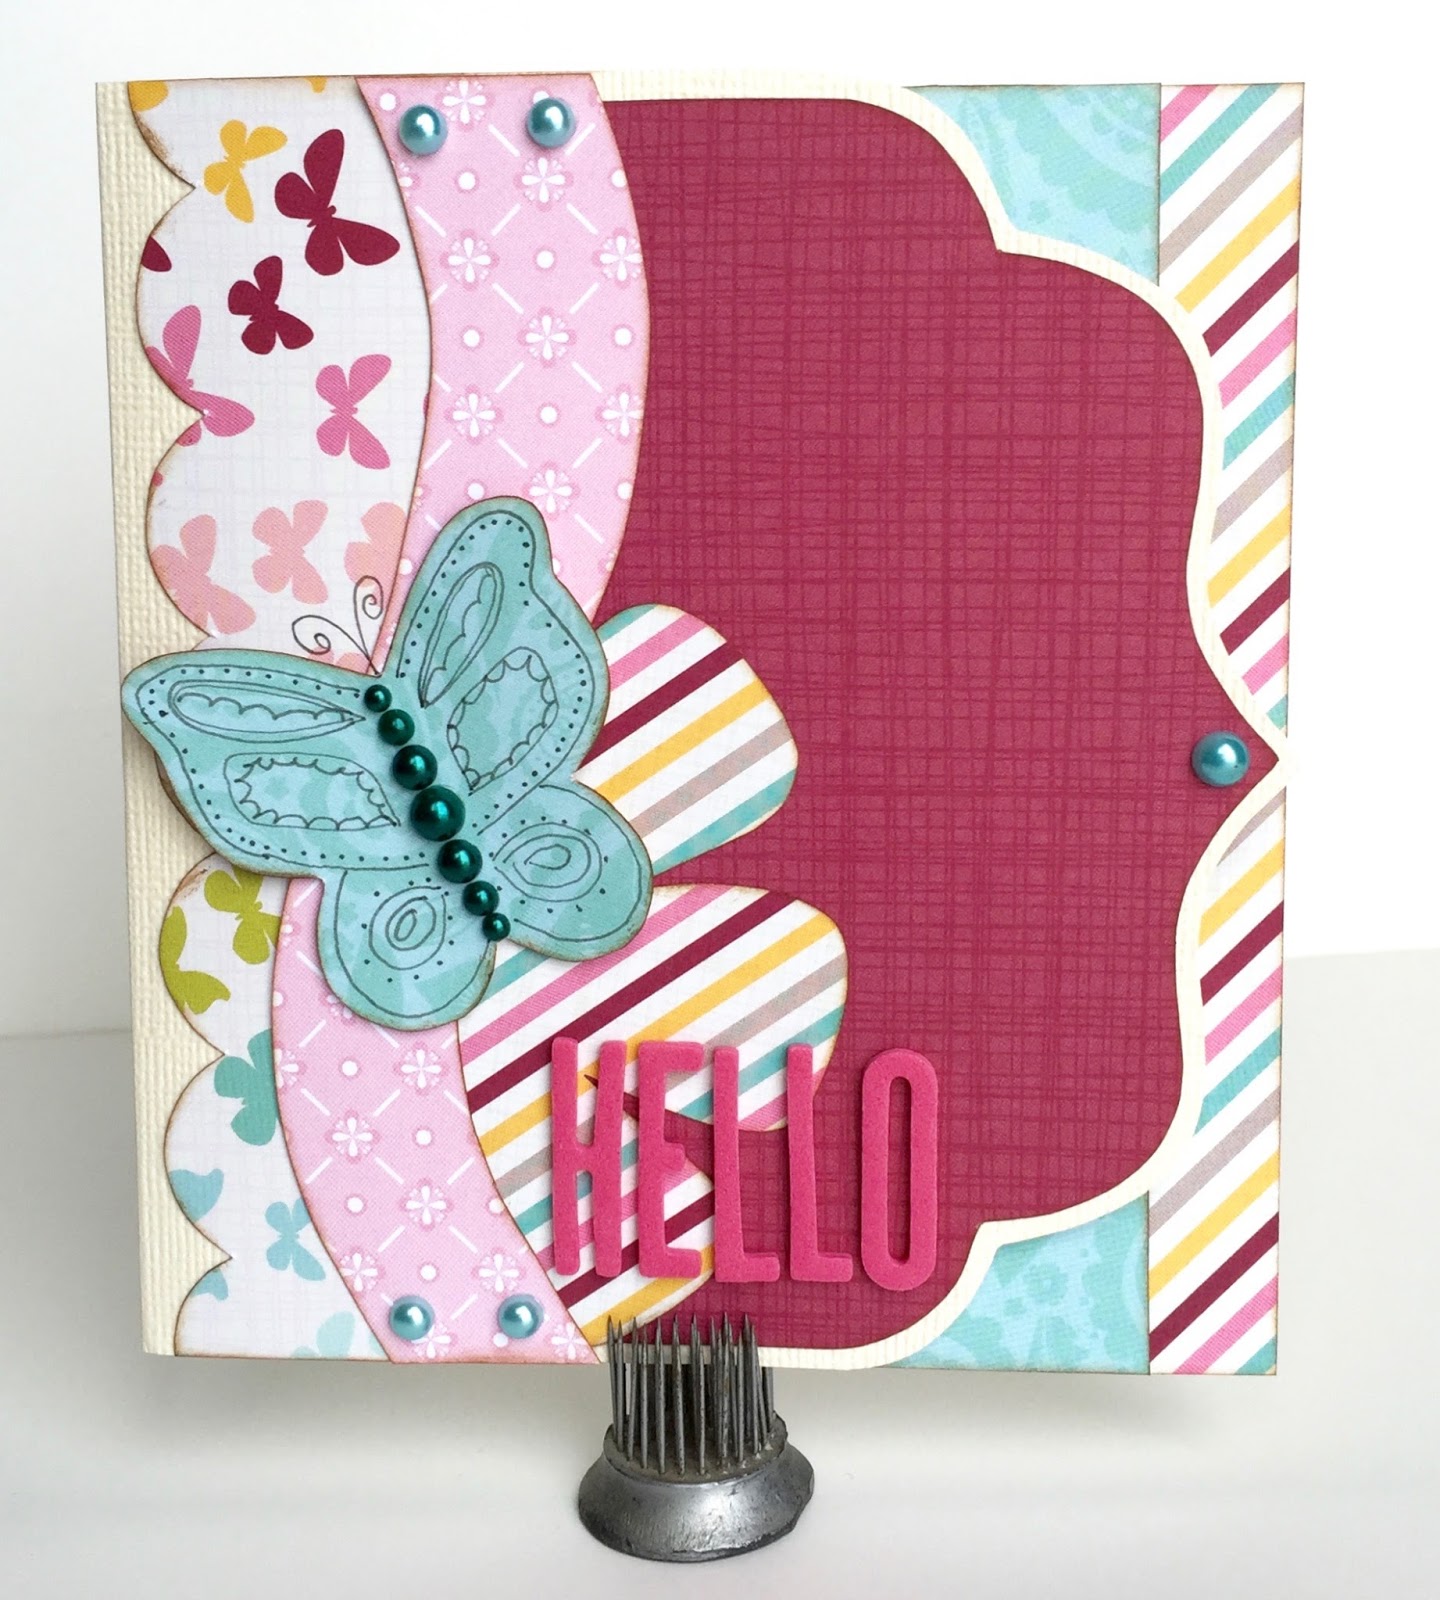
The "Hello" card has a shaped edge and some detail on the inside:


Even after making a layout and a few cards, I have enough scraps of paper left to make at least a few more cards. I love how much you can do with each Kiwi Lane paper kit!

Thanks for stopping by and Happy Scrapping!!

Templates used:
Bracket 2
Adorn 3A,3B,1B
Tiny Nature 2T
Scallops 1B
Wildflower 1T,4T
Autumn 1,3,6
Springtime 2
Mini Scallops 2A

Friday, October 9, 2015

Shaped Cards for Fall with Kiwi Lane

Happy Fall, Y'all!!  Fall is definitely my favorite season and I'm happy to share some fall and Halloween themed cards with you today using my Kiwi Lane Designer Templates.  

As you may have heard, this month's featured sets are Halloween and Tiny Holiday.  These sets go hand in hand and work so well together!  I love that the Tiny Holiday template set has all the tiny versions of shapes from Christmas, Halloween and Winter.  Whether you're a card maker or a scrapbooker, these sets should be in your stash!  If you happen to be a card maker, you probably just read that and thought, "Huh?  Why do I need to have the large holiday sets?"  Well, to make your card base, of course!  Let me show you what I mean.

First off, here are the cards I made:


   Supplies: cardstock (American Crafts, Georgia-Pacific); patterned paper (Studio Calico); brad and sticker (Doodlebug); glitter glue (Ranger); ink (Ranger, Superior); enamel dots (SEI); embossing folder (Darice); jewels, button, wire, stamps (craft supply).

You'll notice they are not your typical square or rectangular cards.  They're shaped cards and so easy using your templates!  First step- grab a manilla folder and some templates from the Halloween template set.  Leaving some of the template hanging off the folded side of the manilla folder, trace your template.  It should look something like this:


Now cut out your shapes.  Leaving some of the template hanging over the edge when you trace and cut makes the shape a card, like this:


Grab the templates you used to cut your card base and start planning your card.  Layer with smaller templates and make sure the majority of the smaller templates are on top of the larger one and not hanging too far off to ensure your card layers are strong and will adhere together.  Here are my "Framed" cards:


Now trace, cut and decorate your cards and you're ready to give away some gorgeous shaped cards that were easy to do with your Kiwi Lane templates!

Thanks for stopping by and Happy Crafting!!

Templates used:
Halloween 1,2,4
Tiny Holiday 2,4,5
Autumn 1

Tuesday, October 6, 2015

Stacked Halloween Blocks (Inspired by Pinterest)

So I've recently been put in charge of a crafting group in my area.  Which is all fine and dandy when you consider I have an extensive knowledge of paper crafting.  But this group thing is kind of throwing me for a loop.  Why?  I asked for input as to what the group wanted to make, and NOTHING was paper crafting.  It was wood... and paint... and metalwork... and other scary things!  But, I decided to jump in with both feet and branch out of my paper world.

One of the projects shared was this:
It was shared from Pinterest. This looked fairly do-able and I decided to take a shot at it.  Here's what my stacked Halloween blocks ended up looking like:
Just a bit different from the original idea, right? ;)  I had no idea what the block on the bottom was- a scarecrow? A witch?  And I wasn't too thrilled with the idea of having two green blocks, so I turned the scarecrow/witch block into a pumpkin and switched places with the monster guy.  I also wanted the eyes to have more personality, since they are the only part of the face.  I have no idea what size blocks were used for the original, so I just did what I thought would be easy- I chopped up a 4x4 into cubes.  Actually, it was a 3.5x3.5.  I had enough people sign up to do the craft that I ended up doing about 25 sets.  Lots of cutting and sanding.

So, lets go through the stack and I'll let you know what I did.

Pumpkin block:
Painted it orange, traced and cut a burlap leaf from the Kiwi Lane Designs Tiny Nature template set, painted a spool with a layer of brown followed by a layer of bright green on top, made a vine out of twine and painted eyes on the front of the pumpkin.  Hot glued the leaf, stem/spool and vine/wire to the top of the block like this:

Mummy block:
Painted a layer of white followed by a layer of cream (Why? Because 2 layers of cream looked to yellow and 2 layers of white looked too bright.), painted eyes, wrapped around a 2-3" strip of gauzy fabric and tied in a knot on the side above the eyes.

Monster block:
Painted it green, spray painted wooden push pins silver, cut hair out of paper and glued to the top of the block as hair, painted eyes and scar.  I used paper because I could not find any black felt in our town ANYWHERE!!  And I looked everywhere I could think of.  But, if you use paper, don't use hot glue!! I did and it has warped the paper and looks awful! I think I'll be replacing it with felt as soon as I can find some again.  Anyone want to send me some? ;)

I sanded the edges of all the blocks for a slightly distressed look (and to help cover up any painting mistakes- sanding makes it look messy on purpose!)  The finished product ended up being about 12" tall, including the spool/stem.

And there you have it!  My first soiree into the world of wood crafting!  Maybe not the first, but I don't think I've done anything in that department for a few decades.  Is there such a thing as a born again wood crafter?  If so, I think I'm in that category! ;)  I really liked playing with paint and blocks. I think I might even do it again!

Thanks for stopping by and Happy Crafting!!

Wednesday, September 9, 2015

New Layout Using Kiwi Lane's "Birds of a Feather" Paper Kit

Hey Kiwi Peeps!  Last month I shared a layout and card using on of the new Kiwi Lane Designs paper collections.  Well, it might be a bit like a rerun, but today I also have a layout and a card using one of the new Kiwi Lane Designs paper collections.  This time, I decided to use the "Birds of a Feather" collection. I love the muted peach, yellow, green and blue paired with a brighter coral along with charcoal and white.  This mix of bold and pastel colors were just asking to be paired with some photos I had from a family field trip to Wheeler Farm in Utah.  Here's the layout I came up with:


I'm kind of loving the muted tones for the pumpkins and leaves.  It really pops against the bolder papers.  And if I haven't mentioned it before, there is a sheet of printed cards and smaller bits of printed patterns in each collection to give you a variety of options when building your page.  For example, I was able to use the peach for a few things, but it was just a small area printed on one sheet of paper.  In fact, I was able to cut the pumpkins, tree trunk, tree top, bracket, flower and tag (behind the title) all out of the same piece of paper (using both front and back).  Plus the butterfly, flower and sentiment/quote on the card.  Talk about getting your money's worth!  And speaking of cards....


This was made using the same "Birds of a Feather" collection, but this time I steered clear of the bolder colors.  Now, instead of having a bold autumn feeling, the paper has a softer spring-like feel.  I also added some sparkle.  Because I just couldn't resist! ;)  I used some glitter glue to edge the butterfly and some iridescent Smooch top coat on the edges of the flower and the leaves.  Kind of hard to see in photos, but here it is-


I love how versatile this paper collection is!  Thanks for stopping by and happy scrapping!

Templates used:

Layout:
Madison Avenue 2A,2B
Aspen Court 3A,3B
Nature 1,4
Halloween 2
Tags 1
Tiny Accents 1T
Tiny Nature 1T,4T,6T
Tiny Holiday 2T,4T
Tiny Brackets 4T

Card:
Tiny Nature 1T,2T,6T

Saturday, August 22, 2015

New "Live Life" Paper Kit with Kiwi Lane

Hey Kiwi Lane friends!  Have you been dying over the new Kiwi Lane paper lines, too?  I think I'm in love with all of them!!  So, to show how great they are, I've made a 2 page layout and a card to share with you today.  Both were made using the new "Live Life" collection from Kiwi Lane.  

Here's the "Framing" of my layout:


And my completed layout:


While I was making my layout, I noticed some black dashed lines along one of the printed strips that I was using.  And what goes well with a little bit of black printed on paper?  Doodling!  For my tree, I took the Tiny Nature 6T shape and doodled along the edges.  I knew I would be stacking it on the Nature 6 shape and the doodling (along with a few foam adhesive dots between the layers) help set apart the layers and add depth without a lot of bulk.  


And, of course, I had to add a little bit more doodling so I did a simple outline around the Tiny Bracket shapes for journaling, the tree trunk and the leaves of the dragonflies.  A simple addition that adds so much.  And remember- doodling doesn't have to be perfect.  The imperfections add to the charm. :)


And what do we do with our leftovers?  Make a card, of course!

The printed card is part of the Kiwi Lane "Live Life" paper collection.  I used a few templates from the Elements template set to mimic the printing on the card for a simple card.

And that's it for today!  If you, too, couldn't resist those super cute Kiwi Lane paper collections, I'd love to see what you made with yours!  Feel free to share them to Kiwi Lane's Facebook page or blog.  Or you can share the link in the comment section of this blog post.  Can't wait to see!

Templates used:
Journey 1,6
Rings 1,2,3,4
Nature 6
Tiny Nature 6T
Playtime 4
Tiny Explore 1T
Tiny Brackets 1T,2T
Paisley Place 3A,3B
12" Strips

Thanks for stopping by and happy scrapping!

Monday, June 22, 2015

Family Fun Layout

Well, if you follow Kiwi Lane's blog at all, you'll have already seen this layout.  Because, well, I'm late in posting.  Again.  I feel like I should be saying "as usual" at this point.  Sigh.  The reason for my tardiness this month?  I was on vacation with my kids!  Yep, I took my kids and drove a few thousand miles and went to visit my sister and her family in the Madison, Wisconsin area.  We spent two weeks covering lots and lots of freeway, playing with family, seeing some sights and doing a little bit of nothing.  It was fun, but I'm glad to be home.  And don't worry.  There are plenty of photos from that trip for me to scrapbook.  And, who knows? Maybe they'll even make it onto a page sooner rather than later.... yeah.  Right!  :)

So here's what I made using my Kiwi Lane templates:
Supplies:  patterned paper, brads, printed chipboard, enamel dots (My Mind's Eye); alphabet stickers (Pebbles); ink (Ranger); pen (Staedtler)

And here's how I framed my layout with my Kiwi Lane templates:

Honestly, there's nothing super special about this layout.  No tips or tricks that I can think of.  If you can see any, let me know. ;)  

Templates:
Cascade Trails 1A, 1B, 3A, 3B
Adventure 1, 2, 3, 4, 6
Tiny Explore 4T
Tiny Accents 3T
Tiny Wacky 1T
Photos

Thanks for stopping by and Happy Scrapping!

Wednesday, May 13, 2015

S'mores Day 2 Page Layout using Kiwi Lane Design Templates

(Sorry this is posted late- I had it scheduled for next month, for some unknown reason...)

Hello!
I have a 2 page layout to share today.  
Supplies: cardstock (American Crafts, WRMK); patterned paper (Simple Stories); letter/number stickers (American Crafts); brads (Doodlebug, WRMK, Basic Grey); pen (Staedtler); ink (Ranger)

When I was putting my supplies together for this layout, I chose this patterned paper by default.  It was the only collection on my table that had colors that wouldn't clash with the clothing in the photos.  I hate to admit it, but there it is.  Sometimes proximity and color play a rather large part in my paper choice.  This particular collection gave me a few issues that I needed to find solutions for, though.  First- I didn't have very much patterned paper to work with.  I'd already used the collection on a layout, so I had 2 sheets of pocket page style cards and 3 pieces of patterned paper that had half used or more on each sheet.  Second- The theme of the collection is summer/beach/vacation.  So how did I come up with a 2 page layout with the aforementioned problems?  Here it is...

For the issue with paper amount, I added solid card stock to the mix.  The collection was full of bright, bold color so that limited options to light colored or white card stock for the background.  Since part of my patterned paper was yellow (and I knew I wanted to use it for layering), that meant I'd use white for the background. Decision made!  Easy peasy.  I also used a solid green card stock with the chevron border along the bottom of the layout for a bit more depth.  Because the patterned paper is so bold, I chose to keep my embellishments simple.  I used a few layers of my Kiwi Lane Designs Wildflowers, Tiny Wildflowers, Tags and Tiny Tags Accessories for most of the embellishments.  I also used a 3x4 card to fill some space with a title.  And I used a black pen to outline many of the accessory shapes. This adds a bit more dimension without bulk.  The final touch was adding some brads to the tag shapes and the small chevron on the left page.  I added small brads that are the same color as the paper on the chevron.  This is another technique to add some dimension and interest to a simple shape without adding a lot of bulk.


What did I do about that summertime theme?  Well, you know those sheets of pocket page cards?  I used those to mat my photos, adding more color to the layout and covering the theme that didn't apply to my photos.  I cut my photos 1/4" smaller than the cards for the perfect thin mat.

That's it for this layout!  I hope you fell inspired to use those scraps up on more than just cards, and use those pocket page cards on more than just pocket pages!

Thanks for stopping by and Happy Scrapping!

Template list:
Chevrons 1A, 1B, 2A, 2B
Mini Colter Trails 1A
Tiny Tags 3T, 5T, 7T
Tags 1, 2
Tiny Wildflower 2T, 5T
Wildflower 1, 2