Don't forget to visit my Etsy shop to see more of my work!
Showing posts with label cards. Show all posts

Wednesday, May 11, 2016

Using Stamps with your Kiwi Lane Templates


Howdy! I'm here today with a few tips for using stamps with your Kiwi Lane Designs templates.

I know you’ve seen all the cute cards, pages and projects over the years with stamped sentiments, titles, journaling spots or other images. But, have you ever wondered what the process would be to use your stamp stash with your templates? While we all have a little bit of our own spin to the process, I’m going to share a few tips and tricks to help you create your own stamped template shapes.

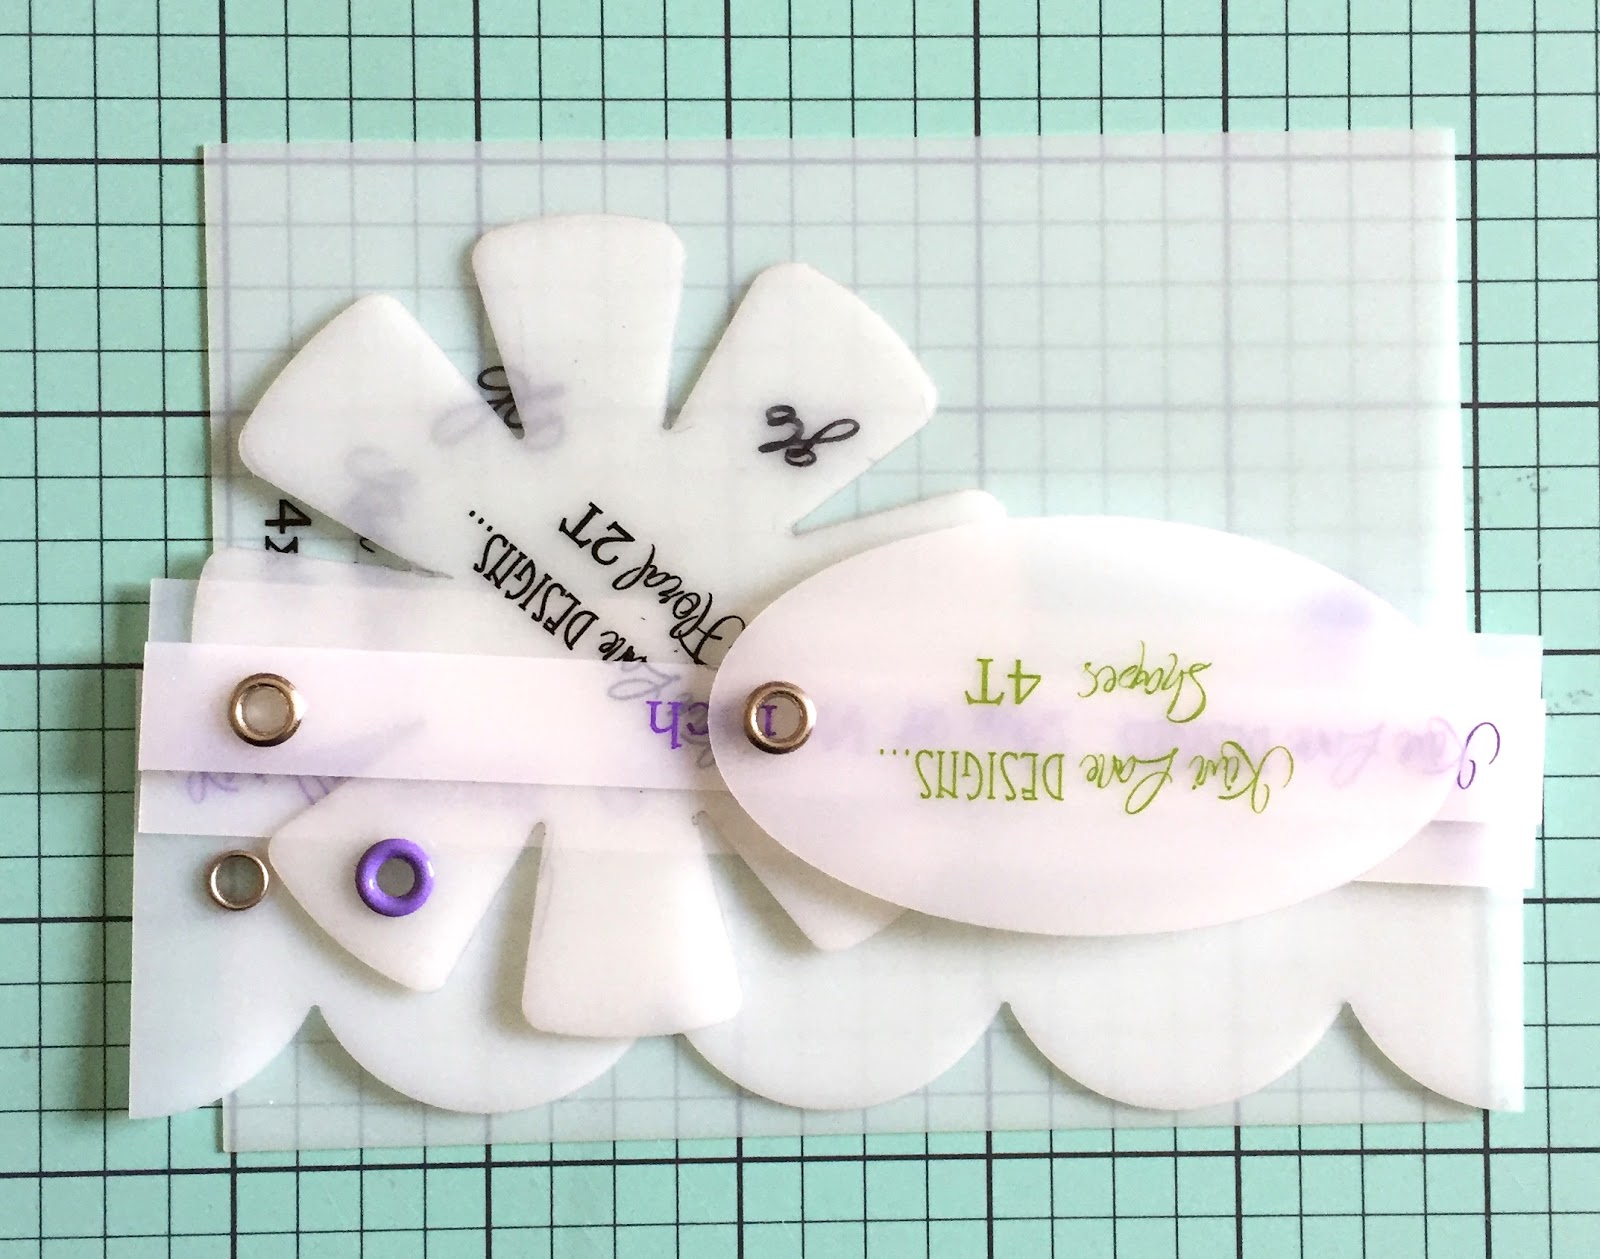
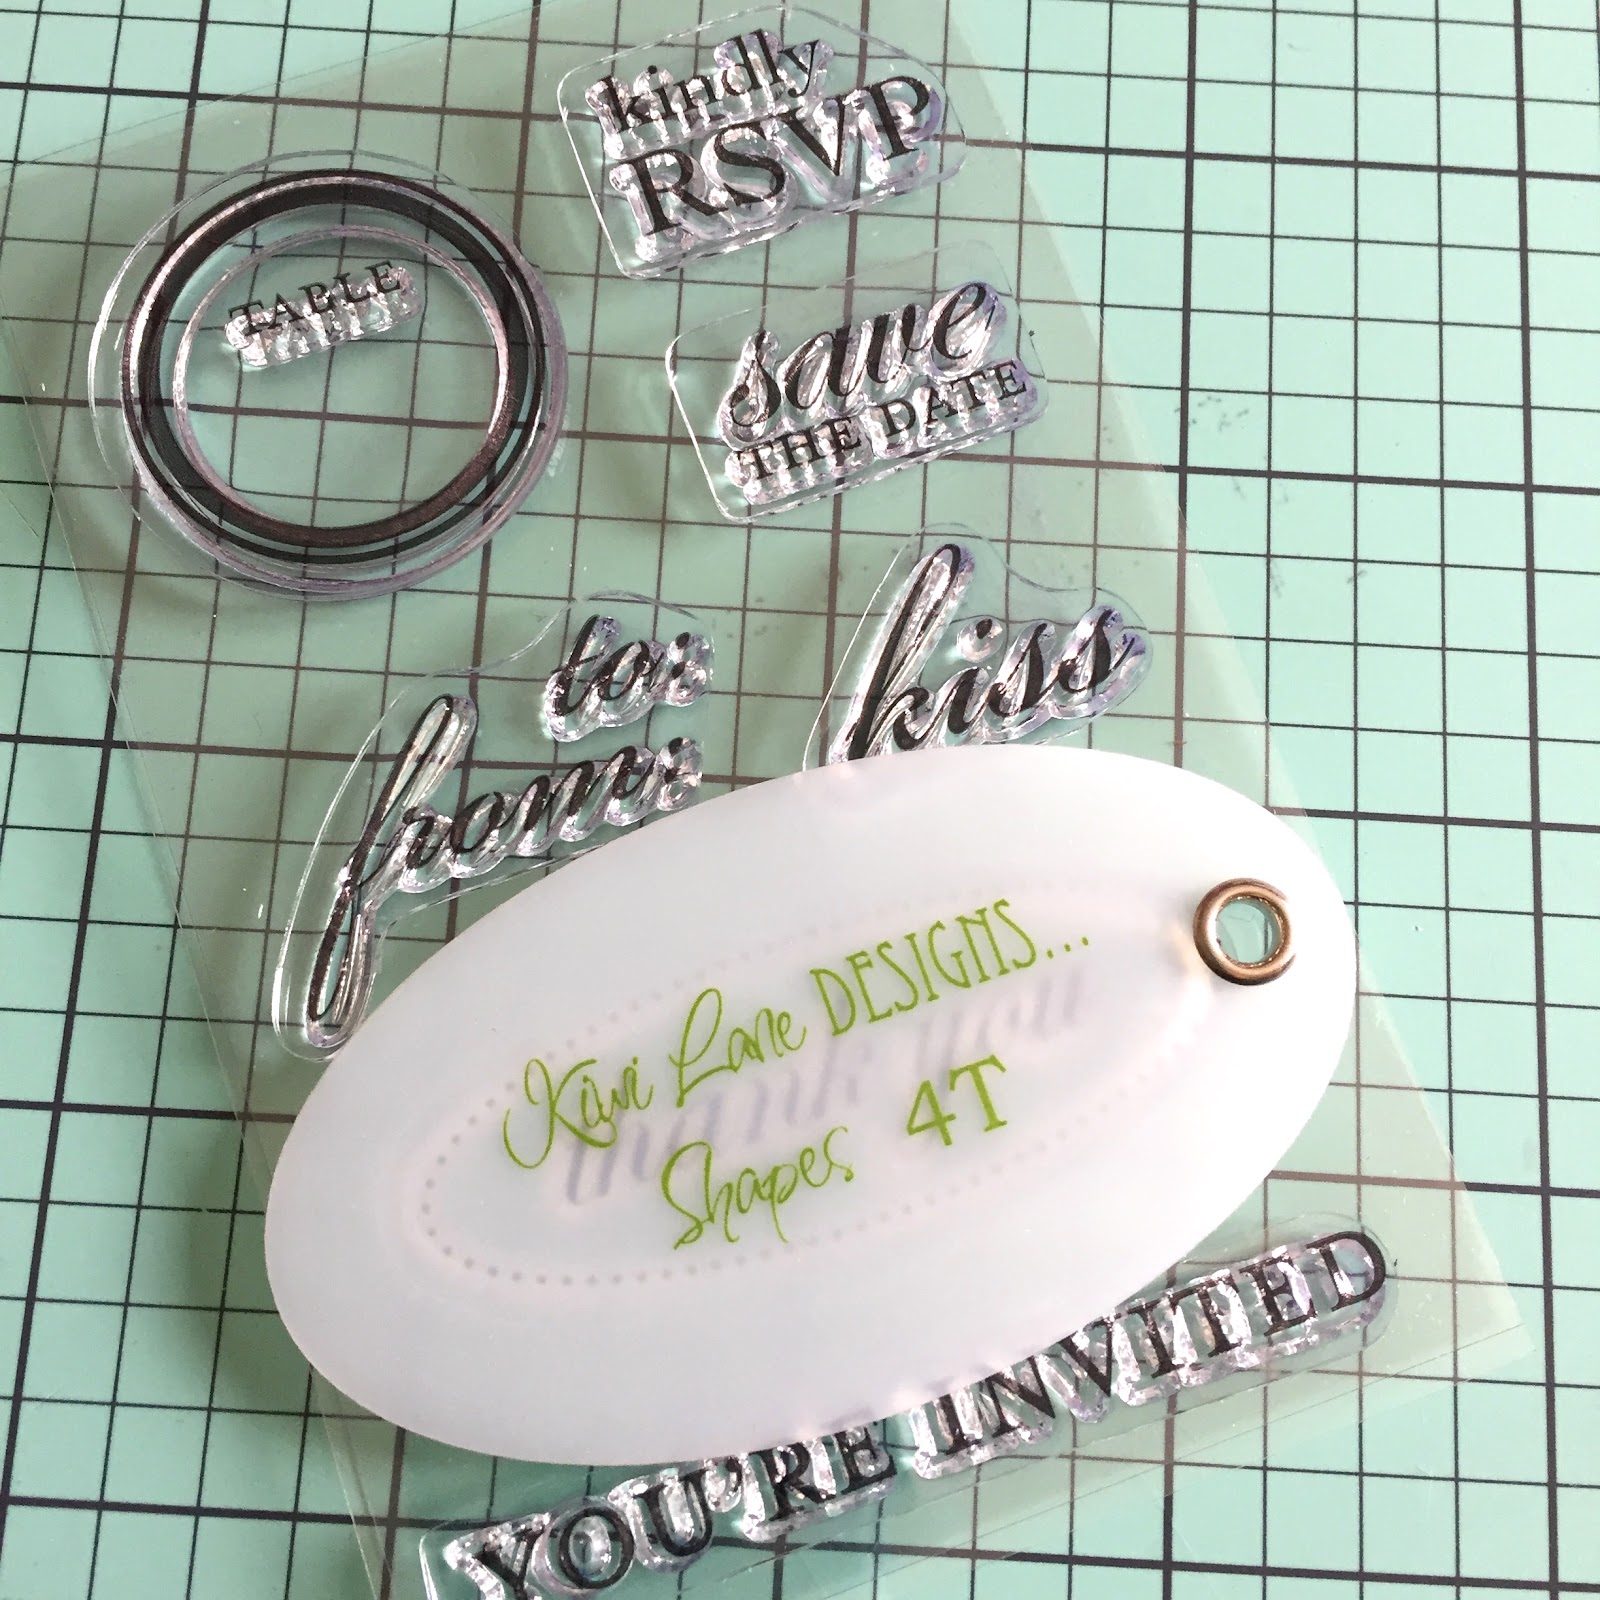
The first step (and the most time consuming) is matching a stamp and a template shape. This is where the translucent property of the templates comes in handy. You can place your template directly over the stamp to see if it’ll fit, like this:
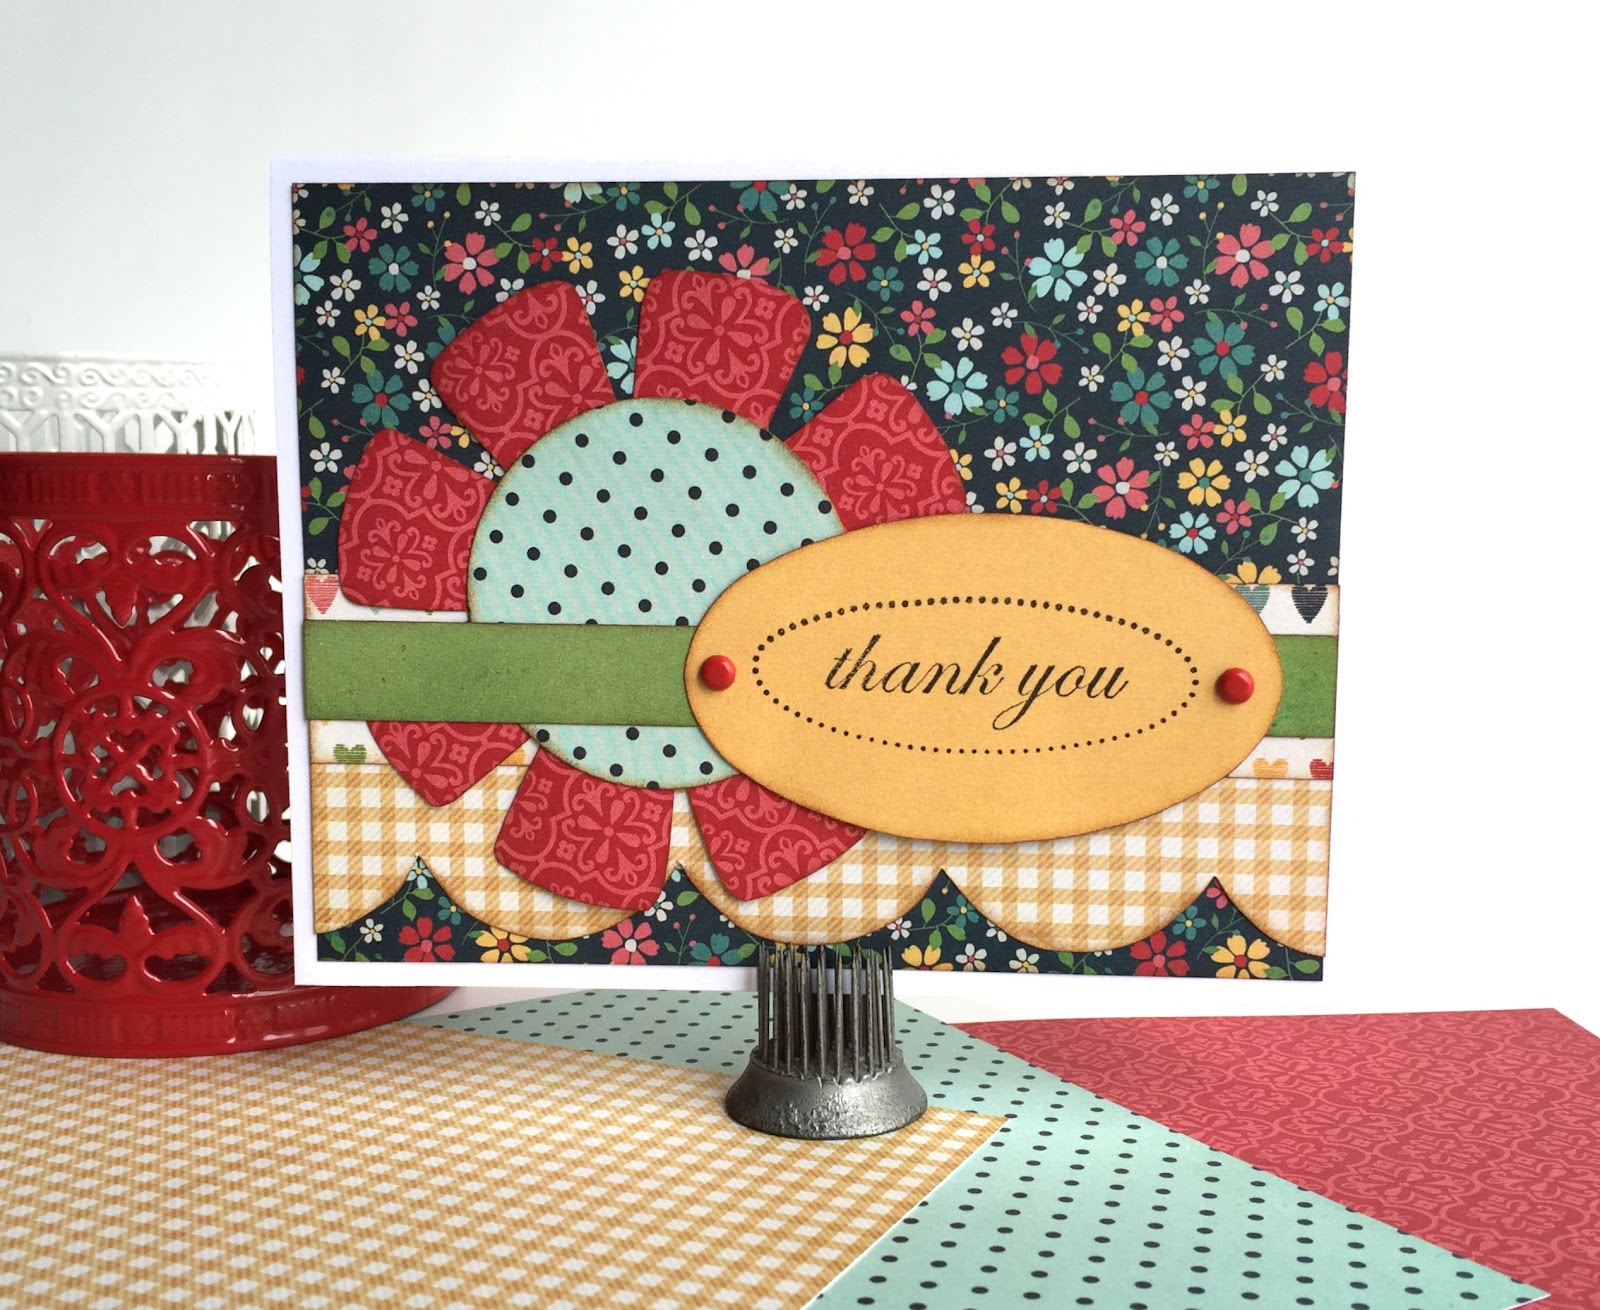
Once you have your template matched with a stamp, you can start Playing to Create using your Kiwi Lane templates. Here’s my framed card:
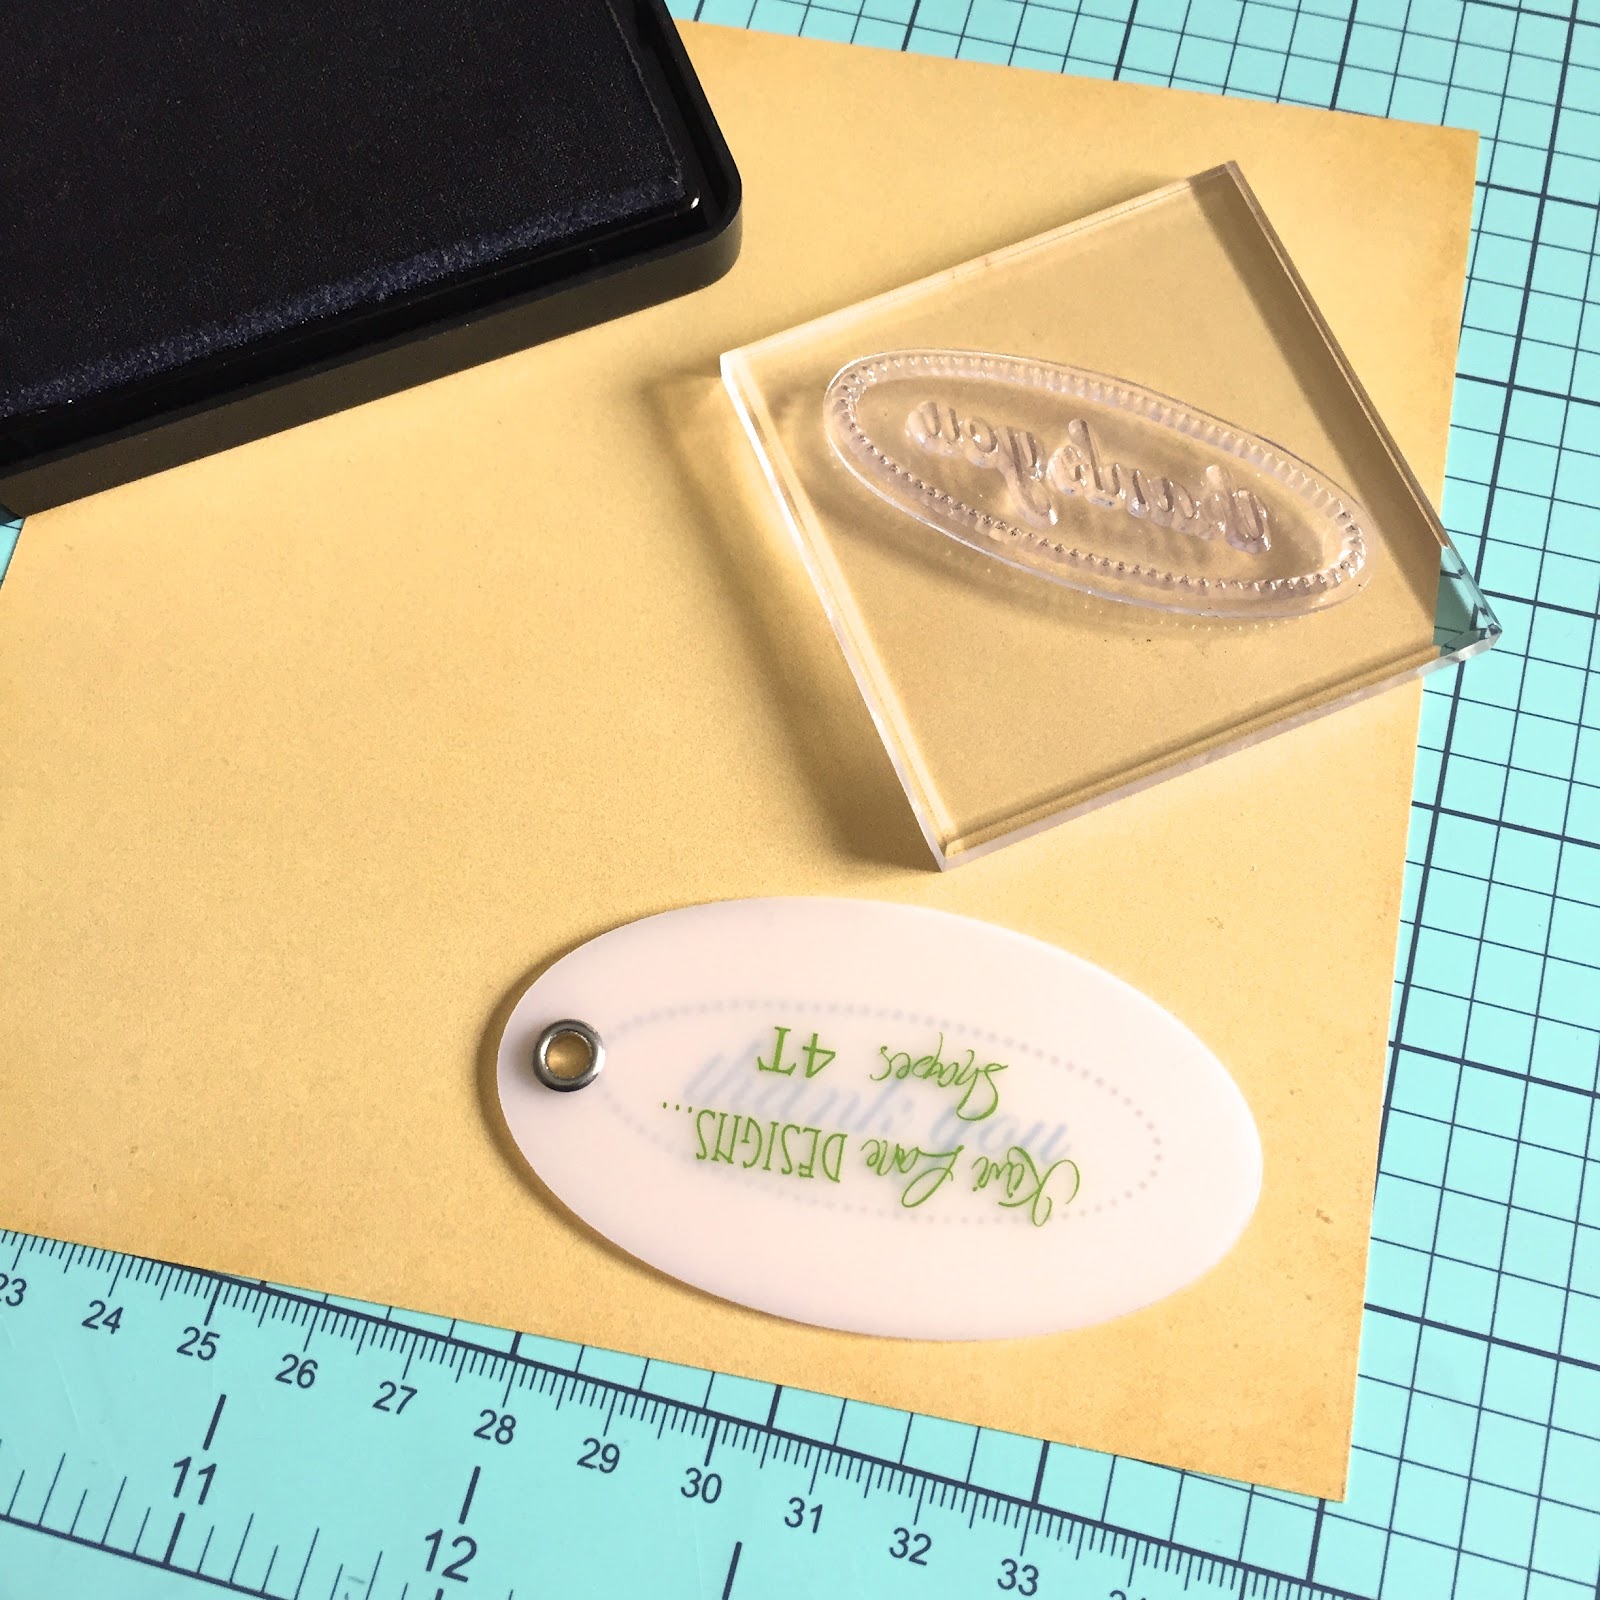
To get a perfectly centered stamped image, first stamp the image on your paper. Make sure you leave enough space around the image to accommodate the template you want to use. Once your stamped image is dry, place the template over the image (again- the awesome translucent property at work!) and trace like so:
Next, cut out your shape:
And now you’ll continue building your card as you normally would- tracing, cutting, inking and adhering- until you have your finished card:
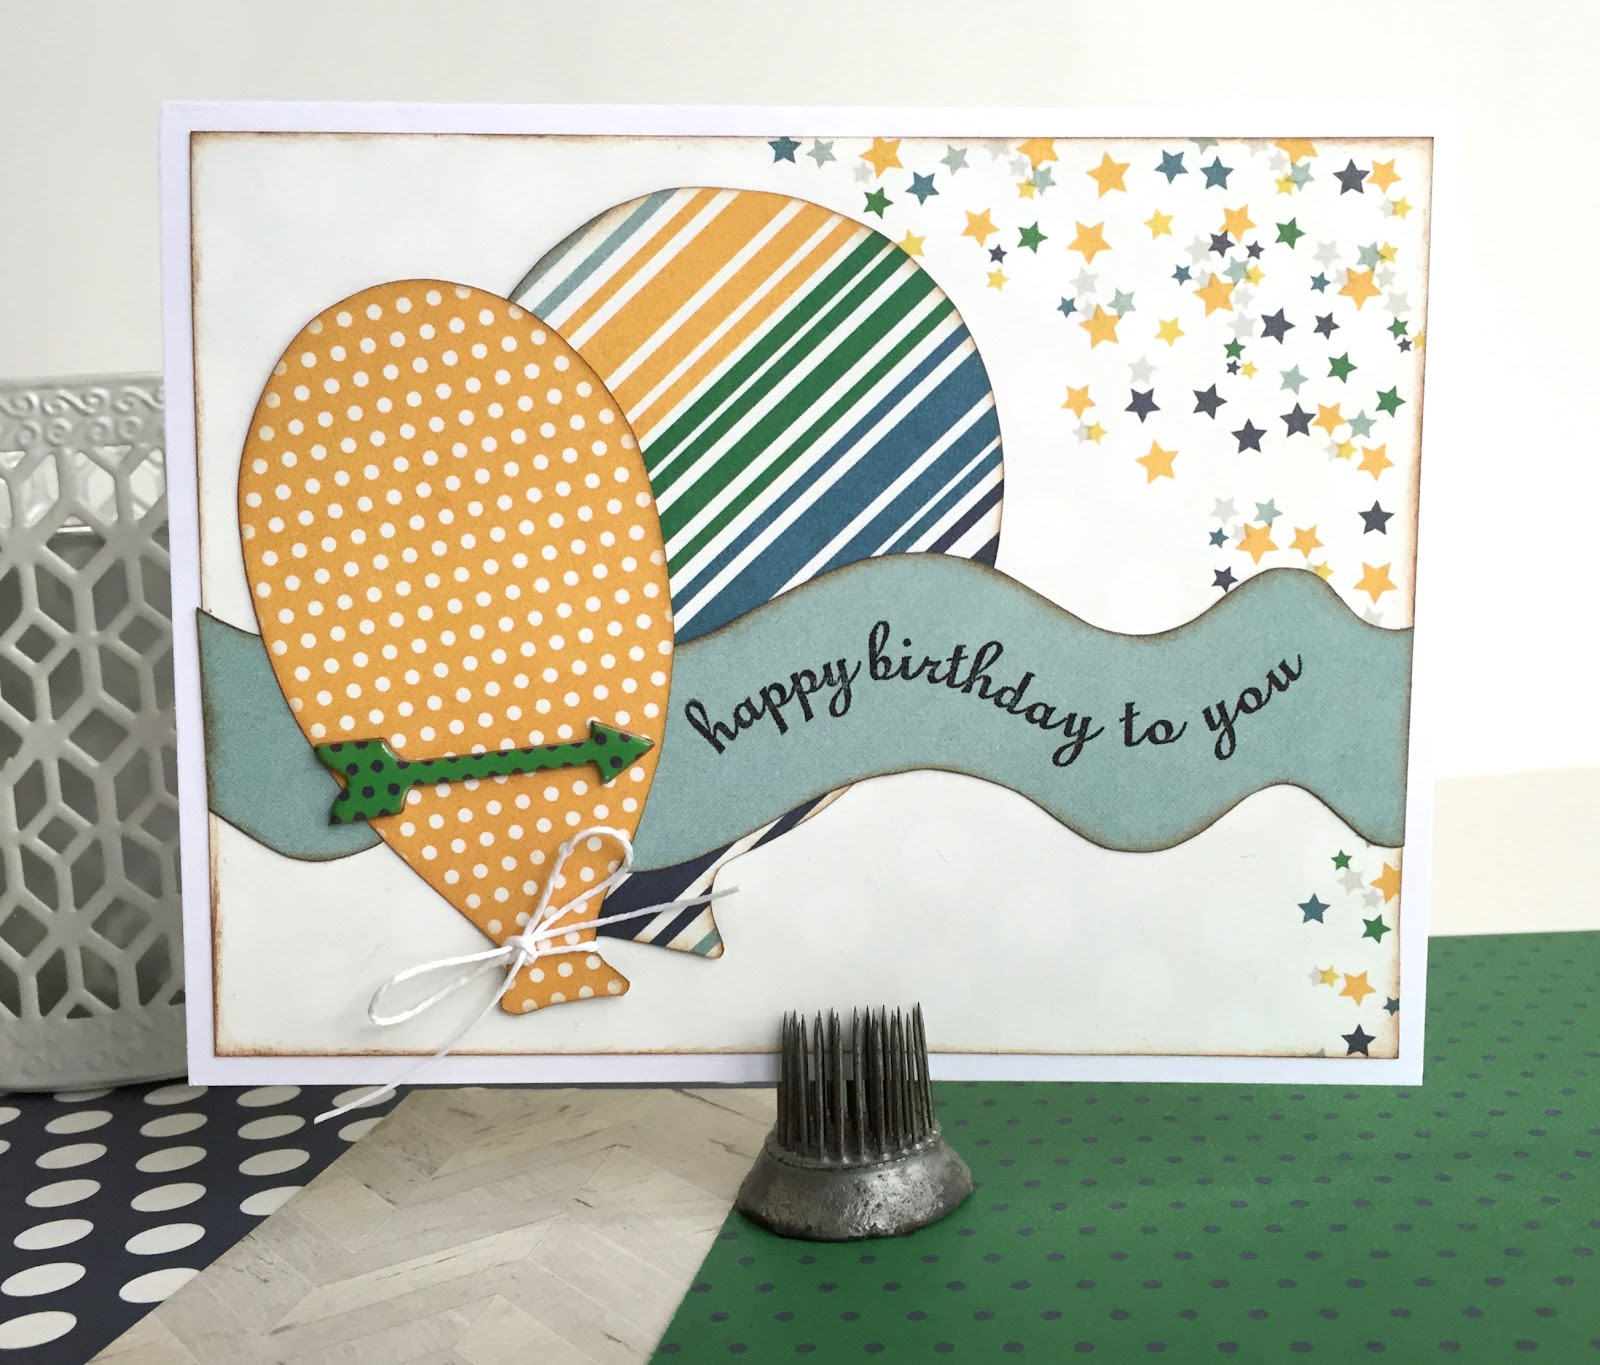
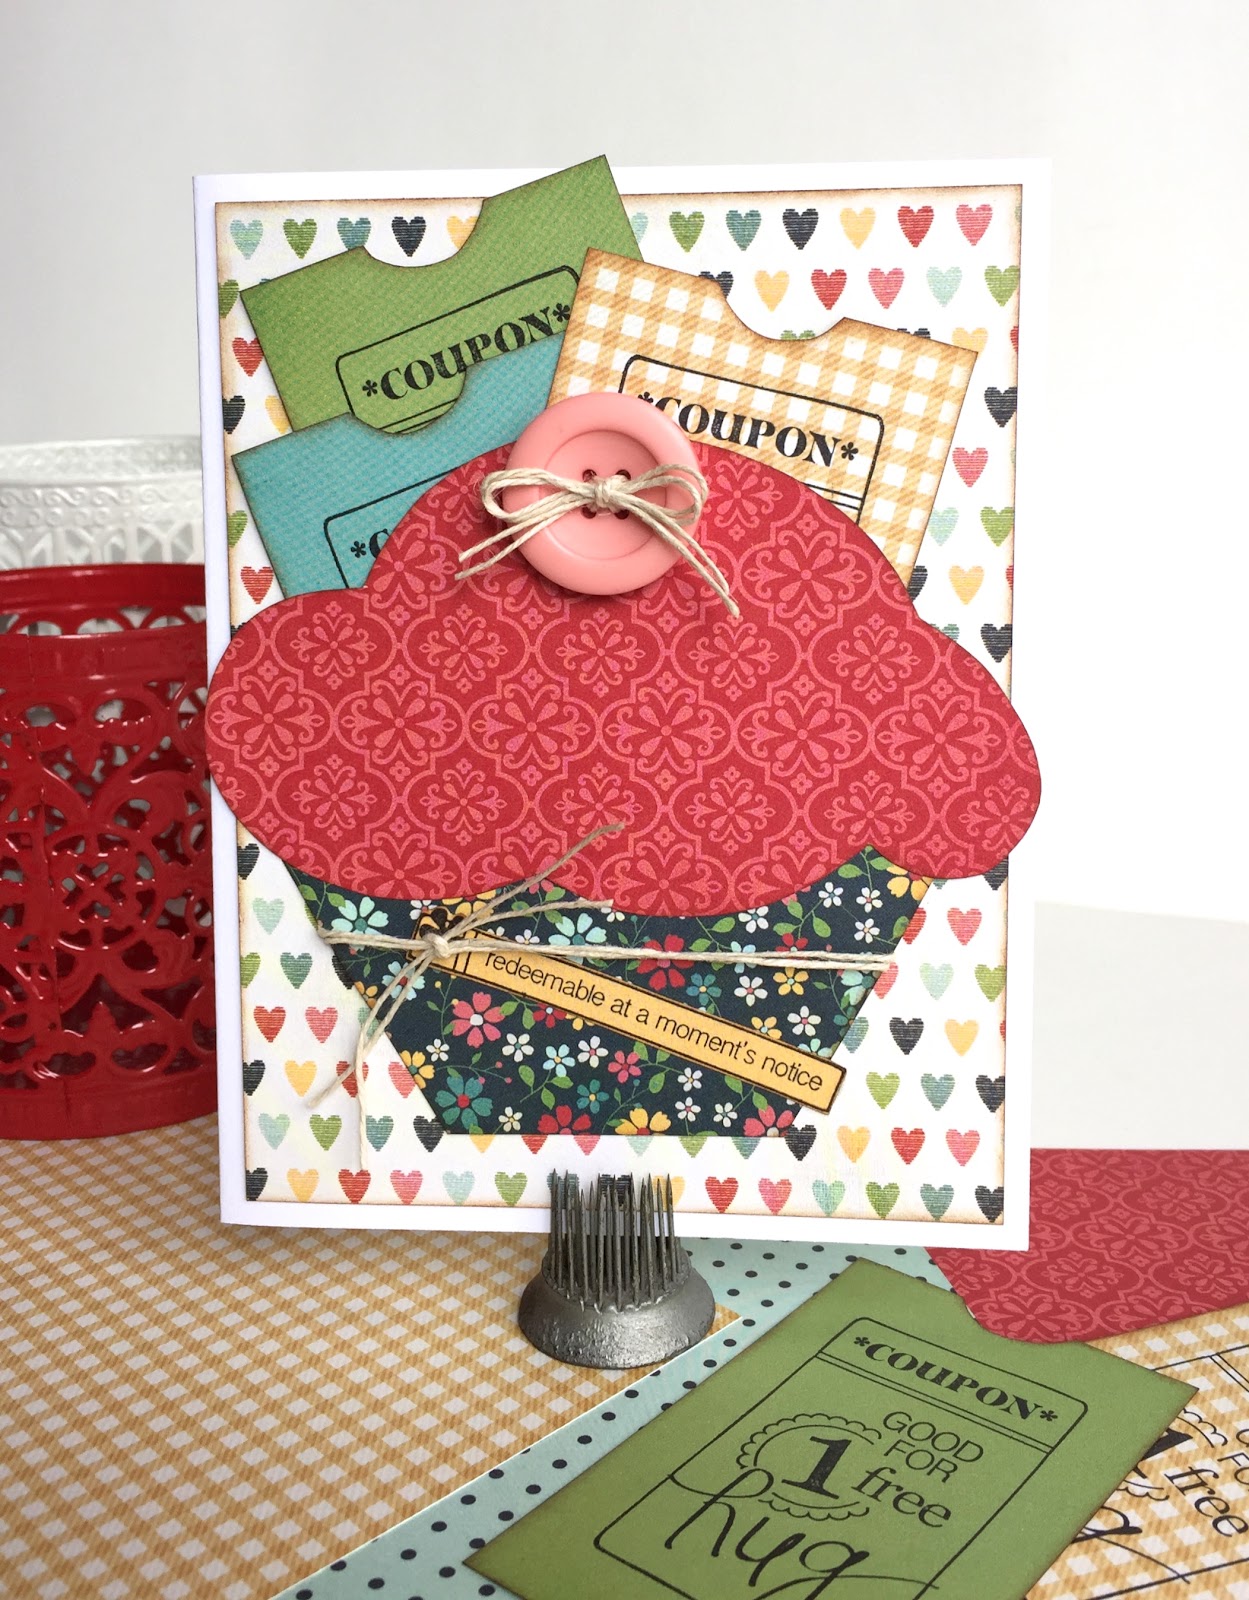
Here are a couple more cards that I made using the same process: 
And a quick note- the stamped tickets on the cupcake card are removable coupons for hugs- how cute!!

I hope this little tutorial helped! Now you can work some stamping into your projects when you use your Kiwi Lane templates and the Play to Create System!!

Do you use stamps in your scrapbooking? Have you already begun combining stamps and Designer Templates? If so, please share in the comments section below!

Templates used:
Celebrate 2,3,5
Tiny Celebrate 2T
Delight 3
Tiny Shapes 4T,6T
Tiny Floral 2T
Card Strips

All paper is Simple Stories. Stamps by Making Memories, Studio G, 3 Bugs in a Rug.

Friday, November 6, 2015

A Layout and a Few Cards with Kiwi Lane

Hello fellow Kiwi Lane fans!  I have a few things to share with you today. And to continue with my theme from some of the last few posts I've done, I used another fabulous Kiwi Lane paper kit to create a single page layout and a few cards, along with this month featured templates- Brackets, Adorn and Autumn.

I used Kiwi Lane's "Social Butterfly" paper kit this month. I have to admit- when I saw this collection, I thought it was going to be way too girly for me to do use very well.  Especially with the Autumn template set.  I mean, it has pink, flowers and butterflies!  BUT, I should have known better!! These Kiwi Lane ladies are genius and know how to make a paper kit so that you don't have to use the girly elements in a way that overpowers the page. Instead, you use the reverse side and smaller pieces of those prints that scream GIRLY GIRL.  And you end up with a project that is just feminine enough without jumping out at you with a tiara, tutu and sparkly wand. I'm telling you, it's pure genius!!

So here's the layout I ended up with:
Supplies: Kiwi Lane's Social Butterfly paper kit; alphabet stickers (American Crafts, Making Memories); ink (Ranger); pen (Staedtler)

And here's how I "Framed" my layout:


Yes, that is a grand total of three templates on my layout.  I had no idea what I wanted to do with the layout when I started.  So I threw on a few templates from the Adorn template set, along with a template from the Bracket set and built my page from there. I added lots of layers of the scalloped edge and mirrored that at the bottom of the page.  I also used one of the printed quotes from the paper kit and added that early on to make sure I left room for it.  I finished off the page with a butterfly from the Tiny Nature set and a few flowers from the Tiny Wildflower set and a title using some alphabet stickers.  

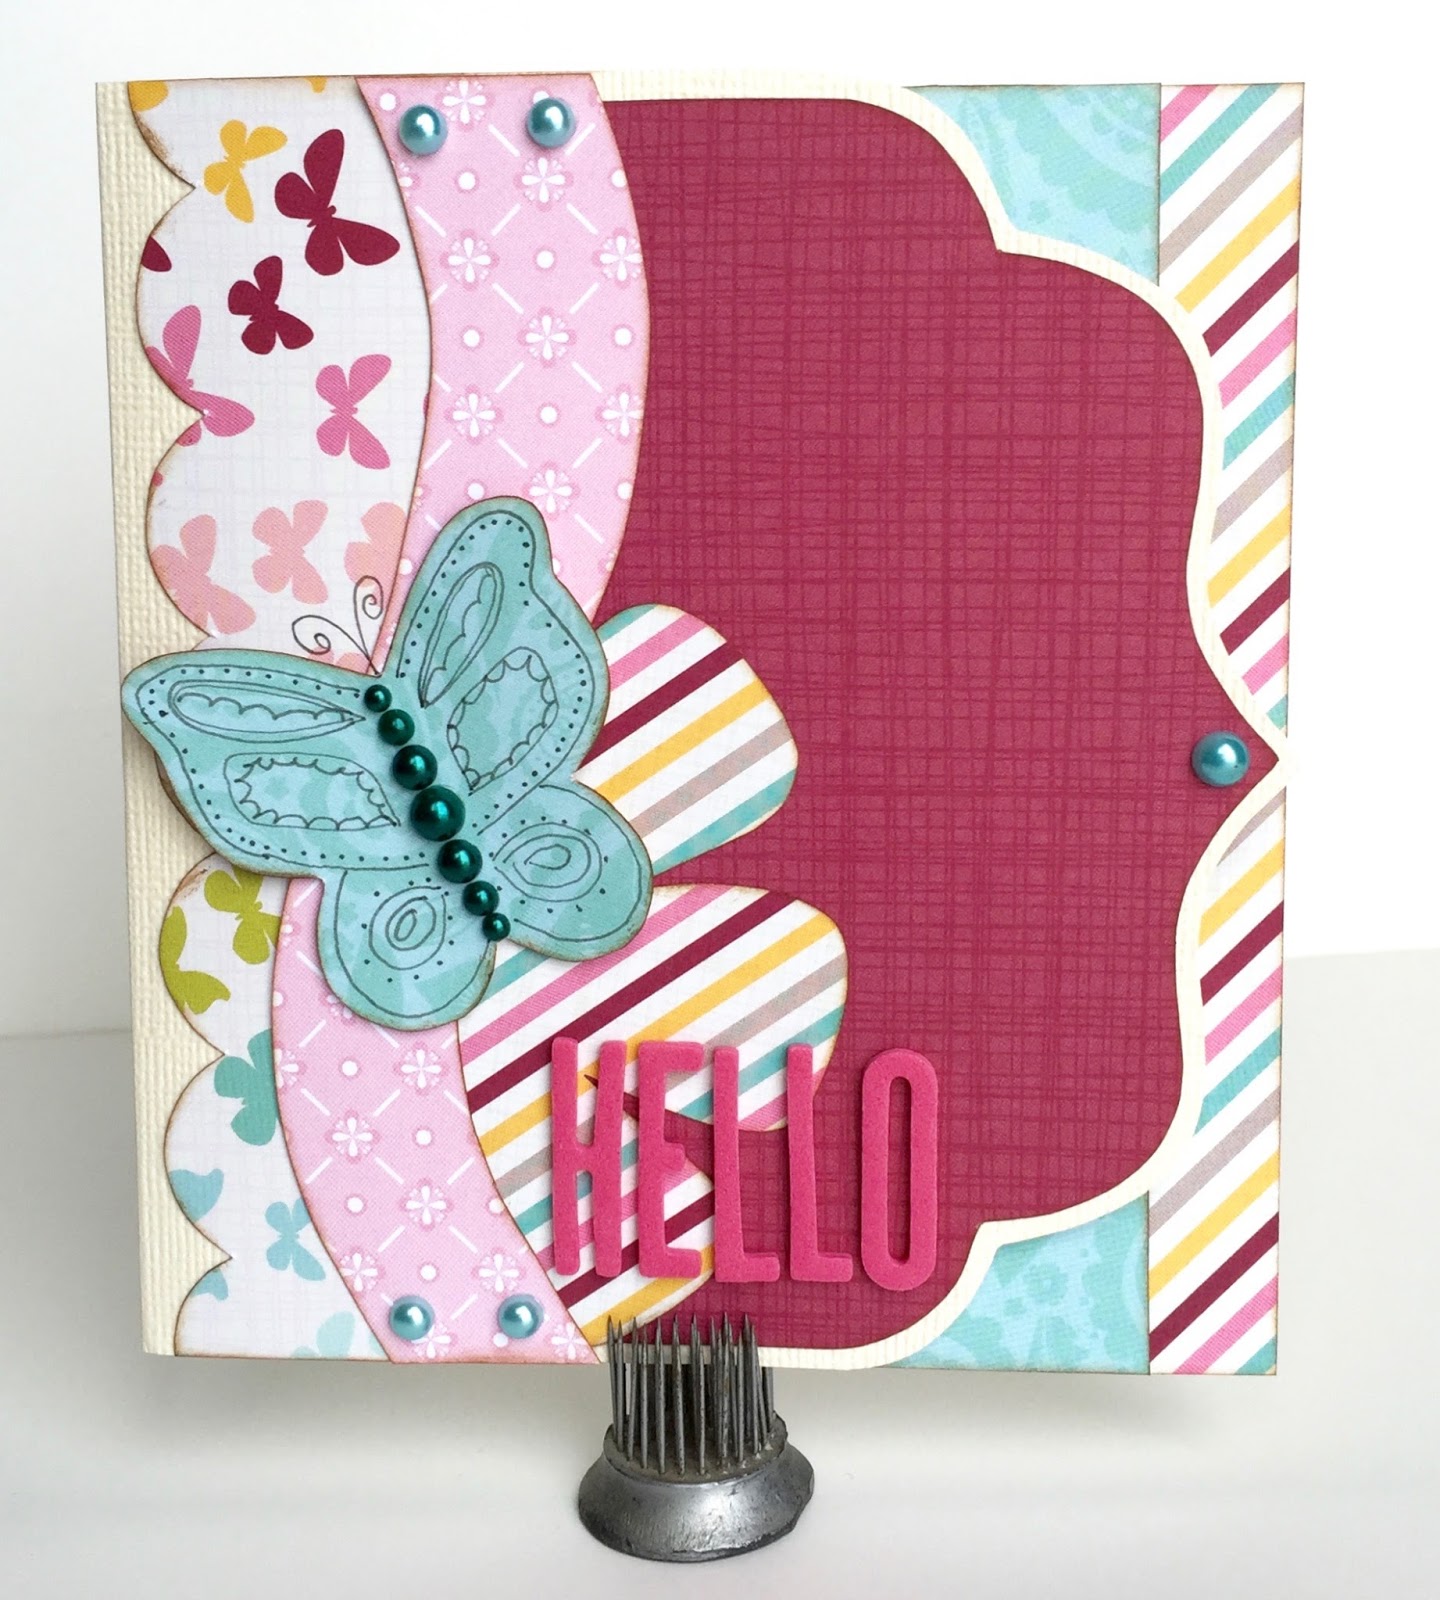
With some of the remaining paper from the kit, I made some cards:
Supplies: Kiwi Lane's Social Butterfly paper kit; card stock (American Crafts); pen (Staedtler); ink (Ranger); stamp (Basic Grey); jewels (craft supply)
 Supplies: Kiwi Lane's Social Butterfly paper kit; card stock (American Crafts); pearl (Doodlebug); brad (American Crafts); ink (Ranger)
Supplies: Kiwi Lane's Social Butterfly paper kit; card stock, alphabet stickers (American Crafts); pearls (Doodlebug); ink (Ranger); pen (Staedtler)


The "Hello" card has a shaped edge and some detail on the inside:


Even after making a layout and a few cards, I have enough scraps of paper left to make at least a few more cards. I love how much you can do with each Kiwi Lane paper kit!

Thanks for stopping by and Happy Scrapping!!

Templates used:
Bracket 2
Adorn 3A,3B,1B
Tiny Nature 2T
Scallops 1B
Wildflower 1T,4T
Autumn 1,3,6
Springtime 2
Mini Scallops 2A

Friday, October 9, 2015

Shaped Cards for Fall with Kiwi Lane

Happy Fall, Y'all!!  Fall is definitely my favorite season and I'm happy to share some fall and Halloween themed cards with you today using my Kiwi Lane Designer Templates.  

As you may have heard, this month's featured sets are Halloween and Tiny Holiday.  These sets go hand in hand and work so well together!  I love that the Tiny Holiday template set has all the tiny versions of shapes from Christmas, Halloween and Winter.  Whether you're a card maker or a scrapbooker, these sets should be in your stash!  If you happen to be a card maker, you probably just read that and thought, "Huh?  Why do I need to have the large holiday sets?"  Well, to make your card base, of course!  Let me show you what I mean.

First off, here are the cards I made:


   Supplies: cardstock (American Crafts, Georgia-Pacific); patterned paper (Studio Calico); brad and sticker (Doodlebug); glitter glue (Ranger); ink (Ranger, Superior); enamel dots (SEI); embossing folder (Darice); jewels, button, wire, stamps (craft supply).

You'll notice they are not your typical square or rectangular cards.  They're shaped cards and so easy using your templates!  First step- grab a manilla folder and some templates from the Halloween template set.  Leaving some of the template hanging off the folded side of the manilla folder, trace your template.  It should look something like this:


Now cut out your shapes.  Leaving some of the template hanging over the edge when you trace and cut makes the shape a card, like this:


Grab the templates you used to cut your card base and start planning your card.  Layer with smaller templates and make sure the majority of the smaller templates are on top of the larger one and not hanging too far off to ensure your card layers are strong and will adhere together.  Here are my "Framed" cards:


Now trace, cut and decorate your cards and you're ready to give away some gorgeous shaped cards that were easy to do with your Kiwi Lane templates!

Thanks for stopping by and Happy Crafting!!

Templates used:
Halloween 1,2,4
Tiny Holiday 2,4,5
Autumn 1

Thursday, October 2, 2014

Happy World Card Making Day!!

....well, it will be on Saturday.  But, around here, we like to get an early start on any party! ;)  And I think a giveaway is in order for this party, right?  Details for that part will be at the end of the post, so look at the pretty cards and then follow the instructions for the giveaway.  Got it?  Good!

Here are some holiday cards I made using my Kiwi Lane Designs Templates:

"Falling For You"

Supplies: cardstock (American Crafts); patterned paper, sticker (Doodlebug Designs); ink (Ranger); pen (Sakura, Staedtler)
Kiwi Lane Templates:
Mini Colter Trails 2A
Nature 4
Tiny Nature 4T
Tiny Holiday 2T
Tiny Brackets 1T
Autumn 2

"Spooky"

Supplies: cardstock (American Crafts); patterned paper (BoBunny); sentiment (Doodlebug Designs); ink (Ranger); enamel dots (My Mind's Eye)
Kiwi Lane Templates:
Autumn 1, 5, 6

"Cornucopia"

Supplies: cardstock (American Crafts); patterned paper, stickers, washi tape (Doodlebug Designs); ink (Ranger); pen (Sakura, Staedtler)
Kiwi Lane Templates:
Celebrate 7
Tiny Shapes 7T
Tiny Holiday 2T
Tiny Nature 1T
Autumn 3

"Let it Snow"

Supplies: card stock, glitter glue (American Crafts); patterned paper (Pebbles, Inc.); brad, twine (Creative Impressions?); ink (Ranger); pen (Sakura, Staedtler)
Kiwi Lane Templates:
Tiny Traditions 3T

"Joy"

Supplies: cardstock (American Crafts); patterned paper (My Mind's Eye); stamp (Studio G); ink (Ranger, Tsukinedo)
Kiwi Lane Templates:
Tiny Holiday 1T
Cedar Trails 1A
Tiny Traditions 2T

So do you feel ready to tackle the holiday card season now?  I hope so!

Now for that giveaway- simply leave me a comment telling me which holiday is your favorite to make cards for.  That's it.  If you want a bonus entry, become a follower of my blog and let me know in your comment that you have become a follower (or let me know that you're already a follower).  You have until Sunday October 5, 2014 at 11:59 pm MDT to leave me a comment to win.  The winner will receive a set of Tiny Holiday Templates like this one:
I hope you enjoyed my cards!  Don't forget to leave a comment to participate in the giveaway!

Thanks for stopping by and Happy Scrapping!
 

Wednesday, May 7, 2014

Cards with Kiwi Lane and Fancy Pants Designs

Howdy peeps!  I just thought I'd pop in with a few cards I made... if you're here from the Kiwi Lane blog for a few more details on the "how-to", keep on reading... :)

This month for Kiwi Lane, I was able to work with the super versatile Nautical collection from Fancy Pants.   I love the colors in this collection- it's filled with red, orange, yellow, navy blue, black, sky blue, turquoise, gray, white, cream... do you see why it's so great?!  And I love that, even though there are a lot of different colors, they all mix and match really well.  Now, don't be put off by the "Nautical" title... some of the papers have a very nautical feel to them, but others are summery, some are beach-y and all of them are fabulous!  It was a fun collection to work with!!

Here are the cards I made:

"Happy Travels"
Card size: 5" x 7"
Supplies: paper, letter stickers (Fancy Pants Designs); washi tape (Freckled Fawn); twine (Lillybelle's Paperie on Etsy); pearls (Doodlebug); button (craft supply); ink (Ranger)

I used the airplane that was already printed on the paper to my advantage, making sure to leave it in the top left corner of the card when I was trimming my paper.  I then used a large Floral template to do the bottom layer of the sun (the orange with white dots).  I took of strips of washi tape, folded the strips onto themselves and used those for the next layer of the sun, followed by a yellow sun shape from the Tiny Accents accessory templates.  I made a washi "flower" on top of the yellow sun (you can watch THIS YouTube video to see the gist of how), then finished off my layers with a button and twine.  I made my "sun" look like it was setting over the ocean by using the wavy border from the Sincerely template set.  Note:  the card border template sets are only 5 1/2" long and this card is 7" long. To elongate your borders, match up the ends of a set to make one longer, continuous border.  I then added the tiny alphabet stickers that were in my packet of Fancy Pants goodies and some golden colored pearl dots and.... TA DA!!  One card that has lots of layers, but not as much bulk as you'd think.  And super cute, no? ;)

Templates used:
-Floral 1
-Tiny Accents 4T
-Sincerely 3A & 3B

"Enjoy"
Card size: 5 1/2" x 5 1/2"
Supplies: paper, sticker (Fancy Pants Designs); flower (Prima); pearls (Doodlebug, Pebbles); ribbon (Offray); ink (Clearsnap); die cut machine and embossing folder (Cuttlebug)

This is a gate fold card and opens in the front- to achieve this look, layer your flowers and only adhere half of the bottom flower to the front of the card over the seam to open the card.  For the ribbon, I figured out how much I needed and cut that amount.  I started layering my flowers and tied the ribbon around the card after I'd adhered the two red flowers but before the white one was attached.  I tied the ribbon around the card, adjusting until I had the bow where I wanted it, then adhered the white flower over the ribbon, thus attaching it to the card without a ton of adhesive.  Make sense?  I hope so!  If you're ever confused about my instructions, please feel free to email me!!  glo(underscore)owens(at)man(dot)com 

Templates used:
Tiny Bracket 1T
Tiny Accents 2T
Tiny Floral 2T

"Oh, the Places You'll go!"
Card size: 4 1/4" x 5 1/2"
Supplies: paper, stickers, flair (Fancy Pants Designs); pearls (Doodlebug, Pebbles); ink (Clearsnap)

I used the edge of the chevron template in the Delight template set on the card base to create the chevron bottom.  Here's a little bit of a better view:
To make sure the chevron design on the edge stood out, I used the leftovers from another cut to add to the inside of the card for another layer of interest.
I could have used just a straight edge on the inside of the card, but I already had this cut, and who doesn't like to use every little bit? :)  I used some more of the tiny stickers to spell out "Oh, the Places You'll Go!"  I thought this card would be a great one for graduation- 'tis the season, right?

Templates used:
Tiny Brackets 1T
Delight 4, 6

So, even though this "Nautical" collection of scrappy supplies is "supposed" to be focused on water-related events, you definitely don't have to use it for that!! In fact, we should probably try to use our scrappy supplies beyond the invisible parameters set for them a little more, doncha think? 

Thanks for stopping by and Happy Scrapping!

Tuesday, February 25, 2014

Some Cards with the NEW Kiwi Lane Template Release!!

I'm a little late with this post, but here's the scoop anyway...

Did ya hear?!  Kiwi Lane has released 3... yes, THREE!!... new template sets.  They are all sets that are awesome for cards, but could be incorporated in any of your crafting.  Two sets (Sincerely and Delight) are card border sets and the third set is Tiny Celebrate (a mini version of the larger Celebrate accessory set).  I was giddy when I got these goodies in the mail and was itching to get to work, but a fierce cold had other plans for me.  Blurg.  After spending a few days in bed with a fever, chills, body aches, stuffy head and runny nose (sounds.... fun, huh?), I was thrilled when I was well enough to dive in to my pile of paper scraps!  Here are a few of my creations:
 Templates:
Tiny Celebrate 5T, Sincerely 2A & 2B, Tiny Shapes 2T & 7T, Tiny Strips 1/2"
Supplies:
Patterned paper (SEI); card stock (DCWV, Georgia Pacific); twine (American Crafts); jewel (Doodlebug); brads (Basic Grey); ink (Ranger, craft supply); stamp (Fiskars)
 Templates:
Tiny Celebrate 1T, 2T & 8T, Celebrate 2
Supplies:
Cardstock (DCWV, Georgia Pacific); patterned paper (SEI, Imaginisce); ink (Ranger, craft supply); brads (Basic Grey); embossing powder (EK Success); stamp (Fiskars); twine (American Crafts)
 Templates:
Tiny Accents 3T, Tiny Celebrate 7T, Sincerely 3A & 3B
Supplies:
Cardstock (Bazzill, Georgia Pacific), patterned paper (SEI), brad (SEI), enamel dots (Teresa Collins), ink (Ranger), stamp (Studio G), wahsi tape (WRMK)
Templates:
Delight 4, Tiny Nature 1T, Tiny Shapes 7T
Supplies:
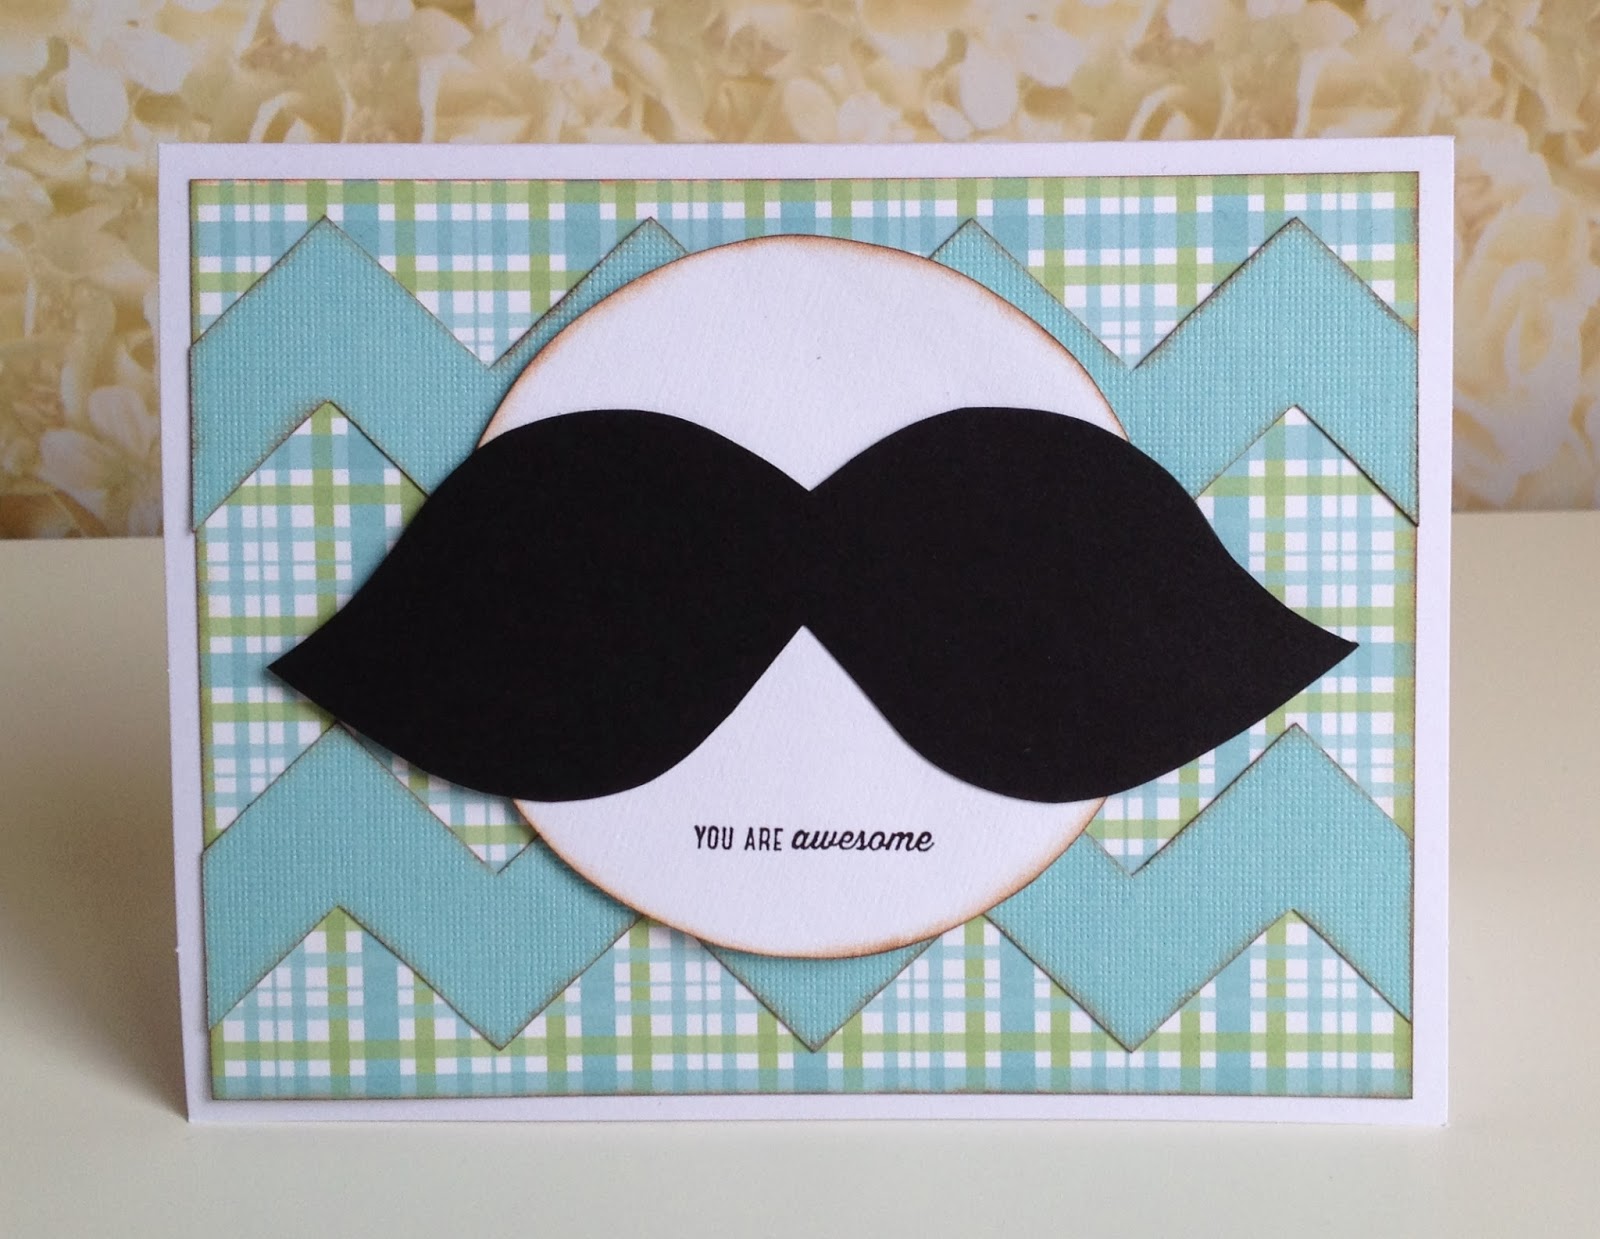
Cardstock (Georgia Pacific, DCWV, Provo Craft); patterned paper (3 Bugs in a Rug); stamp (American Crafts); ink (Ranger)

Aren't you just in love with that mustache card?!  I am, and I'm the one who made it!!  While there's not a Kiwi Lane Template for a mustache, you can easily make one using the leaf from the Tiny Nature Accessory set- just flip it back to back (overlap the stem part of the leaf) and trace two and that's it!  Easy, right?

So if you have some time, I'd strongly suggest you head on over to the Kiwi Lane blog to see all the beautiful samples they have for the new releases.  And you could even buy them, if you feel so inclined. ;)

Friday, October 4, 2013

October Blog Hop for Kiwi Lane

Welcome Kiwi Lane Blog Hoppers!  You should be hopping over from Michelle's blog.  If you came here any other way, I highly suggest you head back to Kiwi Lane's blog and start from the beginning so you don't miss any of the crafty goodness!  Don't forget to comment along the way because one lucky commenter from one of the participating blogs will win a $25 gift code to the Kiwi Lane Shop.  Here's the line-up in case you get lost along the way:


  1. Kiwi Lane http://kiwilane.com/here/blog/
  2. La-Vie Borde-Perry 
  3. Lyne Schnable-Blodgett 
  4. Jennifer Budge 
  5. MekaMatthews
  6. JeNn Nicholes 
  7. Joan Holmes Leitch
  8. Michelle King Beaudry
  9. Gail Owens  (You are HERE)


So not only is it Kiwi Lane's Blog Hop this weekend, but Saturday is World Card Making Day.  (click this link for some more fun with Kiwi Lane for WCD!)  This is the event that kicks off the season of cardmaking for the holidays.  But, instead of holiday cards, I have a few cards to share with you that show how dimension can be added to cards made with the Kiwi Lane Templates.  Here's what my cards looked like after I "Framed" them:
The first card I made was the simplest one and was the top right card:
Supplies:  paper (Authentique); card stock (Georgia Pacific); stamps (Technique Tuesday); ink (Ranger, American Crafts, ColorBox); punch (Marvy Uchida); resin flower (Making Memories)

Templates:  Sentiments 2B, Adorn 1B, Tiny Wildflower 3T, Tiny Brackets 1T, Tiny Accents 2T

This card is quite easy and really quick to make- simply trace, cut and ink all the pieces according to the "Framed" design.  Stamp your sentiment on the Tiny Bracket. Punch out a flower, curl the petals around a pencil to add some dimension, adhere it to the card and add a resin flower center.  Here's a better  view of the curled flower petals:
My next card was a little bit higher on the difficulty level, but still pretty darn easy:
Supplies: cardstock (Georgia Pacific); patterned paper (3 Bugs in a Rug); brad (We R Memory Keepers); pearls (Doodlebug); stamp (7 Gypsies); ink (Ranger); pen (Uniball Signo); punch (Martha Stewart)

Templates used: Tiny Tags 7T, Tiny Accents 1T, Tiny Holiday 7T, Paradise 4

I used the small poinsettia to do a double layer of leaves under the flower.  I used a white ball point pen to outline a few of my shapes to add definition to the layers.  And I bent the four layers of the flower to add dimension without having to add anything between the layers.  Here's what it looks like from the side:


My third card was a little bit more involved to make, but still super easy using the templates:
Supplies: cardstock (The Paper Company); patterned paper (3 Bugs in a Rug); letter stickers (Echo Park); twine (Owl Supply on Etsy); glitter glue (American Crafts); sequins (Making Memories); moon (craft supply); rhinestone star (Teresa Collins); pen (Staedlter); ink (Ranger)

Templates used: Sentiments 3A, Adventure 1 & 2, Card Strips 1/2" & 1"

For this card, the layers of templates are simple.  But, to add more depth, I added foam adhesive to the star shape.  And I added the sequins, rhinestones and glitter glue for some detail.  To top everything off, I did a hand written sentiment (you could add a stamp if you'd rather).  This card was a bit more labor intensive than the previous ones, and took more time, but only because I had to wait for the glitter glue to dry.  The actual cutting and inking was easy!  Here's a closer look from the side:

My last card is the most labor intensive of the day:
Supplies: cardstock (Georgia Pacific); patterned paper (My Mind's Eye); twine (LilyBelle's Paperie on Etsy); brads (My Mind's Eye); pearls (Making Memories and Doodlebug); jewel (Doodlebug); vellum (Provo Craft); stamp (Heidi Grace Designs); ink (Ranger, Colorbox); pens (Uniball Signo, Staedtler)

Templates used:  Adorn 3A, Tiny Tags 1T & 6T, Tiny Nature 2T

This card really is fairly self explanatory- all you do is trace, cut and ink the pieces using your Kiwi Lane Templates.  The details make this card!  I used a black pen and a white pen to go around the pieces, adding dimension and detail. And I added a vellum butterfly that I also drew some detail on.  Here's a closer look at that detail:

Whew!! That was a marathon post!  I hope you enjoyed seeing my cards and I really hope it inspires you to go and create your own cards using Kiwi Lane Designs Templates!

Don't forget to leave a comment on my blog (and all the blogs along the hop) for your chance to win a $25 gift code to the Kiwi Lane shop.  One lucky commenter will be chosen from one of the participating blogs and announced on the Kiwi Lane blog on Thursday, October 10th.  You have until 11:59 pm MST on Sunday, October 6th, 2013 to comment.

I think, since you made it through that super long post (and the rest of the blog hop), you deserve a chance to win something nice from me- don't you?  Leave a comment on my blog letting me know which card was your favorite and I'll have my own little drawing for a set of templates... I may even let the winner choose the set they want. ;)  You have until Sunday, October 6th at 11:59 pm MST to comment and the winner will be announced here on my blog on Tuesday, October 7th, 2013

Thanks for stopping by and Happy Scrapping!
Monday, January 28, 2013

DT Doodles with Kiwi Lane Designs

It's time to kick off the new year (It's still January! I'm not THAT far behind... yet.) with a new feature from Kiwi Lane.... DT Doodles!  It will be the feature every Monday on the Kiwi Lane blog and members of the Kiwi Crew will be taking turns sharing their amazing skills!  There have already been three weeks of DT Doodles shared on the blog, and I'm happy to be bringing you this week's Doodle!

So, are you wondering what a DT Doodle is??  Here's the low down: this is basically just a weekly sketch you can use to jump start your creativity with Kiwi Lane templates.  There's also the chance at winning a $25 gift code to the Kiwi Lane Shop when you make a project based on a Doodle, but I'll give you that info after I share my project...

My assignment was to make some Valentine cards using Authentique's Lovely collection.... and we all know how much I LOVE Authentique, to I was happy to comply! :)  And the combination of Kiwi Lane AND Authentique... I'm now beyond words... so I'll let the cards speak for themselves... Enjoy!


Supplies: kraft paper (The Paper Company); patterned paper and stickers (Authentique); brad (The Girl's Paperie); ribbon (craft supply); twine (Doodlebug); pen (ZIG)
Kiwi Lane Templates: Adorn 2A & 2B, Tags 7, Tiny Accents 2T, Tiny Sweetheart 2T & 3T, Sweetheart 2

Supplies: cardstock (The Paper Company); patterned paper and die cut (Authentique); flowers (Prima); jewels (Doodlebug); ink (Clearsnap); twine (Lilly Belle's Paperie on Etsy); vellum (Provo Craft); circle punch (Marvy Uchida); decorative scissors (Provo Craft)
Kiwi Lane Templates: Adorn 3A & 3B, Tiny Strips 1/2" & 1"

Supplies: cardstock (The Paper Company); patterned paper, die cuts and sticker (Authentique); jewels (Doodlebug); pearl brad (My Mind's Eye); ink (Ranger)
Kiwi Lane Templates: Adorn 1A & 1B, Tags 2, Tiny Tags 2T


Supplies: cardstock (The Paper Company); patterned paper, die cut (Authentique); twine (Creative Impressions); ink (Ranger); glimmer mist (Tattered Angels)
Kiwi Lane Templates: Tags 1, Adorn 3A & 3B, Tiny Shapes 3T & 7T

Do you ever need a leaf smaller than the ones the templates provide? Think again!  Use any of the scallop borders to make the size of leaf you need!  Cool, huh?  Here's how:

Trace the scallop template:
Flip the template and line up the "valleys" of the scallops so they are touching and trace again.

Now you have a line of leaves!

Now just cut out your leaves, ink and adhere.  This was the process I used to make the two different sizes of leaves on the last card.

 And here's a video for how to make the rosettes using a circle template-
(I would like to add here that this is my first ever attempt at making a video tutorial, so it's not great, but you should be able to get the point... and if you hear funny noises in the background once in a while, it's my 3 year old son who was instructed to "not make a peep.")

Now for the good stuff!  Wanna win a $25 gift code to use in the Kiwi Lane Shop? (Seriously, who wouldn't?!) Hop on over to the Kiwi Lane blog for the details!

Thanks for stopping by and happy scrapping!