Poinsettia:
Supplies: cardstock (The Paper Company); patterned paper (Making Memories); brads (Imaginisce, Basic Grey); glitter glue, ink (Ranger); shimmer mist (Tattered Angels). Kiwi Lane Templates: Tiny Nature 5T, Tiny Holiday 7T, Tiny Tags 7T, Adorn 1A & 1B.
Folded Christmas Tree:
Supplies: cardstock (The Paper Company); patterned paper (Making Memories); twine (Divine Twine); jewels (Doodlebug); ink (Ranger). Kiwi Lane Templates: Rings 3, Adorn 3A, Tiny Strips.
This folded Christmas tree is pretty easy to figure out- trace and cut a circle and cut that circle in half. Each half circle makes one tree. Different size circles will make different sizes of trees. Make sure you like the pattern on both sides of your paper, as you will be seeing parts of each side. I do suggest trying your folds on a scratch piece of paper first, then mark and score where you want to fold on your pretty paper. I also need to note that I adhered EVERYTHING down so it's all flat, but you could leave some parts of the folds unattached to add some dimension.
Washi Tape Tree:
Supplies: cardstock (The Paper Company, craft supply); patterned paper (Making Memories); washi tape (Downtown Tape); glitter glue, ink (Ranger). Kiwi Lane Template: Celebrate 6
Super easy Christmas tree! Ready? 1- Trace and cut the cone/pennant/triangle shape onto white or cream card stock. 2- Cover shape in washi tape (or tissue tape or decorative masking tape), folding the torn edges over the shape. 3- Layer some background papers and adhere tree to card. 4- Add a star and a trunk. And done! You can add more embellishment, if you want to (or have time ;) ). I added some dots of glitter glue to the dots that were already on the red washi tape.
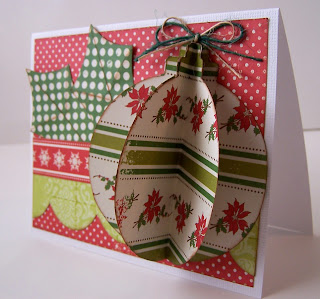
3D Ornament:
Supplies: cardstock (The Paper Company); patterned paper (Making Memories); twine (Creative Impressions); ink (Ranger). Kiwi Lane templates: Tiny Holiday 1T, Christmas 1, Adorn 3B
3D Christmas Tree:
Supplies: cardstock (The Paper Company); patterned paper (Making Memories); ink, glitter glue (Ranger); small star punch (Carl); jewel (Doodlebug). Kiwi Lane templates: Tiny Holiday 8T, Tiny Accents 3T.
This 3D card is done much like the ornament one, but you'll notice that the template is for only half a tree. So when your tracing, trace one half, then flip the template and trace the other half. Cut multiple trees (I did four), fold, glue together, adhere to card. I added a lot of glitter glue to this one- to the edges of the tree, to the red star, to the white star- to make it look like it was glistening with ice crystals. Beautiful! Again, here's another slightly different angle to help you see the dimension:
Well, that's all I have for you today! Debbie has a few more cards on the Kiwi Lane blog, too, so don't forget to check over there for more holiday inspiration.
Thanks for stopping by and happy scrapping!


No comments:
Post a Comment