Don't forget to visit my Etsy shop to see more of my work!

Monday, February 25, 2013

DT Doodles With Kiwi Lane and We R Memory Keepers (and a Giveaway!)

It's Monday.... and I really can't decide if that's a good thing or not.  I'm not a fan of Mondays, but my daughter loves them because it means she gets to go to school... weird kid!  Well, whether you're glad it's Monday or not, you should be glad that it's time for another DT Doodle!  And I should mention the chance to win a $25 gift code in the Kiwi Lane Shop if you play along... that should help you get going today!

This month, instead of doing a few card sketches, I chose to do one sketch and use that sketch for both a layout and card or two.  I just really wanted to show how versatile sketches can be with the Kiwi Lane templates, no matter the size of your project.  So here it is:


And here's my layout using We R Memory Keepers' "Crazy for You" collection:
Supplies: cardstock (DCWV, Provo Craft); patterned paper, ribbon, twine, bottle cap, metal flower, die cut (We R Memory Keepers); white alphabet stickers, brad (Doodlebug); black alphabet stickers (Making Memories); ink (Ranger); shimmer mist (Tattered Angels); date stamp (7gypsies)

Kiwi Lane Templates:  Clara Lane 1B; Scallops 2A; Sweetheart 3, 4 & 5; Tiny Sweetheart 3T, 4T & 5T; Tiny Accents 4T & 5T; 12" Strips 1/2"

I used the Sew Easy Ribbon- Scallop tool from We R Memory Keepers to punch the scallops for the ribbon to be threaded through- such a fun look with the Kiwi Lane Scallop!  I'll give you a quick tutorial on the tool at the end of this post... and give you a chance to win it!  I also used the twine a few different ways- I made a bow with a double strand and put it under the metal flower embellishment, made a flower with a single strand to put under the bottle cap embellishment, sewed around the smaller heart with it, and separated the strands to get just the purple to sew along the Clara 1B border.  I love how thick this twine is and the different ways you can use it!

Here are a few close ups of the layout:
Now for some cards:
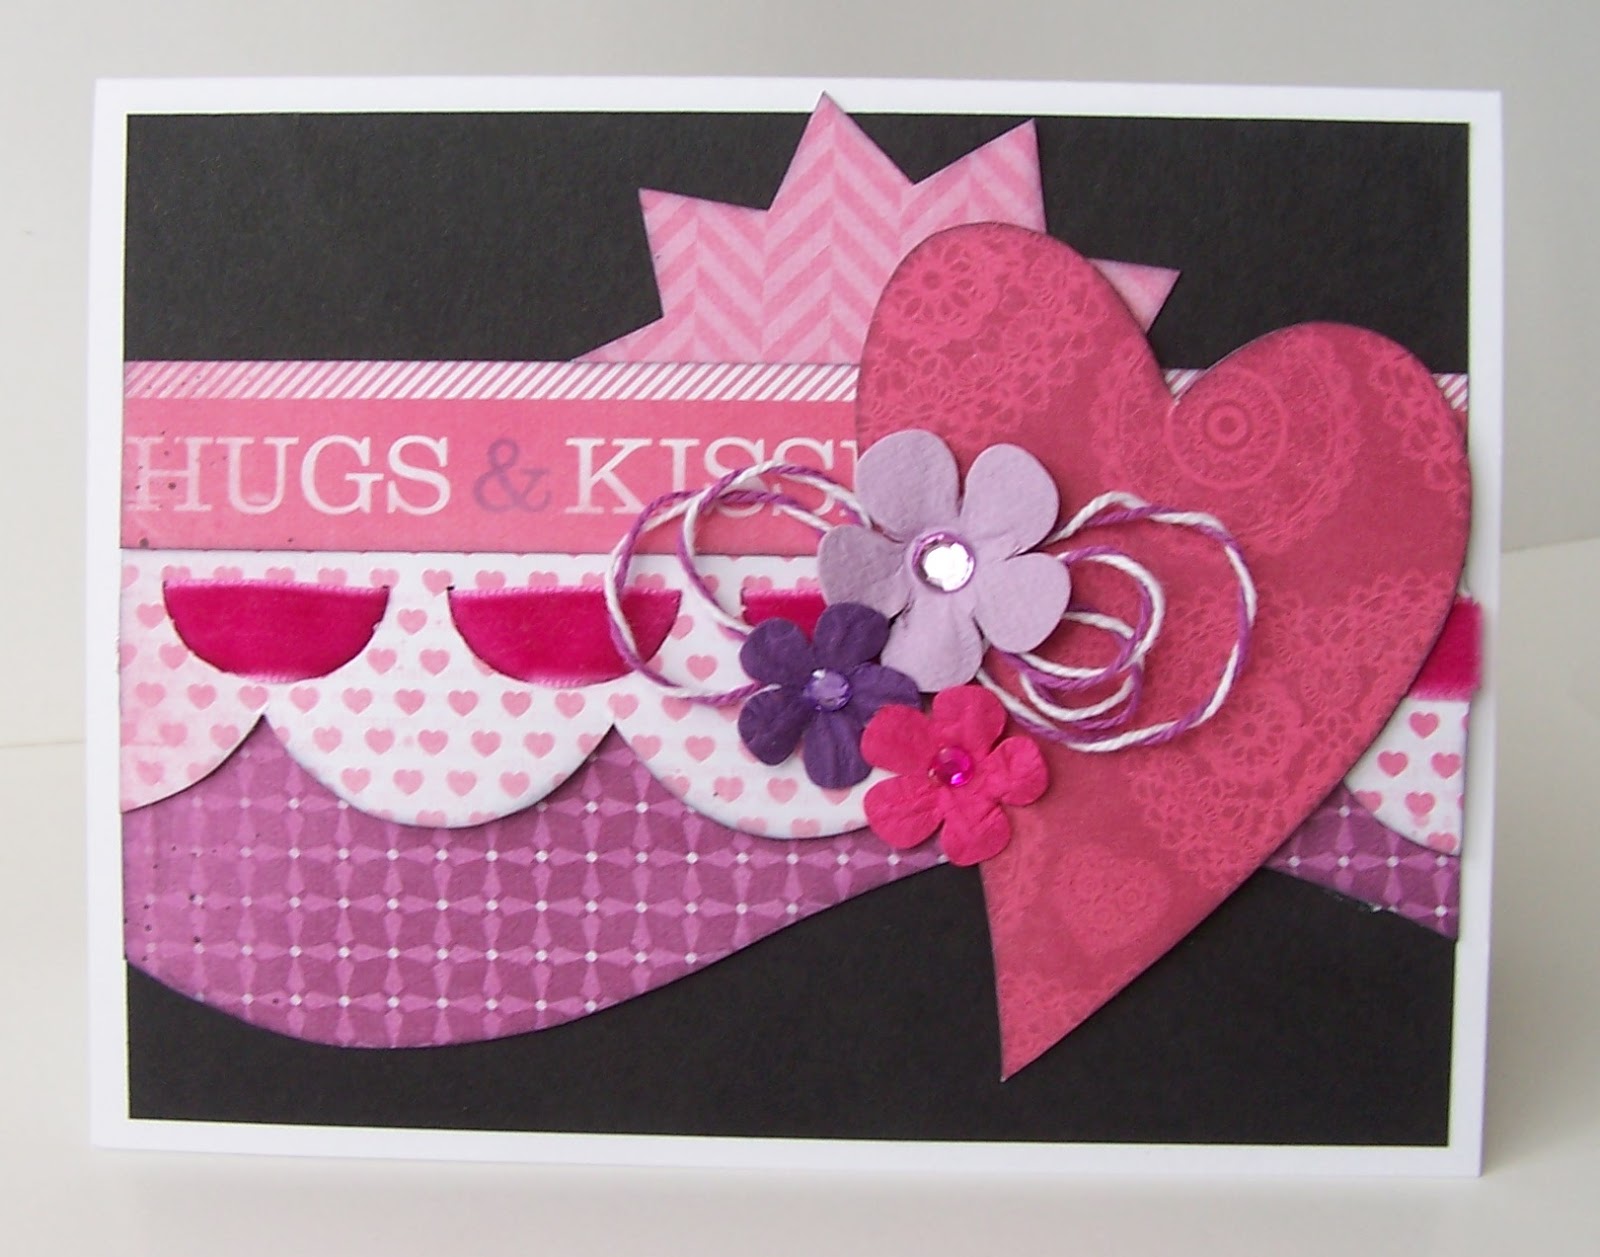
Supplies: cardstock (Provo Craft); patterned paper, ribbon, twine (WRMK); flowers (American Crafts); ink (Ranger)
 Kiwi Lane Templates: Thoughtful 2B; Adorn 3B; Tiny Sweetheart 2T; Tiny Accents 4T

For this card, I mimicked the border at the bottom of the page and added a few of the shapes from the top right of the layout, used the Sew Ribbon tool again, added some twine and flowers and TA DA! A card based on a layout sketch!  Easy, right?  But what if you want your card to be rotated?  You rotate the sketch, of course!  Here's another card, still based on the same sketch, just rotated a bit:
Supplies: cardstock (Provo Craft); patterned paper, ribbon, twine, button (WRMK); ink (Ranger); jewel (Doodlebug)
Kiwi Lane Design Templates: Sentiments 1B; Adorn 3A; Tiny Accents 1T & 2T

I used flowers on this card to mimic the flower on the layout.  I also used twine for one of my flower centers by twirling it onto a 1" Glue Dot and finishing it off with a self-adhesive jewel.  Easy, peasy!

Alrighty... the moment you've been waiting for! ;)  Here's how to do the Sew Ribbon punch tool:

 It comes with a two sided punch that has magnets that hold it together over the paper:
 It really is easy- you just use the punch thingy and stick it through the holes in the punch template thingy:
 Then you thread the ribbon through the slits like so:
(And I know that fuchsia and kelly green don't go together... I was using scraps and that's what I pulled out of my box.)  This is quite a fun tool and goes hand-in-hand with the Kiwi Lane Templates!  I love how it adds just a bit more texture and a bit more dimension to your projects and layouts.... and I love how easy it is to use!!

So wouldn't you love to have one of these fancy schmancy tools to add to your scrapbook supplies??  Well, you can win one... this one, in fact!  That's right- I'm giving it away to one lucky blog follower.  All you have to do is become a follower of my blog (if you're not already) and leave a comment letting me know that you're a follower and what you would use this Sew Easy Ribbon Punch for!  You have until 11:59 p.m. MST on Sunday, March 3rd to enter.  I'll announce the winner here on my blog on Monday, March 4th 2013. (I had to modify the dates to better correspond with the blog hop... sorry to those who were counting on it being earlier!)

Don't forget to make a project based on this week's DT Doodle for a chance to win a $25 gift code for the Kiwi Lane Shop- head on over to the Kiwi Lane Blog for the details!  

That's it for now - Happy Scrapping!

Friday, February 8, 2013

Baby Layout for Kiwi Lane

Last month, Kiwi Lane had a little contest going on that went along with the partnership they had with Authentique.  The design team and crew were invited to make a layout using photos of us as a baby, or our child as a baby.  I just happened to know where the disk was that had a bunch of photos from my parent's photo album (C needed some photos of her through the years for a church activity, so I had just gone through all the photo disks and happened to notice the one I needed for this project), sent them to Walgreens for printing and started composing a layout. (I won't go into detail right now about how it went against every cheap-o bone in my body to pay FULL PRICE for photo printing... even though it was only 19 cents.)  I used paper from a baby girl paper pack from Authentique that I picked up at Oh My Crafts and I even used some of the featured templates for the month of January.  I completed my layout and this is what I had:
which I was totally happy with.  Then I let it sit on my desk... staring at me... begging for more embellishment.... and I HAD to comply! ;)  So I added some more buttons and twine, a brad and some glitter glue and here's the finished product:
Supplies: patterned paper, die cuts, stickers (Authentique); buttons (DCWV); twine (The Twinery); jewel brad (My Mind's Eye); glitter glue, ink (Ranger
Kiwi Lane Templates: Winter 2, Tiny Strip 1", Tags 1 & 5, Tiny Tags 1T & 7T, Tiny Shapes 7T, Adorn 3B

I do want to say that I didn't hate the layout before the little extras were added, I just thought it could be a bit better with a bit more embellishment.  So what do you think?? Did I over-embellish?  Do you like the original one better? (not that it makes much of a difference because I can't really remove glue dots or stickles...) Or do you agree that adding a little bit more to this layout really made it pop? (These are not rhetorical questions, people... I want some feedback!)

Thanks for stopping by and happy scrapping!

Wednesday, February 6, 2013

Have you ever....

Nope, we're not playing some sort of strange game involving a cup and M&Ms! (I'm not the only one out there who remembers playing that game during awkward get-to-know-you events in high school and college, right?) I want to know.... Have you ever held onto a photo (or a bunch of photos) for years, waiting for the right paper to come along and be perfect?? I have!! I've had these photos from my son's baby blessing day three and a half years ago, and I've gotten them out a number of times intending to put them on pages and into an album, but the paper wasn't quite right and back into the photo box they'd go.  I was starting to think I'd never get these poor pictures in a scrapbook, until I came across some paper I bought on a whim at the last Scrapbook USA Expo in SLC (in September).... It was My Mind's Eye's Kraft Fun Day line and it worked so well with the brick background and the "Dr. Suess clothing" I had J dressed in (my older brother claims I dressed my babies in brightly colored striped sleepers which made them look like Dr. Suess characters... I just don't see it ;)  ) along with all the other clothing and colors going on in the photos.  So I got to work scrapbooking and here's one of the pages:

And some detail of the upper right side:
Supplies: patterned paper, twine, brads, chipboard (My Mind's Eye); ink (Ranger); pen (ZIG)
Kiwi Lane Templates: Rings 2 & 3 (traced for the stitched circles), Tags 1 & 7, Tiny Tags 1T & 5T , Adventure 1 & 2
On a side note: soooo glad I keep index cards in with my photos that tell the date and any other info of the event (I make them right after I print my photos), otherwise I'd have spent HOURS trying to find the date for these pics!

I did do more pages, but don't have photos of those.  I'll post when I get them done...

Thanks for stopping by and happy scrapping!

Monday, January 28, 2013

DT Doodles with Kiwi Lane Designs

It's time to kick off the new year (It's still January! I'm not THAT far behind... yet.) with a new feature from Kiwi Lane.... DT Doodles!  It will be the feature every Monday on the Kiwi Lane blog and members of the Kiwi Crew will be taking turns sharing their amazing skills!  There have already been three weeks of DT Doodles shared on the blog, and I'm happy to be bringing you this week's Doodle!

So, are you wondering what a DT Doodle is??  Here's the low down: this is basically just a weekly sketch you can use to jump start your creativity with Kiwi Lane templates.  There's also the chance at winning a $25 gift code to the Kiwi Lane Shop when you make a project based on a Doodle, but I'll give you that info after I share my project...

My assignment was to make some Valentine cards using Authentique's Lovely collection.... and we all know how much I LOVE Authentique, to I was happy to comply! :)  And the combination of Kiwi Lane AND Authentique... I'm now beyond words... so I'll let the cards speak for themselves... Enjoy!


Supplies: kraft paper (The Paper Company); patterned paper and stickers (Authentique); brad (The Girl's Paperie); ribbon (craft supply); twine (Doodlebug); pen (ZIG)
Kiwi Lane Templates: Adorn 2A & 2B, Tags 7, Tiny Accents 2T, Tiny Sweetheart 2T & 3T, Sweetheart 2

Supplies: cardstock (The Paper Company); patterned paper and die cut (Authentique); flowers (Prima); jewels (Doodlebug); ink (Clearsnap); twine (Lilly Belle's Paperie on Etsy); vellum (Provo Craft); circle punch (Marvy Uchida); decorative scissors (Provo Craft)
Kiwi Lane Templates: Adorn 3A & 3B, Tiny Strips 1/2" & 1"

Supplies: cardstock (The Paper Company); patterned paper, die cuts and sticker (Authentique); jewels (Doodlebug); pearl brad (My Mind's Eye); ink (Ranger)
Kiwi Lane Templates: Adorn 1A & 1B, Tags 2, Tiny Tags 2T


Supplies: cardstock (The Paper Company); patterned paper, die cut (Authentique); twine (Creative Impressions); ink (Ranger); glimmer mist (Tattered Angels)
Kiwi Lane Templates: Tags 1, Adorn 3A & 3B, Tiny Shapes 3T & 7T

Do you ever need a leaf smaller than the ones the templates provide? Think again!  Use any of the scallop borders to make the size of leaf you need!  Cool, huh?  Here's how:

Trace the scallop template:
Flip the template and line up the "valleys" of the scallops so they are touching and trace again.

Now you have a line of leaves!

Now just cut out your leaves, ink and adhere.  This was the process I used to make the two different sizes of leaves on the last card.

 And here's a video for how to make the rosettes using a circle template-
(I would like to add here that this is my first ever attempt at making a video tutorial, so it's not great, but you should be able to get the point... and if you hear funny noises in the background once in a while, it's my 3 year old son who was instructed to "not make a peep.")

Now for the good stuff!  Wanna win a $25 gift code to use in the Kiwi Lane Shop? (Seriously, who wouldn't?!) Hop on over to the Kiwi Lane blog for the details!

Thanks for stopping by and happy scrapping!

Saturday, December 15, 2012

Snow Fun Layout

One day (a few weeks ago) my hubby took the kids and went out of town to help his brother fix a car.... I think that's why he went.  It seems like that's all he goes there to do, so if I'm guessing that was the purpose of the trip, I have a pretty chance of being right.  Anywho, I believe the reason for hubby to take the rowdy kids with him was to give me a chance to catch up on the piles of things on my desk... and in the kitchen... and on his desk... lots of piles of things to be done, filed, finished, trashed, etc.  So what did I do?  I thoroughly enjoyed my alone time and watched cheesy Christmas movies on Netflix and made one (yes, only ONE) layout... but, I L.O.V.E. how this layout turned out, so I believe it was time well spent!
Supplies: patterned paper, stickers, embellishments (Doodlebug); vellum (The Paper Company); twine (Lilly Belle's Paperie on Etsy); ribbon (American Crafts); glitter glue (Ranger); ink (Colorbox); templates (Kiwi Lane Designs) Brackets, Large Brackets, Winter, Tags, Paisley Place, Tiny Brackets, Tiny Tags, Tiny Shapes, Happy Trails

Thanks for stopping by and happy scrapping!

Autumn Cards

A few months ago, my friend and college roommate got married (YAY!!) and I was invited to her bridal shower.  After finding out what her wedding colors were, I decided to make her a set of cards that she could use for whatever she needed.  Her colors were "anything autumn."  Here's what I came up with:
Supplies: cardstock (The Paper Company); patterned paper (Imaginisce); stamps (Imaginisce, Heidi Grace Designs, Studio G); ink (American Crafts, Ranger); ribbon (Offray, Pebbles, Inc.); dies and die cut machine (Cuttlebug by Provo Craft); border punches (Martha Stewart Crafts, EK Success); paper flowers (Prima); corner rounder (WRMK); glitter glue (Ranger)

 I made her 4 of each card, making the gift a dozen cards.  I wish I would have taken some closeup pictures of the individual cards to show some of the detail, but I didn't. :(  I did, however, decorate a brown kraft paper gift bag to match the cards....
Supplies: patterned paper (Imaginisce); card stock (DCWV, Bazzill, WRMK, Provo Craft); buttons (My Mind's Eye); twine (Pebbles, Inc.); ribbon (Offray); paper punch (Martha Stewart Crafts); die cuts and die cutting machine (Cuttlebug by Provo Craft); templates (Kiwi Lane Designs) Aspen, Tags

Personally, I'd be thrilled to receive this gift.  But I'm a paper-holic... What do you think- would you be okay at the receiving end of this type of gift?  Or would you feel a bit cheated?

Thanks for stopping by and happy scrapping!

Wednesday, November 21, 2012

November's Sincerely... for Kiwi Lane

Can you sense the holidays in the air?  The excitement?  The joy?  The overwhelming aroma of cinnamon pinecones at the craft store? ;)  There's also the hustle and bustle that goes along with the holidays, which can be a little stressful, right?  And one of those stressful things is coming up with some cute and creative cards for friends and loved ones.  That's where this month's Sincerely... cards and Kiwi Lane Designs Templates come in- I came up with 5 different cards for your viewing pleasure.  Hopefully there's something here that can help spark your creativity and make your card making a little less stressful this holiday season.... So let's get started!

Poinsettia:
 Supplies: cardstock (The Paper Company); patterned paper (Making Memories); brads (Imaginisce, Basic Grey); glitter glue, ink (Ranger); shimmer mist (Tattered Angels).  Kiwi Lane Templates:  Tiny Nature 5T, Tiny Holiday 7T, Tiny Tags 7T, Adorn 1A & 1B.

To make this poinsettia, simply cut out two of the tiny holiday 7T template and one of the Tiny Nature 5T.  Layer them and attach them together with a brad.  Spray the flower with shimmer mist, shape the petals and leaves and let it dry for a few hours.  Make the background of the card.  Attach dried flower to card.  I added some glitter glue to the center of the flower to make it more sparkly, but you can leave your brad as is.

Folded Christmas Tree:
 Supplies:  cardstock (The Paper Company); patterned paper (Making Memories); twine (Divine Twine); jewels (Doodlebug); ink (Ranger).  Kiwi Lane Templates: Rings 3, Adorn 3A, Tiny Strips.

This folded Christmas tree is pretty easy to figure out- trace and cut a circle and cut that circle in half.  Each half circle makes one tree.  Different size circles will make different sizes of trees.  Make sure you like the pattern on both sides of your paper, as you will be seeing parts of each side.  I do suggest trying your folds on a scratch piece of paper first, then mark and score where you want to fold on your pretty paper.  I also need to note that I adhered EVERYTHING down so it's all flat, but you could leave some parts of the folds unattached to add some dimension.

Washi Tape Tree:
 Supplies: cardstock (The Paper Company, craft supply); patterned paper (Making Memories); washi tape (Downtown Tape); glitter glue, ink (Ranger).  Kiwi Lane Template: Celebrate 6

Super easy Christmas tree!  Ready?  1- Trace and cut the cone/pennant/triangle shape onto white or cream card stock.  2- Cover shape in washi tape (or tissue tape or decorative masking tape), folding the torn edges over the shape.  3- Layer some background papers and adhere tree to card.  4- Add a star and a trunk.  And done!  You can add more embellishment, if you want to (or have time ;) ).  I added some dots of glitter glue to the dots that were already on the red washi tape.

3D Ornament:
Supplies: cardstock (The Paper Company); patterned paper (Making Memories); twine (Creative Impressions); ink (Ranger).  Kiwi Lane templates: Tiny Holiday 1T, Christmas 1, Adorn 3B

This card looks way harder than it really is!  Here's how you do it- cut multiples of the ornament shape. Fold them in half.  Glue them together.  Adhere to the card.  Hmmm.  Those directions made sense in my head, but don't seem adequate now... maybe I'll come up with something brilliant to show how to do it a bit later today :) Meanwhile, here's a slightly different view to help see what I mean:
3D Christmas Tree:
Supplies:  cardstock (The Paper Company); patterned paper (Making Memories); ink, glitter glue (Ranger); small star punch (Carl); jewel (Doodlebug).  Kiwi Lane templates:  Tiny Holiday 8T, Tiny Accents 3T.

This 3D card is done much like the ornament one, but you'll notice that the template is for only half a tree.  So when your tracing, trace one half, then flip the template and trace the other half.  Cut multiple trees (I did four), fold, glue together, adhere to card.  I added a lot of glitter glue to this one- to the edges of the tree, to the red star, to the white star- to make it look like it was glistening with ice crystals.  Beautiful!  Again, here's another slightly different angle to help you see the dimension:
Well, that's all I have for you today!  Debbie has a few more cards on the Kiwi Lane blog, too, so don't forget to check over there for more holiday inspiration.

Thanks for stopping by and happy scrapping!

Tuesday, November 20, 2012

Floral Birthday Card

I made this little card for my neighbor to give to her daughter-in-law:
Supplies: cardstock (The Paper Company); patterned paper (My Mind's Eye); brads (My Mind's Eye, The Girls' Paperie); pearls (Doodlebug); ink (Ranger); rub-on (Pebbles); alphabet stickers (Making Memories); shimmer mist (Tattered Angels).  Kiwi Lane Templates: Tiny Nature 1T & 6T, Tiny Shapes 7T

Thanks for stopping by and happy scrapping!

Friday, November 16, 2012

Paper Pumpkin Centerpiece

In my previous post, I mentioned that I did a centerpiece of paper pumpkins... and here it is!
Supplies: patterned paper (Imaginisce); die and die cutting machine (Cuttlebug by Provo Craft); brads (Imaginisce, Doodlebug); hole punch (Crop-a-Dile by Imaginisce)

I had seen these simple paper pumpkins around the paper crafting world a few times, and thought I'd try my hand at them.  It was so easy!  I don't have a picture or video tutorial, but here's the basic idea:
~Cut paper strips (the longer the strip, the larger the pumpkin).  My large pumpkin was 12 12" long strips that were 1" wide.  The small pumpkins had 12 strips that were 3/4" wide and 8" long.
~Punch a hole at each end of the strips. 
~Stack the strips and put a brad through the holes on either end of the stack of strips.
~ Fan the  strips out.  Doing this makes the pumpkin shape.
~For the stem- cut a strip of paper. Loosely roll up and adhere so it doesn't unroll.  Attach to the top of the pumpkin with a pop dot on the brad.
~Die cut leaves and adhere.  
~Add curly tendrils made of paper or wire, if you'd like.


 I added a leaf garland and put my pumpkins on a clear glass footed serving dish.  I think it's cute!  What do you think?

Thanks for stopping by and happy scrapping!

Thursday, November 8, 2012

Gratitude Journals

For this month's Enrichment meeting at church, our theme was Gratitude (how appropriate/generic for November, huh?).  We had a speaker and some treats and we got to visit with each other and just be women... instead of moms, taxi drivers, housekeepers and whatever else we are during the course of our day!  I always look forward to this monthly meeting, and this month was no exception!  However, this time I was nominated to do a whole bunch of preparation- we wanted to give a gratitude journal to each of the ladies that came and I was asked to decorate 60 steno notebooks with something fall-themed... I think they told me to keep it simple, but I'm me.  I did keep it simple.... for me.  Here's one of the finished journals:
 And here's the box of all of them:
They really weren't that complicated to make- I used a bunch of dies and punches and used scraps from my scrapbox for the leaves.  I had vinyl made for the word on the journal.  And every journal ended up being slightly different from the next... just like the ladies in my ward!

I also made a dessert (Pumpkin Swirl Cheesecake) and a centerpiece.  We ate the cheesecake, so no pics.  I'll post pics of the centerpiece later, though.  It was a quick project that anyone can do!

Thanks for stopping by and happy scrapping!

Tuesday, November 6, 2012

I lost count...

Yep.  I have no idea what number project I'm on because I forgot to keep track of recent projects that were given away, or used, or pages that were put away in a box (and will hopefully find their way to an album as soon as I find where I put my page protectors...) yada, yada.... To make this "gaol" even more disastrous and un-met, I went on my yearly pilgrimage to the Scrapbook USA Expo in September and spent... ahem... a LOT of money on scrapbooking supplies!  And added to the already huge stash of supplies I have.  I must confess, I got home and wondered what I was thinking... but, that place has some sort of spell it puts on me when I walk in and it makes me want to spend money!!  

Even though this goal has not been met (or maybe it has.... I just don't know!), it has gotten me to try to keep up with blog posts.  It has also helped me to get a few more personal projects done by participating in online challenges.  So, in my book, I'm not calling it a total loss...

And now here's what I have worked on for the last few months (well, the ones I remembered to take pictures of):

(Waaaayyyy back in September) I made 50-ish invitations for a church event, plus 3 12x12 posters:
 I will admit, this project got a little out of control.  Usually, I let my creativity just kind of roll for these kinds of things, then scale it back so I can make a whole bunch without taking a long time... this one was another story.  I wanted the invite to double as something the recipients could use as fall decor, if they wanted.  So I ended up cutting out and embossing three ovals for each invite, plus hand cutting a stem, twisting wire for the vine, sticking on a paper flower and a button.... for each invite!!  Plus two more pumpkins,  additional flowers, buttons and wire for each of the posters.  It was a bit labor intensive, but I thought they turned out cute!  I just don't really want to make pumpkins ever again... or at least for a while.  ;)

My neighbor asked me to make some cards for her twin sons' birthday, which was October 30th.  This was one of them (I ended up doing one more that was similar, too) and the other one is in a previous post (the washi tape background):
 Supplies: cardstock (The Paper Company, Provo Craft); patterned paper (Imaginisce); vellum (Provo Craft); twine (Lilly Belle's Paperie on Etsy); alphabet stickers (Making Memories); ink (Clearsnap); button (craft supply); brads (American Crafts); Kiwi Lane Templates: Tiny Holiday (ghost), Tiny Tags (tombstones)

This is another birthday card I made for my neighbor- this was for her granddaughter, who turned 4:
Supplies: cardstock (recycled file folder); patterned paper (My Mind's Eye); stamp (Studio G); embossing ink (Tsukinedo); embossing powder (EK Success); twine (Lilly Belle's Paperie on Etsy); button (craft supply); ink (Ranger); jewels (Doodlebug); alphabet stickers (Making Memories); Kiwi Lane Templates: Celebrate (cupcake top), tiny shapes (cupcake bottom)

This layout is one of the few I got done in October.  I threw this together from scraps from a paper kit by Echo Park.  I've used the kit for at least 7 layouts, this was the 8th.  Not bad for one paper kit, huh?  Of course, I used my trusty Kiwi Lane Templates, which made this layout go together extremely fast- we're talkin' 20 minutes fast!!  Sometimes I even amaze myself! ;)
Supplies: cardstock (We R Memory Keepers, DCWV), patterned paper, stickers (Echo Park); pen (Staedtler); ink (Ranger); ribbon (Pebbles, Inc.); staples (office supply); Kiwi Lane Templates: Tags, Tiny Tags, Spook Alley (zig zag border)

That's all I have documented as of late.  I do have some decorated steno notebooks done (nearly 60 of them) that will be handed out at this month's church activity (tomorrow).  I should take some pictures before those leave, too...

Thanks for stopping by and happy scrapping!

Monday, October 29, 2012

Mid Week Mojo Coral 6

I was actually able to do a page based off a ScrapbookSteals.com sketch within the allotted timeframe- a rarity!  So here's my take on Coral 6:
Supplie: cardstock (We R Memory Keepers); patterned paper, stickers (Echo Park); washi tape (Downtown Tapes); brads (Basic Grey); twine (Lilly Belle's Paperie on Etsy); ink (Ranger); punch (EK Success)
It's a bad night time photo- sorry!  But I really liked this sketch.  I've pulled out these photos a number of times in the past few years, but didn't seem to have the right thing in mind to put them on a page.  So back into the box they went, until today.

Thanks for stopping by and happy scrapping!

MCM #107

I've been trying to catch up on my ScrapbookSteals.com challenges and here's my take on #107 (the one with the owl):
Supplies: cardstock (DCWV, Provo Craft, The Paper Company); washi tape (Downtown Tapes); letter stickers (Makin Memories); ribbon (My Mind's Eye), brads (Basic Grey); die cutting machine (Cuttlebug); dies (Lifestyle Crafts); stamps (Imaginisce, Fiskars); ink (Clearsnap)

I used washi tape for the striped background.  It was fun to use wahsi like that and I'm trying to come up with some more ways to use it... it's my new love! ;)

Thanks for stopping by and happy scrapping!

Sunday, September 23, 2012

Off to School (#39)

This layout was based on a sketch... emphasis on WAS!  I ended up combining a few different sketches and ideas I found and it morphed into something that didn't really resemble what I started with, so I'm not even going to link it.  I'll save it for later :) and maybe I'll make a page that resembles the original sketch.
Supplies; patterned paper (Fancy Pants, Prima); brads, washi tape (My Mind's Eye); twine (LilyBelle's Paperie on Etsy); bag (Whisker Inc.); paper clips, manilla tag (office supply); ink (Ranger); button (Fancy Pants)

Kiwi Lane Templates: Large Brackets, Paisley Place, Tiny Tags, Tiny Brackets

I love adding actual office supplies to school-themed layouts.  This one had the manilla tag and paper clips.  I added washi tape to the yellow paper clip on the little bag and it made it look like a little flag.  I loved all the school elements in this paper from Fancy Pants- they have one sheet that is just flash cards and I cut one out for the perfect little accent.  My little brown paper bag (reminiscent of brown bag lunches) also has another smaller accent- a journaling card that looks like a page from a teacher's grade book.  Great collection of papers and I loved how it turned out!

Thanks for stopping by and happy scrapping!

What a Lovely Meltdown (#38)

This page ended up being the companion page to the layout here and has hidden journaling that tells the story of what REALLY happens when we take the kids out for a photo shoot (and explains why I didn't attempt it last year):
Supplies: patterned paper, stickers, die cuts (Authentique); twine (LilyBelles on Etsy); brads, manilla tags (craft supply); ink (Ranger)

Thanks for stopping by and happy scrapping!

Monday, September 17, 2012

September's Sincerely for Kiwi Lane (#35, 36, 37)

Hello Kiwi Fans!  and all others who may stumble upon this blog :)  Today I have a few cards for Kiwi Lane's Sincerely.  I was given the assignment of "Back to School" and immediately I thought of crayons, pencils, notebook paper and chalkboards and that's what ended up on these cards!

A+
Supplies: patterned paper, stamp (Imaginisce); card stock (Provo Craft, Bazzill); ink (Ranger, Tsukinedo); alphabet stickers (DCWV); ribbon (Offray); circle punch (EK Success)
Kiwi Lane Templates: Thoughtful 2B, Tiny Wacky 3T, Tiny Accents 4T, Tiny Tags 3T, Adorn 2A

For this card, I stamped the notebook paper on white card stock, cut it out and added letter stickers.  I also made a pencil using layers of the same template shape.  Here's how:

First, cut a full tag shape out of cream colored paper (this serves as the base for all your layering and ends up only showing the tip of the pencil) like this:
 Then cut another full tag out of yellow paper (I used a pattern for a bit more interest) and cut the tip off with those zig zag scissors that I know you have ;)  like this:
 Turn the yellow paper so the back side is showing and score every 1/4".  This makes raised lines and adds some texture to your pencil.  You can use a scoring board or the groove in your paper trimmer:
 Now use sandpaper or a sanding block to gently sand off the surface of the scored lines, exposing the white core (if you used a solid core card stock, use a bit of ink on a dauber to add some ink to the scored lines instead) like this:
 Next, trace just part of the tag onto pink cardstock for the eraser like this:
 Layer your yellow paper and eraser on the pencil base and add the "metal" part of your pencil just below the eraser using a silver metallic ribbon (I used 1/8", but 1/4 would also work) like this:
 As the final touch to your pencil, punch a 1/2" circle out of black cardstock and adhere it to the point of the pencil like this:
Now all you have to do is trim off the extra black card stock and silver ribbon and you have a pencil!

#1 Teacher
Supplies: patterned paper (Imaginisce, Prima); card stock (Provo Craft); ribbon (Pebbles); crayon (Crayola); ink (Ranger)
Kiwi Lane Templates: Tiny Tags 3T, Tiny Wacky 1T, Tiny Strips, Tiny Shapes 8T

This card has a crayon, also made out of the tiny tags! I'll show you how in just a bit...  But, I wanted to point out that I used crayon to write the sentiment (I also tried writing it with my left hand to make it look like a child wrote it, but it was unreadable!).  Remember that in your card making, you can use things that you normally would never use for your scrapbook layouts, like writing with crayons and pencils.  You don't have to worry about your card materials being archival quality and acid free, which opens up a whole world of options.

So here's the step by step for the crayon:

Trace the tag on card stock like this:
 Then make a dotted line across the tag, separating the tip from the rest.  Move the tip down a bit and trace again, only going to the dotted line.  Make another line at the top to mark where you will cut the point off the tip to make the flat crayon top.  Like this:
 Now erase the outside line where you have doubles, and the pointy part of the tip.  This is what you should have left:
Cut along the solid lines (NOT the dotted line) and you have your crayon base.  Just flip it over (or erase all the lines), add a "wrapper" and whatever you want to use to embellish it and you're done!

Back 2 School
Supplies: patterned paper (Imaginisce, Prima); card stock (Provo Craft); twine (SupplyOwl on Etsy); "school" sticker (DCWV); glitter letter stickers (Making Memories); ribbon (Offray); ink (Ranger)
Kiwi Lane Templates: Tiny Holiday 4T, Tiny Accents 4T, Adorn 3A & B

While Kiwi Lane does not currently have an apple template, you can think outside the box a little and use a pumpkin with a bit of modification.  I trimmed the bottom so it looked more like an apple, and I made the stem more rounded. 

So, I would love to see what you come up with from looking at these school-inspired cards!  Leave a link in the comments so I can take a peek!

Thanks for stopping by and happy scrapping!