Don't forget to visit my Etsy shop to see more of my work!

Wednesday, April 30, 2014

Write From the Heart with Kiwi Lane and My Mind's Eye

It's my turn to do an installment of Write From the Heart from Kiwi Lane- yay!  I will say that it feels like it has been a looooong time since it was my turn for this segment, though.  Hopefully I'm not too out of practice and can help you with your journaling.

Sometimes when I scrapbook, I feel like there needs to be some long epitaph to convey the story behind the photos, or even the story behind the people in the photos.  And this is true in some cases.  It's nice to tell a long narrative about how much we admire a person or how something came to be.  It's nice to tell part of our family's history by combining our new thoughts with a photo from long ago. But sometimes, just sometimes, we need to let loose and share more of our personality in our journaling.  If you're a fun person, shouldn't you tell the stories that show just how much fun you have?  I think so, too!  So today I'm going to focus on that-

Tell the silly stories!

Here's a layout that I did using the Milo collection from My Mind's Eye's Now & Then-
Before, using my Kiwi Lane templates to "Frame" my layout:

After:
Supplies: patterned paper (My Mind's Eye); brads, die cut, epoxy shapes (My Mind's Eye); epoxy dots (Teresa Collins); letter stickers (My Mind's Eye, American Crafts); ink, glitter glue (Ranger)

Templates:
Wacky 1
Tiny Wacky 1T
Paradise 1
Celebrate 7
Tiny Celebrate 7T
Photos

I love that these photos are part of a silly story about kissing some fish!  And I wanted to make sure that we remembered that we are part of a fun and sometimes silly family that likes to do strange things and have a good time laughing!  It's not a long, sentimental story.  And that's ok.  It's still a story that helps tell who we are.  And isn't that what scrapbooking is about?


And since we're here anyway, here are a few design tips:

- Use your photo templates as a crop tool, along with planning your layout.  They are translucent, so you can see exactly where you need to cut to make that perfect page.

- Cut down a shape to make a smaller shape.  If you notice, I have three sizes of water drops/splashes. I made the smallest one by tracing the Tiny Celebrate 7T template and drawing the same shape inside the traced shape.  It was about 1/4" smaller all the way around.  This made a smaller shape without needing a smaller template.

- Add interest to your pages using lines.  All my photos are on an angle, as are the bits of patterned paper. But, my words (title and journaling) are all on horizontal lines.  And my embellishments (the wave shapes and splashes) are all in vertical lines.  By having each element of the layout moving a different way, your eyes move around the page.

That's it for today.  Thanks for stopping by and Happy Scrapping!

Wednesday, April 9, 2014

Ideas to Inspire with Kiwi Lane

Good Morning all!  It's my turn for the latest installment of Kiwi Lane's Ideas to Inspire.... So are you ready to be inspired?  Good!  Let's get started!

This month at Kiwi Lane, we have the awesome privilege of working with the fabulous My Mind's Eye!  Eeeek!  I'm so excited!! Hence, the "Eeeek!"  Now, if you have never worked with any of My Mind's Eye's stuff, I suggest you find your nearest crafting/scrapbooking store and get your hands on some- you won't be disappointed! 

Now, I don't know about you, but I seem to put off scrapbooking birthdays... I think it has something to do with the feeling that I do the same thing over and over.  Well, this time I took that feeling of doing things over and over and ran with it.  Here's the theme for today's ITI:

~Use numeric repetition as a theme throughout your page.~

Here's the layout I came up (using My Mind's Eye's Now & Then Milo):
Supplies: patterned paper (My Mind's Eye and Scenic Route (background)); die cuts, chipboard, washi tape, letter stickers, epoxy stickers (My Mind's Eye); stamp (7gypsies); ink (Ranger, Tsukinedo); twine (Lilybelle's Paperie on Etsy)

Templates:
Spook Alley 3A, 3B
Wacky 3, 3T
Celebrate 1, 2, 5

The photos are from my son's 3rd birthday.  I used the number "3" in the title, but also used other three's throughout the page... can you find them all? ;)  Here's the list, in case you missed any:
- Three "3"s- one in the title, one at the top of the right page and the candles on the cupcake that resemble III (Roman numeral 3)
- Three burst shapes from the Wacky Accessory set along the bottom of the layout
- Groupings of three things: 2 balloons and a cupcake; small burst shape from the Tiny Wacky set (top of left page), "3" and "cute" die cut; title grouping that has a chipboard shape, the large "3" card and the tiny letter stickers
- There are three groupings of three things
- Three lines of journaling


That's right, peeps!  I even went so far as to emulate the theme in the number of lines for my journaling!

I will point out that I didn't use three photos on my two page layout (and really, when have you EVER seen me use so few pics on a two pager??).  But, I did keep the number of photos in an odd numbered grouping, which is aesthetically pleasing and worked well for the layout.

While the method of using numeric repetition can be quite effective, use it in small doses.  Meaning, it works better for small single digits, rather than larger numbers.  I love the look of this, but I'm certainly not going to use it for my hubby's thirty-something birthday pics. ;)

Now, can I just mention the paper and embellishments from My Mind's Eye's Now & Then Milo collection!  It is SUCH a versatile collection!!  The colors of blues, grays, greens and yellows make it pretty much the perfect pallet for both girl and boy themes, not to mention everything in between.  There's also a touch of metallic silver in the collection- both on the paper and in the embellies (brads, die cuts, printed chipboard, epoxy shapes).  It's not that over powering blinged out silver, though.  It's a soft, subtle touch of silver.  And it works for everything!  The paper itself is that heavy card stock that we have come to know and love from MME and, let's face it, we expect it from them.  The prints in the collection range from classic damask to small floral to geometrics to anchors- seriously.... so versatile!!  I LOVED working with this collection!  So much so, that I chose to use my leftovers from this project to do my Write From the Heart with Kiwi Lane  at the end of the month.  So be watching for that one!

I hope this inspired you to do something repetitive on your pages!  I'd love to see what you come up with-don't forget to post your creations to the Kiwi Lane Facebook page!  And link it here in the comments, too, please!

That's it for today.  Thanks for stopping by and Happy Scrapping!

Monday, April 7, 2014

Winner, Winner!! April Blog Hop Winner!

And the winner of a set of templates is......
Blogger Linda C. said...
I love your layout - especially the funky flag banner at the bottom. I scrolled down to see some of your earlier blogs and found so many great ideas. The Fall Mini Album from Oct. 16, 2013 is beautiful. I had thought these albums would be too hard to do, never thought about using Kiwi Lane Templates to make the pages of the books. I keep changing my mind on which Kiwi Lane set I want next but I think they would be the Cascade Trails and the Tiny Floral

Linda C.- please email me at glo_owens@msn.com so I can get you a list of templates to choose from.  You have until Monday, April 21st at 11:59 pm MDT to do so, or another winner will be drawn.

Thanks to everyone for all your lovely comments- it sure does make a girl's day! :)

That's all for now, but I will have a post on Wednesday for Kiwi Lane's Ideas to Inspire!  Have a great day and Happy Scrapping!

Friday, April 4, 2014

April BLOG HOP!!! with Kiwi Lane


It's time for a blog hop!  Who's excited? Me, ME!!  Are you excited, too?  Well, you should be!  Why?  Because you're going to have crafting inspiration coming out of your ears AND there's a prize!  Here's the scoop- ONE random commenter from one of the blogs along the hop will win a $25 gift code to the Kiwi Lane Shop.  How's that for incentive?!  So make sure you start at the Kiwi Lane Blog and comment along the way (including the Kiwi Lane Blog)!  You have until Sunday April 6, 2014 at 11:59 p.m. MDT to make you comments.  The winner will be announced on the Kiwi Lane Blog on Thursday April 10th. 

Here's the line-up of blogs, just in case you take a wrong turn along the way:
  1. Kiwi Lane 
  2. Gail Owens (You are Here!!)
  3. Catherine Povec  (Go Here Next!!)
  4. Jennifer McDermott 
  5. Kristy Lee 
  6. Heather Conklin 
  7. Misty Buck 
  8. Jennifer Nicholes 
  9. Barb Rapp 
  10. Christina Steel 
For this month's blog hop, we were asked to create something using the Celebrate and Wacky template sets from Kiwi Lane.  Here's the two page layout I came up with:
Supplies: patterned paper (The Pier by Crate Paper); brads (Echo Park); alphabet stickers (American Crafts); wood shapes (Studio Calico); plastic flower (Queen and Co.); stamps (Autumn Leaves); pen (Staedtler); ink (Ranger)

Templates:
Photos
Wacky 1, 3
Celebrate 3, 5, 6, 8
Tiny Celebrate 3T, 4T, 5T, 6T
Tags 1
Tiny Tags 1T

Here's what it looked like when I "framed" my layout:

And a few detailed photos:

I loved the look of this paper for these photos- and I couldn't resist using a collection called "The Pier" to document our walk down the pier at Tybee Island in Georgia!  I loved the look of the weathered wood with the distressed colors that were reminiscent of wind tattered beach umbrellas and canopies.  I wanted to add some whimsy and almost a celebratory feel to my layout and I accomplished this with layering two shapes (the long triangle/pennant from the Celebrate sets and a tag from the Tag sets) in two sizes.  I also tucked the ticket shapes under the photos on one side to add to the fun feeling of the layout.  To add a hint of the sun and sea to the layout, I used a template from the Wacky set to make a "sun" shape on the left page, layered with "clouds" from the Celebrate and Tiny Celebrate sets.  I added a splash of blue in a wavy shape from the Wacky set to mimic the water on the bottom of the right page. 

Sometimes when I get everything on the page, I feel like some of the shapes are blending into each other, when I really want them to stand out from each other.  When this happens, I use a pen to highlight the shapes that I want to stand out.  This time I used a fine tipped black pen to do some quick outlines of the cloud shapes, the tickets, the pinwheel and the banner where I put the title.  I made my outlines quickly and didn't worry about perfection- an added bonus of using shabby-looking paper!

To make my journaling spot, I stamped a lined image on my left page using distress ink.  I thought it looked too neat for the feel of the layout, so I stamped it again- the same image just slightly askew from the original.  Then I used my pen to write my little story.

This layout turned out almost exactly like what I framed it to look like using my templates- and it's exactly what I had in my head!  Don't you just love Kiwi Lane Designs Templates?!  I do!

And for an added bonus for getting to the bottom of my long-winded post (Sorry, kids.  I'm wordy.  It's not gonna change anytime soon.), how about another giveaway?!  In the comment that you're going to leave on this blog post (ya know, the one you need to leave so you can be entered to win a $25 gift code to the Kiwi Lane Shop...), please tell me what template set you've had your eye on.  Or which one is your fave, if you happen to have them all.  You have until Sunday, April 6, 2014 at 11:59 p.m. MDT to leave your comment.  I will draw a winner and announce it on Monday, April 7th.  The lucky commenter will get to choose a template set of their choice from my stash!  Hooray!

That's it for now- don't forget to comment!  Happy Scrapping!

Wednesday, March 5, 2014

Ideas to Inspire with Kiwi Lane and We R Memory Keepers

Once upon a time, I was a fun mom and did lots of fun artsy craftsy things with my kids… mostly because I had a little girl who had not reached the teen years and still liked me.  Now I have a little boy who doesn’t want to do anything that doesn’t involve a circuit board.  *sigh*  Anyway, when I was a fun mom, we spent an afternoon making tie-dyed paper using food coloring and shaving cream.  If you've never seen this process, go HERE  and take a gander.  It’s fun and messy!  And we ended up with some cool looking card stock that looked like this:
I had never used it because it isn’t acid free or safe for scrapbooks and looked a little too juvenile to be paired with the cards I usually make.  So it sat in a paper bag for a few years until I pulled it out a few months ago.  It was sitting on my desk, waiting to be turned into something wonderful, when my new punch board arrived, along with some cards from the Hip Hip Hooray! Albums Made Easy Card Set and matching twine.  And my tie dyed paper matched!  (Well, close enough.)  So I set to work making some candy boxes. If you don’t know how the punch boards work, you need to head on over HERE and check out the videos!  Again, I am using the Candy Box Punch Board, but there are many others.  It’s super easy, as the instructions for the boards are printed right on them.  I cut my paper to 7” by 11”, lined up the paper, punched and scored as instructed, flipped the paper, punched and scored some more and this is what it looked like:

I used some super strong double sided tape to make my box and it looked like this:
Whenever my kids have a friend birthday party to attend, I encourage them to give their friends art supplies.  A long candy box is perfect to house some pencils (out of the packaging), a glue stick (again, out of the packaging), and some erasers!
After I stuffed my box and closed the ends with baker’s twine, I used a card from the Albums Made Easy Card Set for a tag and decorated with some templates like so:
I still had lots of the tie dyed paper left, and I wanted to do a birthday themed card and envelope set, so I used my Envelope Punch Board to make an envelope for a 3 1/2” by 4 1/2” card (the measurements you need are right on the board- super easy!).  The envelope looked kind of boring, so again I used my Kiwi Lane templates to decorate it:

Then I used another card from the Albums Made Easy Card Set for the basis of a card.  I simply matted it with some polka dot paper, chomped the corners with my WRMK Corner Chomper and put the card and mat on a 7” by 4 1/2” card base (folded in half, of course, to make a 3 1/2” by 4 1/2” card):
Here’s the final result of my tie dye paper crafting, with the help of my Kiwi Lane templates and some We R Memory Keepers tools:
I hope you enjoyed my project- and I hope it inspired you!

Templates used:
Happy Trails 1B
Tiny Accents 4T
Tiny Celebrate 1T, 4T, 6T
Tiny Shapes 7T

Delight 1

Tuesday, February 25, 2014

Some Cards with the NEW Kiwi Lane Template Release!!

I'm a little late with this post, but here's the scoop anyway...

Did ya hear?!  Kiwi Lane has released 3... yes, THREE!!... new template sets.  They are all sets that are awesome for cards, but could be incorporated in any of your crafting.  Two sets (Sincerely and Delight) are card border sets and the third set is Tiny Celebrate (a mini version of the larger Celebrate accessory set).  I was giddy when I got these goodies in the mail and was itching to get to work, but a fierce cold had other plans for me.  Blurg.  After spending a few days in bed with a fever, chills, body aches, stuffy head and runny nose (sounds.... fun, huh?), I was thrilled when I was well enough to dive in to my pile of paper scraps!  Here are a few of my creations:
 Templates:
Tiny Celebrate 5T, Sincerely 2A & 2B, Tiny Shapes 2T & 7T, Tiny Strips 1/2"
Supplies:
Patterned paper (SEI); card stock (DCWV, Georgia Pacific); twine (American Crafts); jewel (Doodlebug); brads (Basic Grey); ink (Ranger, craft supply); stamp (Fiskars)
 Templates:
Tiny Celebrate 1T, 2T & 8T, Celebrate 2
Supplies:
Cardstock (DCWV, Georgia Pacific); patterned paper (SEI, Imaginisce); ink (Ranger, craft supply); brads (Basic Grey); embossing powder (EK Success); stamp (Fiskars); twine (American Crafts)
 Templates:
Tiny Accents 3T, Tiny Celebrate 7T, Sincerely 3A & 3B
Supplies:
Cardstock (Bazzill, Georgia Pacific), patterned paper (SEI), brad (SEI), enamel dots (Teresa Collins), ink (Ranger), stamp (Studio G), wahsi tape (WRMK)
Templates:
Delight 4, Tiny Nature 1T, Tiny Shapes 7T
Supplies:
Cardstock (Georgia Pacific, DCWV, Provo Craft); patterned paper (3 Bugs in a Rug); stamp (American Crafts); ink (Ranger)

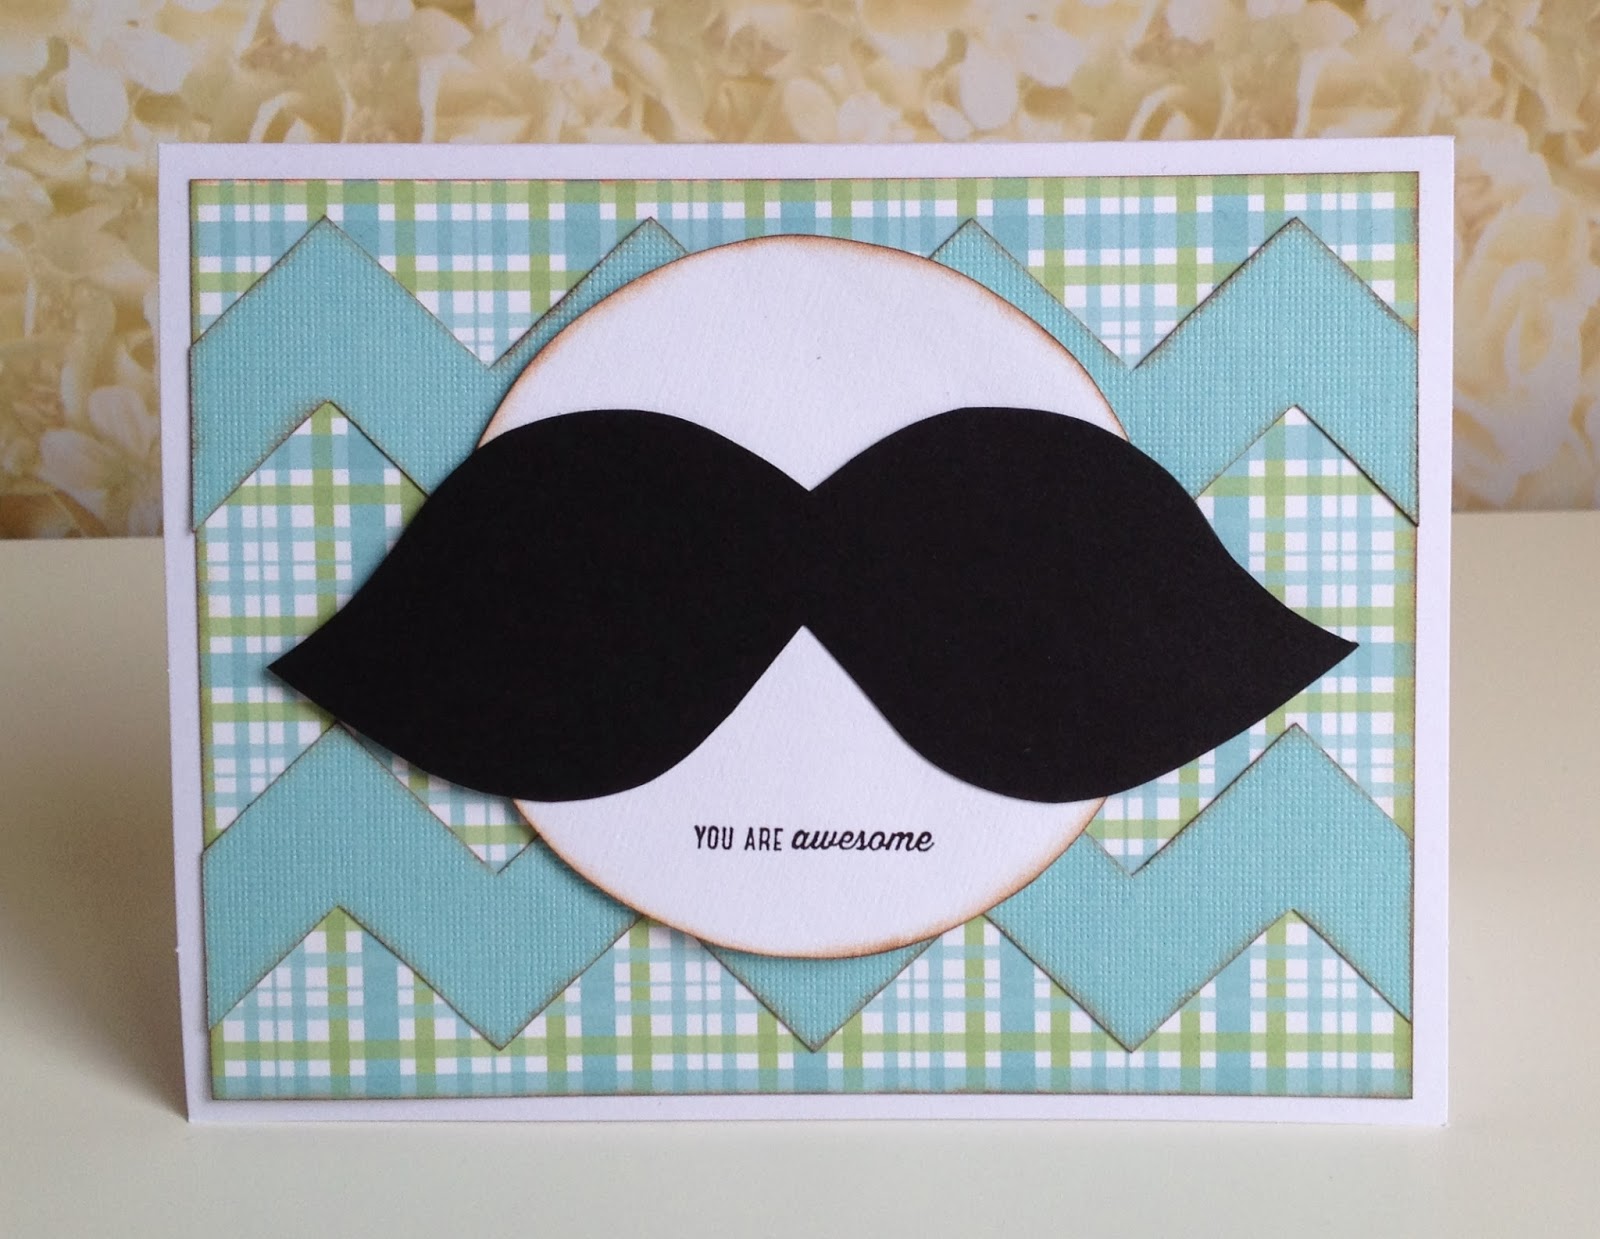
Aren't you just in love with that mustache card?!  I am, and I'm the one who made it!!  While there's not a Kiwi Lane Template for a mustache, you can easily make one using the leaf from the Tiny Nature Accessory set- just flip it back to back (overlap the stem part of the leaf) and trace two and that's it!  Easy, right?

So if you have some time, I'd strongly suggest you head on over to the Kiwi Lane blog to see all the beautiful samples they have for the new releases.  And you could even buy them, if you feel so inclined. ;)

Thursday, February 13, 2014

February Blog Hop Winner Winner!!

Good morning!  Just thought I'd hop on here really quick and announce the winner of the additional prize from the Kiwi Lane Blog hop last weekend since... well, since I said I would today.  And I try really hard to do what I say I will.  :)

The winner of a set of templates from me is.....

Blogger Robin B. said...
Cute layout! I love the colors along with the shell and flower. Thanks for sharing. Our favorite vacation spot is Young State Park, we camp there every year.

Congrats Robin!  Please send me an email at glo_owens(at)msn(dot)com by 11:59 p.m. MST on Thursday, February 27, 2014 letting me know that you are the blog hop winner from my blog.  I'll let you choose your fave template set from my stash- sound good?  I thought so!
That's it for today- have a great day and happy scrapping!

Wednesday, February 12, 2014

Ideas to Inspire with Kiwi Lane and Hemptique

Happy Wednesday!  I feel like I was just doing a blog post... maybe because this is my third one in four weeks... a rarity, for sure!  Hope you're not too tired of me yet! ;)

For this installment of Ideas to Inspire for Kiwi Lane, I was given the opportunity to work with a company I've never worked with before. Gasp!  What?  A crafting company whose product I don't already have in my stash?!  Seriously.  It happens.  And much more often than people may think.  Especially after they view my wall-o-supplies that lines the dining area in our house.  One day I should share that with the world.  But not today.  Today, I get to share with you wonderful product from Hemptique!

I was, oh, so happy when I was sent some of Hemptique's metallic hemp cord!  This is what it looks like:
I had lots of visions of the billions of projects I could do with it, but then realized that I had to narrow it down just a bit.... to one project, to be more accurate.  So I decided to use it like I would use embroidery floss and stitch on a layout.  Hemp cord is a little bit thicker and stiffer than embroidery floss, but it's still fairly easy to work with.  Here's the layout I came up with:

I framed my page using the Kiwi Lane Templates:
And then after I traced, cut, inked and replaced:
Supplies: patterned paper, cardstock stickers (My Mind's Eye); sequins (Teresa Collins Design); cord (Hemptique); stitching template, letter stickers (American Crafts); paper flowers (Prima); pen (Staedtler); ink (Ranger)

(I used My Mind's Eye's Lucky in Love collection.... and yes, I changed my mind about the background paper after I had everything laid out- it happens a lot.  One of the advantages of using the templates!)

I started working with my Hemptique cord and realized that it wasn't quite the color I wanted- all the hemp was natural color and the metallic strings are intertwined.  I knew I wanted the metallic, but decided to see if the hemp would take color.  So I conducted a little experiment- I put a length of cord in a plastic baggie and sprayed some ink in the bag and squished the cord around in the ink.  And it worked!  A little too well, actually.  I ended up rinsing the cord to remove some of the blue color because it was so dark it looked almost black- pretty, but not quite right for my project.

So what was I going to stitch?  I wasn't sure, but then I saw an advertisement for a sale on fabric at a craft store.  Muslin and tulle.  I thought that they would be fairly easy to cut and stitch, so off to the store I went!  I made my huge purchase of 12" of white muslin and 12" of pink tulle (a whoppin' 56 cents worth of fabric) and ran home to get to work!  Seriously, kids, I don't remember the last time I was this excited to work with fabric and string.... probably never.
I started by tracing the flower shape from the Sweetheart accessory set onto the muslin, cut it out, then realized that I didn't really want to stitch around a flower shape.  That's too complicated.  ;)  So I opted to use the larger circle in the Shapes Tiny Accessory template set.  I cut a layer of muslin and a layer of tulle (netting) and also a circle of pink lightweight cardstock to add some stability.  I used the smaller circle from the same set to pierce holes to stitch through.  Towards the end of stitching the circle, I thought it would be fun to make the circle into a shaker box... sort of.  So I threw some sequins in between the muslin and tulle and finished stitching.  The circle became the middle of the large flower.  I tore strips of the white muslin to run through the entire layout and stitched some pink x's on the border.
While I never would have thought to use hemp cording on a scrapbook page before this, I'm certainly glad I got to try it!  I love the way it turned out!!  Hemptique makes other cording, string and yarn out of natural fibers like cotton and bamboo- some are natural colored and some are dyed.  They even have some cute looking bamboo bakers twine that I'm looking forward to getting my hands on some!

Thanks for stopping by and happy scrapping!  Don't forget to come back tomorrow for the announcement of the winner from the Kiwi Lane blog hop!

Templates used:
  • Sweetheart 1, 3
  • Clara 1A, 1B, 3A, 3B
  • Tiny Shapes 3T, 7T
  • Thoughtful 2A, 2B
  • Strips
  • Photos
  • Tiny Photos

Friday, February 7, 2014

February Blog Hop with Kiwi Lane

Happy Blog Hop Weekend!!  I hope you've been having fun along this hop and have been gathering lots and lots of scrapbooking inspiration.  You should have made your way here through Kristy's blog.  If you happened to wander over from another location, I highly suggest you mosey on back to the Kiwi Lane blog and start from the beginning- I'd hate for you to miss any ideas!  Here's the line-up if you get lost along the way:
  1. Kiwi Lane 
  2. Charissa Miller 
  3. Claire Spielman
  4. Lissa Mitchell
  5. Kristy MacKeen 
  6. Gail Owens (You are HERE!!)
  7. Arin Flynn 
  8. Holly Gagnon 
  9. Jennifer Blomquist
  10. Christine Meyer
Don't forget- there's a prize involved in this blog hop!  One random commenter from ONE of the blogs on the hop (including the Kiwi Lane blog) will win a $25 gift certificate to the Kiwi Lane Shop.  You have until Sunday night (February 9, 2014) at 11:59 p.m. MST to comment.  The winner will be announced on the Kiwi Lane blog on Thursday, February 13th.

Alrighty... here's what I came up with for my project:
Supplies:  patterned paper, journaling cards, title, stickers, brads, washi tape (My Mind's Eye); cardstock (craft supply); flower (Doodlebug Design); flower punch (American Crafts); black pen (Staedler); white pen (Signo); ink, glitter glue (Ranger).

These photos were taken at the beach on Tybee Island in Georgia a few years ago.  It was really misty and cool the morning we went, so all my photos turned out gray and tan.  I decided to use the subtle blue, gray and greens of My Mind's Eye's The Sweetest Thing- Bluebell collection.  I layered the border designer templates on the bottom of the layout to echo the water meeting the sand.  I used a navy blue cardstock to mat my photos and really have them pop- did it work?  I think it did! ;)  And I used some accessory templates from both the Paradise and Sweetheart sets to add a few embellishments. 
 I find that sometimes outlining the template shapes helps to add another layer of dimension without adding bulk to a page, so I outlined the blue shapes (the swirl on the left page and the splat on the right) with just a white pen.  I outlined the flower and shell shapes with the same white pen, but I also did an outline with a black pen on top of the white when it dried (not right on top of the white line, but close) and then some "Frosted Lace" Stickles on top of the pen outlines.  Sounds kind of complicated, but it's really a fast and simple way to add some more interest to your pages- give it a try sometime!
Templates used: 
Clara Lane 1A & 1B
Abbie Road 3A & 3B
Aspen Court 3A & 3B
Sweetheart 4
Tiny Sweetheart 1T
1/2" Strips
Paradise 3, 4, 5, 6

I hope you enjoyed my layout today!  Don't forget to leave a comment on my blog before you leave- you could win a $25 gift code to the Kiwi Lane Shop, remember?  And next on your hop is the blog of the ever so talented Arin Flynn!  

How would you like a chance to win another prize?  I have a few sets of templates hanging around my craft table and I would love to give one of those sets away to one random commenter on this blog post.  Just tell me where your favorite vacation spot is, and you'll be entered to win.  That's it- easy peasy!  Your vacation spot comment doesn't have to be a separate comment.  I will choose a random commenter to win their choice of templates from my desk.  You have until 11:59 p.m. on Sunday, February 9, 2014 to leave a comment and I will choose a winner on Monday, February 10th.  Don't forget to check back to see if you've won!  Or, better yet, follow my blog!!

Have a great day and happy scrapping!


Wednesday, January 29, 2014

Ideas to Inspire with Kiwi Lane and ADORNit

Hey there!  I've been away from my blog for quite a spell, and I've kind of missed it!  I was actually scheduled to participate in Kiwi Lane's January blog hop, but had to move to February's instead because of an unfortunate accident involving a glass of milk, my laptop and a very clumsy and repentant 4 year old... it was just sad.  And expensive.  So for Christmas (well, more like New Year's) we got a new computer.  And I've been relearning everything!  If you know me at all, you probably know I don't like change.  I'll do it, but I don't like it.  This whole new computer debacle is the same deal- I'll get a new one, but I'm not going to like it.  Let's just say I feel old and computer clumsy and leave it at that, shall we? Uhm hmm. :)

Moving on...


This month I was sent ADORNit's Sunflower Splendor collection to work with.  As soon as I saw the papers and stickers, I was in love with the tones of yellow, blue, red, brown, green and gray in this collection and I knew they would compliment some photos of our corn maze meanderings a few October's ago while visiting family in Georgia.  So I got to work framing my layout with Kiwi Lane templates and this is what I came up with: 

(Yup, horrible picture.... I just think getting good photos of the templates is rather difficult.  That's where PhotoShop would come in, but this new computer seems to have eaten my new program.   See?  My dislike of computers is not single sided... ;) )

And after a little tracing, cutting, inking and adhering (seriously, it took about 30 minutes once I had it laid out- I just love my Kiwi Lane templates!), I had this: 
Supplies: cardstock (American Crafts, Bazzill); patterned paper, wood, stickers (ADORNit); ink, dimensional adhesive (Glossy Accents by Ranger); stamps (My Mind's Eye, American Crafts); glitter glue (American Crafts); circle punch (Marvy Uchida)


I just love the fall tones with the blue!  I thought the printed sunflowers needed a little bit of extra bling, so I used some glitter glue along with a dimensional adhesive to add some sparkle and shine.


I am also in love with ADORNit's laser cut wood shapes- they're fantastic!  I considered using ink on them to change the color, but decided to keep it natural, as it was a good match to the dried corn stalks and hay in my photos.  And the natural wood is a perfect compliment to the Sunflower Splendor collection! 
(What's with the blues being different in every photo?  Seriously!!  This photo ^^ has the truest color, if you were as confused as I am by the inconsistency of color.  One day I'll have my new computer figured out and I'll find where Photoshop is hiding... one day...)

I should mention that the glitter glue and Glossy Accents I added to the small sunflower on the title was not completely dry when I took the photo and thus looks warped.  It did dry a few minutes later and is flat, sparkly and pretty. :)

I love the look of stitching on layouts, but I tend to shy away from it since it takes a while.  I'm all about short cuts, so I found a stamp by My Mind's Eye that could pass for some long stitches and, with some dark brown distress ink, made some fake stitches around the blue background paper and the kraft paper on the opposite page.  Doing the stamped stitches around squares on each page, but different sizes, adds continuity and draws the eye over the pages.  

I hope you enjoyed looking at my layout today- and I hope you found something in there to help you be inspired!

Templates used:
Chevron 1A & 1B, 3A & 3B
Tiny Nature 1T, 3T, 5T
Winter 1

Wednesday, December 18, 2013

Write From the Heart with Kiwi Lane Designs and Authentique

Hello again!  It seems like it's been a long time since I've been on my blog... I think the holidays took over a little bit.    And they'll probably continue to take up most of my time for at least the next few weeks.  Blurg.  I think I'd rather be scrapbooking than... well, almost anything else that doesn't involve making more memories! ;)

It's my turn on the Kiwi Lane blog today, and I have a layout to share for our "Write From the Heart" segment.  If you're new to my blog or don't know about Kiwi Lane, here's the scoop- Kiwi Lane is a small, family owned and operated business that creates templates that make your scrapbooking a whole lot easier!  And everyone at Kiwi Lane is always overflowing with inspiration and creativity!!  You should definitely check them out, if you haven't already!


For this installment of Write From the Heart, I was able to work with one of my favorite manufacturers- Authentique!  I have loved them from the get go and their "Joyous" collection is another beautiful collection that those awesome creators have given us to help showcase some of our holiday memories!

Supplies:  cardstock (Core'dinations); patterned paper, die cuts, small letter stickers (Authentique); ink (Ranger); glitter glue (Ranger, American Crafts); brads and flower punch (American Crafts); brown letter stickers (Pebbles, Inc.); washi tape (Downtown Tape); paper bag (craft supply)


As is my specialty, this page has some hidden journaling.  And a rather lengthy explanation of why.

This photo is of me and my Grandpa about 5 years ago.  It's the last photo I have of us together.  The next morning he aspirated on a drink, had a series of strokes and passed away in the hospital on New Year's Eve.  I did not even know this photo existed until my mom showed it to me a few years ago.  I had it printed and sitting in a box, waiting to be put on a page.  I just didn't know how to give this unflattering photo the words it deserved.  It wasn't until our inspiring blog-hostess-with-the-mostest, Kristy, started doing pages for her book about her beloved dad, who passed away earlier this year, that I realized it had to be done.  I had to find the words to go with this not-so-great photo.  Before I continue, you should know two things about me: 1) I don't like to show strong emotion... in anything.  2) I rarely cry.  I might tear up, but the tears are not quick to fall.  Finding the words for this layout went against both of those things.  I decided on a letter to my grandpa for the journaling format.  I figured it would be easier to write to him the things I wanted to say, rather than write like I was telling someone else what I wanted to tell him.  And it was.  It is probably the most emotional piece of journaling I have ever written... top three for sure.  Don't get me wrong- I am a stickler for journaling, but it's usually very superficial.  And the heartfelt letter on this page had me crying... no, I was bawling!  There were many times that I had to stop and wait for the tears to subside so I could see enough to continue.  And I hate crying.  But, it was worth it!  I was able to capture what I had in my heart and now it's preserved for the future.  

Now, because I am not an outwardly emotional person, I would never share my innermost thoughts and feelings with the general public.  But, because I like you, and we're friends, I'm going to let you take a peek at my heart.  This is what my letter to my grandpa says:

Dear Grandpa,
It’s been awhile.  Just under five years, to be exact.  Five years and not a day goes by that I don’t think of you, remember your stories or feel your presence.  I miss your chuckles when I say something silly.  I miss your stories (yes, I was listening!).  I miss the loving way you always looked at Grandma.  I miss your words of wisdom.  I miss the way you never failed to call me your Princess.  I never thought I would miss any of these things if they were gone.  But. I do.
I still have my memories of you, though, for which I’m truly grateful.  Like this photo.  This unflattering, quick snap of the camera that captured some of your last moments with us in this life.  It was Christmas Day.  We taught you how to play Apples to Apples.  You laughed and had fun... a rarity in those last few years.  You even ate some Christmas dinner- another rare occasion as your appetite seemed to diminish after your last birthday.  We were even able to tell you that we were expecting our second child.  It was a very good day!
I’m so grateful to have had you as my Grandfather.  Some people may think that 95 years was long enough to be in this life, and I agree.  You had a long, full life.  But, there will forever be a hole in my heart where I will miss you every day.  I’m thankful for the time I was allowed to be part of your life here on the earth, and even more grateful that we are part of an eternal family.  It’s comforting to know that I don’t really have to say, “good-bye.”  Just “until we meet again.”
Thank you for being my Grandpa. 

Love, 
    Your Princess

(Photo taken 12/25/2008; Journaling written 12/10/13)


Thanks for letting me share with you today!  And I encourage you to Write From the Heart- especially when it's hard to find the words!

Templates used:
Mini Scallops 1A, 2A
Christmas 1, 2, 3
Tiny Holiday 7T
Tiny Tags 1T, 6T
Tiny Brackets 1T, 4T

Wednesday, November 13, 2013

Ideas to Inspire with Kiwi Lane and Teresa Collins

Happy Wednesday!  It's my turn on the Kiwi Lane blog with an Idea to Inspire and here's what I came up with:

This month I was able to work with Teresa Collins' new Memorabilia collection. And can I tell you how much fun it was?!  I love the neutral grays and tans, with the bits of chalkboard elements, paired with the pops of blue.  When I looked at this collection alongside the featured templates this month (Nature, Abbie Road and Tiny Shapes), I though it would be fun to make some place cards and napkin rings for my Thanksgiving table.  I know that neutrals and blue are not the usual color choices for a fall table setting, but I knew it would be fun and different. 

So I have a little bit of a confession- I never seem to have enough time to do cutesy decorating in my house.  Yes, it's true.  I'm a paper crafter, yet I don't decorate my home with cute paper crafty things.  I just always seem to run out of time!  I should say I USED to run out of time- because now, with the Kiwi Lane templates, I can whip out quick and cute seasonal decorations in no time!  It took me about 7 minutes to make the napkin ring (seriously- I timed it!) and a little bit longer to do the place card (there's stitching and more pieces, so it takes a few more minutes- but not much!).  Here's what they look like:  


Of course, you would make a place card and a napkin ring for each person at your table- I was trying to figure out how long each one took to make, so I started with one.  Now that I know how little time they take, I'll finish making the rest for our Thanksgiving table!

For the place card, I used a 4" x 5" card base.  Then I cut a 3 3/4" x 4 3/4" piece of patterned paper, stitched around it, stamped a border just inside the stitching, and distressed the edge.  Then I cut a ring out of a pewter colored metallic card stock, using the Rings 2 template.  I stitched around the ring and distressed the edges.  Then I cut out some leaves (Nature 1 and Tiny Nature 1T and 4T) from patterned papers and glitter paper, inked the edges and played with them until I liked the arrangement.  For the oval (Tiny Shapes 8T) under the name, I made a little pouch with patterned paper layered with vellum and sewn together with some sequins between the layers.  To finish the place card, I used gold glitter Thickers from American Crafts.  I added a few sequins and was done!  It took me about 15 minutes to make the card, once I had chosen my papers and pulled out my supplies.  Here's a closer look:  


For the napkin ring, I cut a 2" x 6" piece of yellow cardstock, then cut a strip of patterned paper using the Happy Trails 1A template.  I inked the edges, adhered the patterned paper to the card stock and stapled the ends to form a ring.  I cut two leaves (Tiny Nature 1T, 4T), inked the edges and adhered to the ring.  I used some washi tape and some twine to make a bow to accent the leaves.  Super fast, super easy!  


I hope you liked my place card and napkin ring!  I sure enjoyed using the Teresa Collins Memorabilia collection- and I can't wait to finish making the rest of my table decor for Thanksgiving!  And don't forget- if you don't celebrate Thanksgiving where you are, you can use my ideas for a jumping off point for your own craftiness.  The place card would make a beautiful notecard- just switch the name for a greeting!

Thanks for stopping by and Happy Scrapping!