Don't forget to visit my Etsy shop to see more of my work!
Showing posts with label 1 page layout. Show all posts

Friday, January 29, 2016

Winter Layout with Kiwi Lane Designs

Hello, Hello!!
Happy January! I'm sure you've made (and possibly broken) your resolutions by now, but did you make one that had to do with getting your scrapbooks done? Well, hopefully I can help inspire you today and get you on your way to meeting your goals! 

First of all, I used some of January's featured templates on my layout, plus a few extras. And the paper line I used was called "Snow Fun" by Pebbles, Inc. and I'm pretty sure it was released circa 2008/2009. Yes, I know. I'm a paper hoarder. Admitting it is the first step... to the craft store to get some more paper. Haha! Anyway... Here's what my layout looked like when I started framing using my Kiwi Lane templates:
I know you can't really see the framing. It's what happens when you are trying to take a photo of framing on a white background after midnight under fluorescent lighting. You get the idea, though. And, of course, the original framing is not exactly what I ended up with. I added a few more templates, plus some punched snowflakes.  Here's what the finished product looks like:
Supplies: card stock, glitter glue, chipboard (American Crafts); patterned paper, die cut, letter stickers (Pebbles, Inc.), brads (Creative Impressions), vellum (Provo Crafts); pen (Staedtler); ink (Ranger); punch (Marvy Uchida); Kiwi Lane Designs templates

If you haven't figured this out yet, I love, LoVe, LOVE using vellum and glitter on winter layouts! They add layers and texture without a lot of bulk, an they mimic the look of ice and snow. So what happens when you combine the two? You get a little bit of warping. Not great, but not horrible either. In fact, it adds another layer of texture to your layout. If you look at the finished layout, you'll notice that the vellum ice crystal shape is outlined with glitter glue and it's warped it so it curls off the page a little bit. It will get pressed down when put in a page protector, so not a big deal. My punched vellum snowflakes didn't fare so well when I added some glitter glue- they warped a LOT!! I put the glitter on them and went to bed. I awoke to this:
Warped and curled and not willing to flatten out at all!! So what do you do when you need to flatten your crafting project quickly? You grab your super small crafting iron, of course! I put the snowflakes between the folds of a kitchen towel and ironed (crossing my fingers because I hadn't actually ever ironed vellum before and I didn't know if it'd work). And it worked!! Here's a before and after:
And just because I know you're going to ask, here's the super cute little crafting iron I used:
It's the size of your palm, plugs into the wall, only does dry heat and doesn't have holes on the face of the iron. It's a great little tool!

Thanks for stopping by and checking out my layout- Happy Scrapping!!

Templates used:
Mini Aspen 1B,3A
Winter 1,2
Tags 1

Friday, November 6, 2015

A Layout and a Few Cards with Kiwi Lane

Hello fellow Kiwi Lane fans!  I have a few things to share with you today. And to continue with my theme from some of the last few posts I've done, I used another fabulous Kiwi Lane paper kit to create a single page layout and a few cards, along with this month featured templates- Brackets, Adorn and Autumn.

I used Kiwi Lane's "Social Butterfly" paper kit this month. I have to admit- when I saw this collection, I thought it was going to be way too girly for me to do use very well.  Especially with the Autumn template set.  I mean, it has pink, flowers and butterflies!  BUT, I should have known better!! These Kiwi Lane ladies are genius and know how to make a paper kit so that you don't have to use the girly elements in a way that overpowers the page. Instead, you use the reverse side and smaller pieces of those prints that scream GIRLY GIRL.  And you end up with a project that is just feminine enough without jumping out at you with a tiara, tutu and sparkly wand. I'm telling you, it's pure genius!!

So here's the layout I ended up with:
Supplies: Kiwi Lane's Social Butterfly paper kit; alphabet stickers (American Crafts, Making Memories); ink (Ranger); pen (Staedtler)

And here's how I "Framed" my layout:


Yes, that is a grand total of three templates on my layout.  I had no idea what I wanted to do with the layout when I started.  So I threw on a few templates from the Adorn template set, along with a template from the Bracket set and built my page from there. I added lots of layers of the scalloped edge and mirrored that at the bottom of the page.  I also used one of the printed quotes from the paper kit and added that early on to make sure I left room for it.  I finished off the page with a butterfly from the Tiny Nature set and a few flowers from the Tiny Wildflower set and a title using some alphabet stickers.  

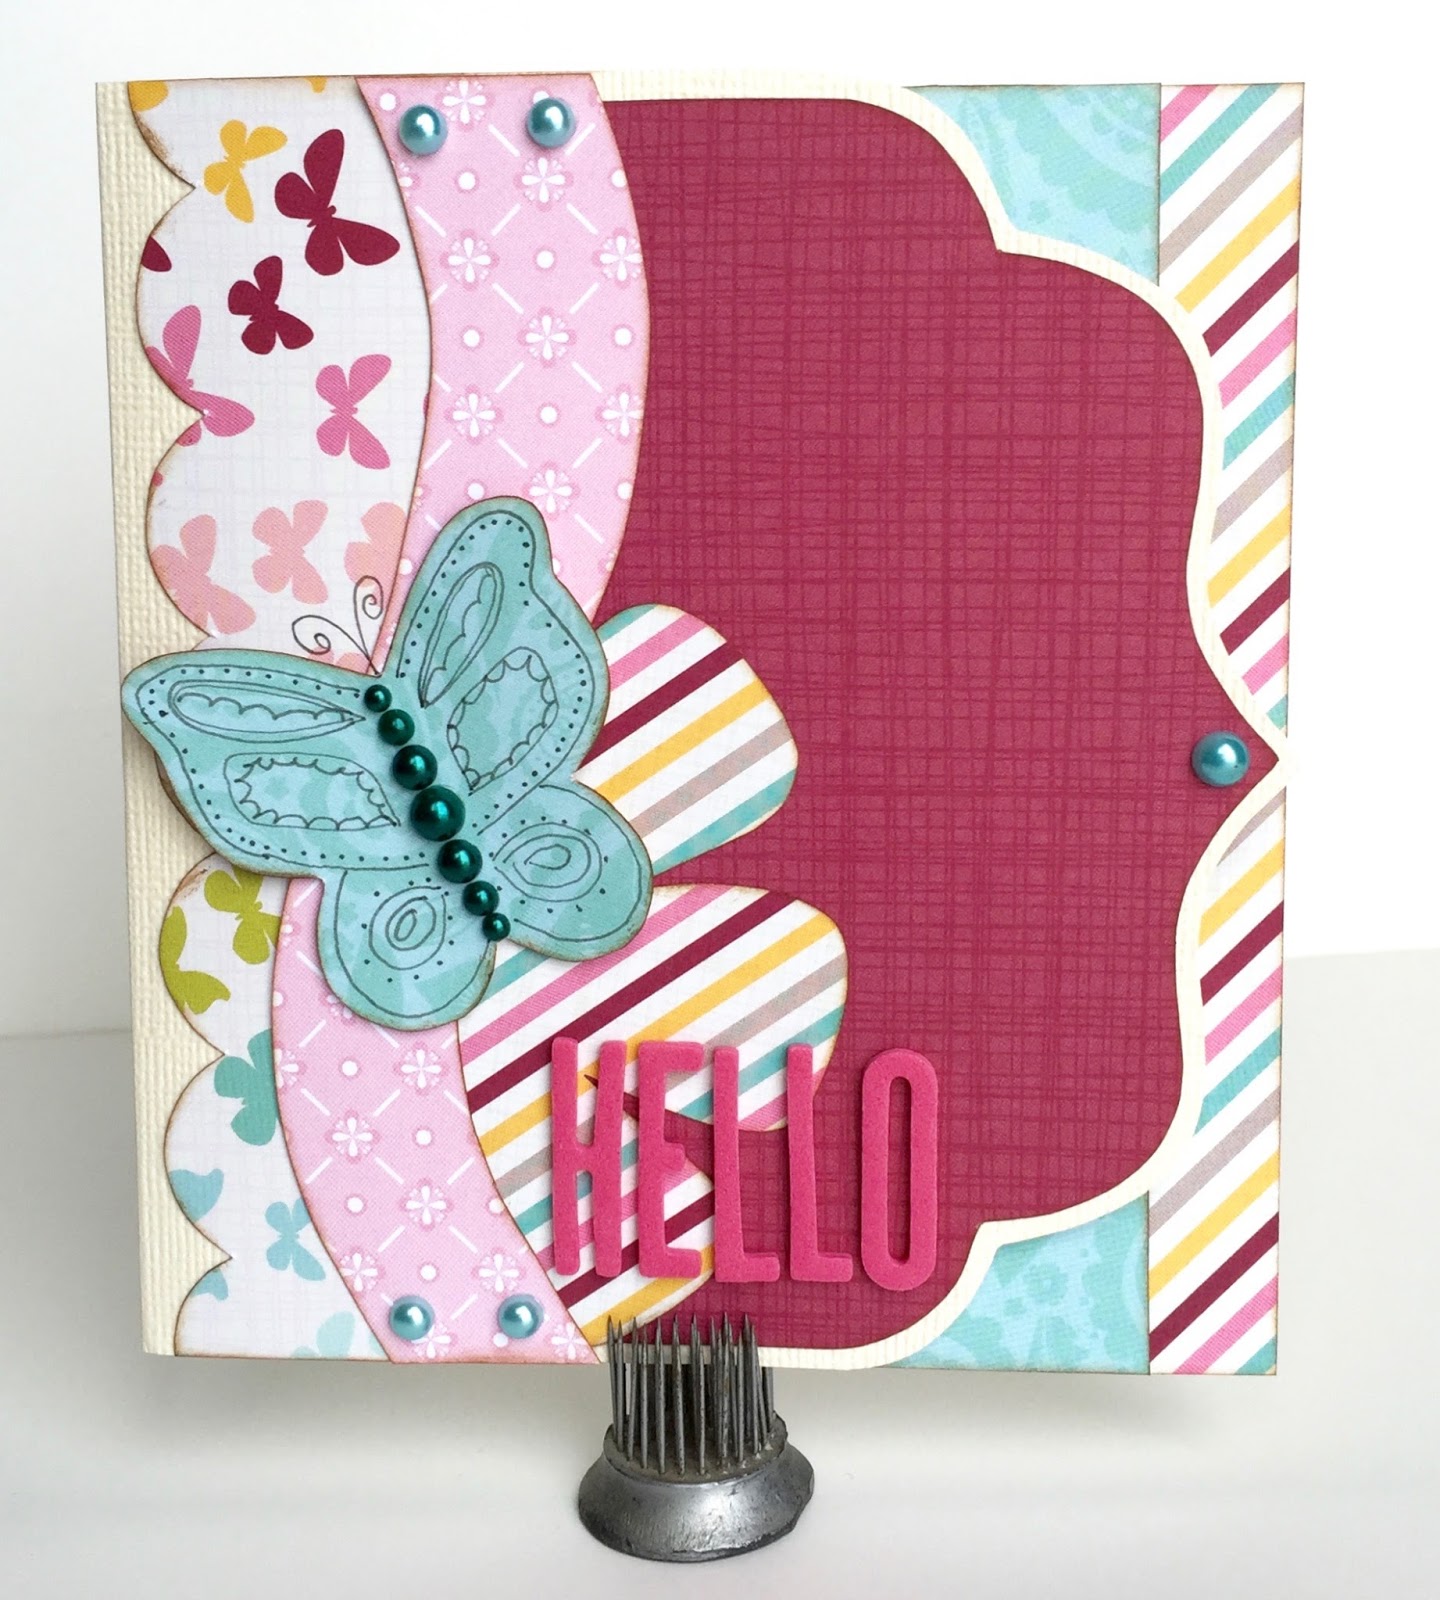
With some of the remaining paper from the kit, I made some cards:
Supplies: Kiwi Lane's Social Butterfly paper kit; card stock (American Crafts); pen (Staedtler); ink (Ranger); stamp (Basic Grey); jewels (craft supply)
 Supplies: Kiwi Lane's Social Butterfly paper kit; card stock (American Crafts); pearl (Doodlebug); brad (American Crafts); ink (Ranger)
Supplies: Kiwi Lane's Social Butterfly paper kit; card stock, alphabet stickers (American Crafts); pearls (Doodlebug); ink (Ranger); pen (Staedtler)


The "Hello" card has a shaped edge and some detail on the inside:


Even after making a layout and a few cards, I have enough scraps of paper left to make at least a few more cards. I love how much you can do with each Kiwi Lane paper kit!

Thanks for stopping by and Happy Scrapping!!

Templates used:
Bracket 2
Adorn 3A,3B,1B
Tiny Nature 2T
Scallops 1B
Wildflower 1T,4T
Autumn 1,3,6
Springtime 2
Mini Scallops 2A

Monday, January 12, 2015

Midweek Mojo Petunia 7

I was able to get my version of Petunia 7 done this week... and on time!!  Hallelujah! ;)  Haha!  In all reality, I love doing weekly layouts of the sketches at ScrapbookSteals.com.  Even if I don't always get them done on time to enter the weekly drawing.  This is the original sketch (done by the awesomely talented Melissa Denhe):


And here's what I came up with:
 I used Dear Lizzy's Neapolitan collection and a few other coordinating embellishments from American Crafts, along with my ever-present Kiwi Lane Designs templates.  Did you know that Kiwi Lane release 3 new sets of templates this week?? Well, they did!  I used one of the sets for this layout, but you can go HERE to see all three sets... and maybe order your own, if you'd like. :)

Here are a few close up shots of my embellishments:

Thanks for stopping by today, and Happy Scrapping!!  Stop by tomorrow for a great Kiwi Lane project and a Giveaway!!

Templates: 
Elements 2, 5, 6, 7, 8
Cedar Trails 2A & 2B

Monday, December 8, 2014

Christmas Visitor Layout with Kiwi Lane

Welcome Kiwi crafters!  Today, I have a single page layout with just one photo on it.  Yep. One solitary photo.  I tend to gravitate towards scrapbooking groups of photos from a single event, which then leaves me with a pile of single photos.  And that pile sits around while I figure out what to do with those somewhat random photos.  Most of these photos have at least a little bit of a story behind them- but some don't.  This is one of the photos that had a short story, but I still wanted to remember the moment.  So, what happens when you have a single photo and a short story??  You have room on your page to add lots and lots of layers!! This sounds like a job for my Kiwi Lane Design Templates!  Instead of trying to keep my layers somewhat simple because I have multiple photos on a layout (which can mean multiple focal points and craziness, if you're not careful), I'm free to add layers of embellishments to my templates without it feeling overwhelming.  

Here's what my page looked like after I framed it with my templates:


And my layout after I traced, cut, inked and replaced:
Supplies: patterned paper (My Mind's Eye); brads (We R Memory Keepers, All My Memories); glitter tape (American Crafts); sequins (Teresa Collins, Hazel & Ruby, glitter alphabet stickers (Making Memories); glitter glue, ink (Ranger); pen (Staedtler); 1" circle punch (Marvy Uchida)

Templates:
Abbie Road 3A
Mini Abbie Road 3A & 3B
Cedar Trails 1A
Winter 3
Christmas 1, 4
Tiny Holiday 8T
Tiny Bracket 1T

Originally, I had five templates on my layout.  I added and took away templates until I liked the layout and ended up with eleven templates.  That's one of the perks of using the templates- you can see exactly what your page will look like before cutting a single sheet of paper! And you can arrange and rearrange until you're happy with the look without wasting anything!!  

Let's talk about my page a bit.  First of all, the subject is a spider.  Yep.  We had a spider in our Christmas tree that was helping add to our decorations.  It would spin these perfect little webs that would span between the blinds, the ornaments and the pine needles.  (The web is visible in the photo in person, but didn't translate well as a photo of a photo.  Bummer.)  It was so beautiful that I wouldn't let anyone destroy the web or get rid of the spider.  It lived in the tree in our living room until we took it out after the holidays.  This seems like such an odd thing to document (and, it probably is!), but this was something I wanted to remember.  It was out of the ordinary and a bit strange- just like us! ;)


Next- layering.  Don't be afraid to layer!  Use your templates to plan your page so you can see what those layers will look like.  You can add more elements to your template shapes that add more visual layers.  I used hard embellishments on the ornaments (sequins and brads) so they sparkle and shine.  I also added sparkly glitter glue to the trees to imitate snow and bring some sparkle to the other side of the page.  I put the sparkle in one more spot on the layout (the title) for balance.  Another layer was added by simply popping the small ornament and small tree off the page with some foam adhesive.

So there you have it- a Christmas layout about a spider!  I hope you were inspired by something in this layout- not necessarily the subject matter. ;)  

Thanks for stopping by and Happy Scrapping!

Tuesday, August 26, 2014

August Blog Hop Winner and a Layout with Mon Ami Gabby and Kiwi Lane

Whew!  That blog post title is certainly a mouthful!!  And without further ado, the random winner of a set of Tiny Celebrate templates is...


Blogger bird said...
I love your layout!! And I am already a follower!!
August 22, 2014 at 5:53 PM

Congratulations bird!!  Please send me an email letting me know that you are my blog hop winner and also your mailing address and I'll get that little package of creative goodness out to you as soon as possible!  (You have 2 weeks from today to claim your prize.  If I've not heard from you, I'll randomly choose another winner.)

Now on to today's post:


It's my turn on the Kiwi Lane blog today, and I came up with a pretty simple one page layout using Mon Ami Gabby embellishments and Kiwi Lane templates.  As with the majority of my layouts, I started with framing my page with my Kiwi Lane templates like this:


I have a slight confession- this is not my real "before" photo.  My real "before" photo was too difficult to see on the floral paper with the cream colored background.  So I staged this one on a green background so you could see how I framed my page.  You're welcome. ;)

And this is what my finished layout looks like:

Supplies:  patterned paper, card stock, journaling card (Echo Park); blue flower, crepe paper, tulle (Mon Ami Gabby); letter stickers (Pebbles, Inc.); jewels (craft supply); pen (Staedtler)

Templates:
Playtime 3, 4
Accents 1
Tiny Nature 1T
Nature 1
Photos

Pretty cute, huh?  Did you know that Mon Ami Gabby sells rolls of crepe paper?  And it's thicker and wider than that stuff you get at the party supply store to decorate for birthdays parties, etc.  To get the ruffled effect on the scalloped border just below the photos, simply stretch the edge of the scallop (after you've traced and cut) and then let it contract.  The light yellow mesh border is actually a tulle that has some foam-like stuff sprayed on it.  I know that's not very descriptive, but I'm having a hard time trying to find the right words... anyway, it's a bit messy to work with (tiny bits of the yellow and white foam were all over my work space), but I loved the look when I layered it in with the crepe paper!  And most of the foamy bits stay in the tulle, so don't worry if it seems like there's a lot coming off. :)


One other thing I did with this layout was sand all the edges, instead of inking all the edges.  The reason for this is that I wanted to keep the layout feeling light and airy (like a spa) while still defining the edges of my layers.  So I used a nail file and sanding block to take off just enough of the top layer of printed paper to get the white core to show.  I did the same thing around my photos, too.


I've seriously loved all of the products that I've been able to use from Mon Ami Gabby this month!  They add so much to my layers and work so well with the templates from Kiwi Lane!  If you haven't had a chance to check them out, I highly suggest either visiting their blogFacebook page or Pinterest boards, and Instagram, if not all of the above.  They are full of fun and creative ways to use their plethora of embellishments!

Thanks for stopping by and Happy Crafting!

Friday, June 13, 2014

"Happy" Layout with Hazel and Ruby and Kiwi Lane

Hello, hello!  I'm here today with a layout I made using Hazel and Ruby's Celebrate Word Masks, Pass the Tissue Quote Collage, Sequin Tubes Green with Envy and Gone Typo collection kit.  Here's what my layout looked like after I framed it using my Kiwi Lane Design Templates:
And here's my finished layout:

Supplies: cardstock (American Crafts, Core'dinations); patterned paper, tissue paper, sequins, masks (Hazel and Ruby); buttons (Basic Grey, October Afternoon); alphabet stickers (Making Memories); spray ink (Studio Calico); ink (Ranger)

Templates used:
Chevrons 1A, 3A
Mini Madison 3A, 3B
Tiny Accents 4T, 5T
Accents 4, 5
Photos
Photo Mats

I used my Hazel and Ruby masks and some spray ink to have two of the word "happy" remain white and I used them as a layer of my title.  I used a few ink colors- blue, green and yellow.  It helped bring in the patterned paper and broke up some of the white background.  Here is what my background looked like after I sprayed it:

Then I just peeled off the reusable masks (and they were super easy to use, by the way!) and started building my layers.  I used both sides of the Mini Madison templates together to make a longer border for the tissue.  Then I tore the tissue against the edge of the templates to get a funky and messy look.  
The look was finished up with a few sprays of my yellow ink and left to dry for a few minutes.  I used double sided tape and the smashing method to attach it to my page as a border under the two larger photos.  The smashing method is pretty much what it seems- I put one side down on the tape and smashed and folded until I got a look I liked.  The last layer of my page was the brown letter stickers to finish off my title and some buttons and sequins. 

And there you have it!  I'm so loving these Hazel and Ruby masks!  As soon as I started using them, a plethora of ideas and uses popped into my head- can't wait to use them again and make more pretty stuff!!

Templates used
Chevrons 1A, 3A
Mini Madison 3A, 3B
Tiny Accents 4T, 5T
Accents 4, 5
Photos
Photo Mats

Wednesday, December 18, 2013

Write From the Heart with Kiwi Lane Designs and Authentique

Hello again!  It seems like it's been a long time since I've been on my blog... I think the holidays took over a little bit.    And they'll probably continue to take up most of my time for at least the next few weeks.  Blurg.  I think I'd rather be scrapbooking than... well, almost anything else that doesn't involve making more memories! ;)

It's my turn on the Kiwi Lane blog today, and I have a layout to share for our "Write From the Heart" segment.  If you're new to my blog or don't know about Kiwi Lane, here's the scoop- Kiwi Lane is a small, family owned and operated business that creates templates that make your scrapbooking a whole lot easier!  And everyone at Kiwi Lane is always overflowing with inspiration and creativity!!  You should definitely check them out, if you haven't already!


For this installment of Write From the Heart, I was able to work with one of my favorite manufacturers- Authentique!  I have loved them from the get go and their "Joyous" collection is another beautiful collection that those awesome creators have given us to help showcase some of our holiday memories!

Supplies:  cardstock (Core'dinations); patterned paper, die cuts, small letter stickers (Authentique); ink (Ranger); glitter glue (Ranger, American Crafts); brads and flower punch (American Crafts); brown letter stickers (Pebbles, Inc.); washi tape (Downtown Tape); paper bag (craft supply)


As is my specialty, this page has some hidden journaling.  And a rather lengthy explanation of why.

This photo is of me and my Grandpa about 5 years ago.  It's the last photo I have of us together.  The next morning he aspirated on a drink, had a series of strokes and passed away in the hospital on New Year's Eve.  I did not even know this photo existed until my mom showed it to me a few years ago.  I had it printed and sitting in a box, waiting to be put on a page.  I just didn't know how to give this unflattering photo the words it deserved.  It wasn't until our inspiring blog-hostess-with-the-mostest, Kristy, started doing pages for her book about her beloved dad, who passed away earlier this year, that I realized it had to be done.  I had to find the words to go with this not-so-great photo.  Before I continue, you should know two things about me: 1) I don't like to show strong emotion... in anything.  2) I rarely cry.  I might tear up, but the tears are not quick to fall.  Finding the words for this layout went against both of those things.  I decided on a letter to my grandpa for the journaling format.  I figured it would be easier to write to him the things I wanted to say, rather than write like I was telling someone else what I wanted to tell him.  And it was.  It is probably the most emotional piece of journaling I have ever written... top three for sure.  Don't get me wrong- I am a stickler for journaling, but it's usually very superficial.  And the heartfelt letter on this page had me crying... no, I was bawling!  There were many times that I had to stop and wait for the tears to subside so I could see enough to continue.  And I hate crying.  But, it was worth it!  I was able to capture what I had in my heart and now it's preserved for the future.  

Now, because I am not an outwardly emotional person, I would never share my innermost thoughts and feelings with the general public.  But, because I like you, and we're friends, I'm going to let you take a peek at my heart.  This is what my letter to my grandpa says:

Dear Grandpa,
It’s been awhile.  Just under five years, to be exact.  Five years and not a day goes by that I don’t think of you, remember your stories or feel your presence.  I miss your chuckles when I say something silly.  I miss your stories (yes, I was listening!).  I miss the loving way you always looked at Grandma.  I miss your words of wisdom.  I miss the way you never failed to call me your Princess.  I never thought I would miss any of these things if they were gone.  But. I do.
I still have my memories of you, though, for which I’m truly grateful.  Like this photo.  This unflattering, quick snap of the camera that captured some of your last moments with us in this life.  It was Christmas Day.  We taught you how to play Apples to Apples.  You laughed and had fun... a rarity in those last few years.  You even ate some Christmas dinner- another rare occasion as your appetite seemed to diminish after your last birthday.  We were even able to tell you that we were expecting our second child.  It was a very good day!
I’m so grateful to have had you as my Grandfather.  Some people may think that 95 years was long enough to be in this life, and I agree.  You had a long, full life.  But, there will forever be a hole in my heart where I will miss you every day.  I’m thankful for the time I was allowed to be part of your life here on the earth, and even more grateful that we are part of an eternal family.  It’s comforting to know that I don’t really have to say, “good-bye.”  Just “until we meet again.”
Thank you for being my Grandpa. 

Love, 
    Your Princess

(Photo taken 12/25/2008; Journaling written 12/10/13)


Thanks for letting me share with you today!  And I encourage you to Write From the Heart- especially when it's hard to find the words!

Templates used:
Mini Scallops 1A, 2A
Christmas 1, 2, 3
Tiny Holiday 7T
Tiny Tags 1T, 6T
Tiny Brackets 1T, 4T

Wednesday, July 3, 2013

Write from the Heart with Kiwi Lane.... and Downtown Tape!


Supplies: patterned paper, small letter stickers (Simple Stories); washi tape (Downtown Tape); brad (American Crafts); glitter letters (Creative Imaginations); ink (Ranger); pen (Staedtler)

Kiwi Lane Templates used: Paradise 4, Tiny Accents 1T, Tiny Wacky 1T, Happy Trail 3A

Do you every have "leftover" photos?  You know, the ones you print thinking you'll use them on a layout, but they end up just not fitting?  What do you do with them?  I usually give them to my daughter and let her use them for her layouts, but I kept finding these fun photos of her and her cousin that I just couldn't let go of.  I knew the day would come when I could put all those random extra photos together- and I was right!  

My brother and his family are moving to Guam this month- and this includes my daughter's BFF cousin.  I wanted to make a page with some of those photos as a glimpse into their friendship.  I set to work with my templates, some fun paper by Simple Stories and some marvelous tape from Downtown Tape- an awesome trio!  First I chose my background paper and started to lay out my page.  It looked something like this:
Of course, I always end up moving things around and changing some photo sizes while I'm making the layout.  For instance, I had a flower covering most of a head, so I moved it.  One more reason I love using the Kiwi Lane templates is this planning process!  I knew I'd need a pretty big space for journaling and the templates helped me plan around that space without guessing where things would end up.  I was able to cut my large piece of lined paper (I'm a big fan of lined paper for hand-written journaling!!) and plan around it! No guessing and cutting and wasting pretty paper!  Love it!!  And this is the journaling I ended with:
When I'm planning on doing large sections of hand-written journaling, I cheat and write it all out first on scratch paper, making corrections along the way.  Then I use that to read off of and do my journaling on the page.  I still make mistakes when I'm doing my writing, but my thoughts are a bit more organized.

I loved using the washi tape from Downtown Tape as I would use ribbon- looped behind the top right photo for some added embellishment.  Did you know that you can keep the tape from sticking to itself (making it look more like ribbon) by dusting it with talcum powder?  This is what I did to keep my loops from completely flattening out.  I also made sheets of washi out of the tape that I could trace a template on and easily cut it out- the layered flowers on the page are both made using that technique.  Here's how:

Lay strips of washi (long enough to span the width of the template you intend to trace) sticky side up, slightly overlapping the edges.  When you have enough laid out to accommodate the size of the template, start laying strips of washi tape sticky side down and perpendicular to (or criss-crossing) the washi that is laying sticky side up.  It should look something like this:
Now give it a good rub to make sure it's all stuck together.  Then place your template on top and trace:
I used a pencil to trace and found that it worked quite well and didn't leave dark marks that I had to make sure I cut off.  I also found that cutting the exposed tape off your washi sheet made for easier cutting (nothing extra got stuck to me or the scissors that way).  Here's what my flower looked like:
And I loved the finished look because it has kind of a transparent/plastic/paper look that is hard to see when it's laying on the mat, but this is what it looks like in the light:
Kind of fun!  The orange one had more of a grid pattern because it was lined washi tape.  And here's what it looked like on my page:
And, of course, I had to make a cute little card with some of my scraps:
Kiwi Lane Templates used:  Tiny Floral 3T, Tiny Wacky 2T, Thoughtful 2A

I used the same washi tape layering method to make the pink fluff behind the sentiment.  I love how it just gives a little bit more dimension to the card without adding too much bulk!

Are you as obsessed with washi tape as I am? ;)  Try giving this technique a try!  I'd love to see what you come up with so don't forget to comment with a link to your creative endeavor!

Don't forget to stop by on Friday- Kiwi Lane is doing their monthly blog hop and I have a 2 page layout to share... and maybe a prize will be involved... ;)

That's it for now.  Thanks for looking and happy scrapping!